What is in my CSA?- Week 2

CSA1

Hi friends! I seriously cannot believe that it’s almost freaking July. Are you kidding me?!?!? I mean once 4th of July happens summers zooms by and it’s the dead of winter before you know it. I need to soak up what’s left of summer!

I am going on vacation in a little under 2 weeks! Can.NOT.wait. We’ll be going to Beaver Island, Michigan. It’s heaven on earth. We have been going since I was a little kid (a few years off here and there) but I can’t wait to carry on the tradition when I have kids of my own. While it’s not every one’s cup of tea, I love it. It’s secluded and there not much to “do” but there’s so much to do! If you know what I mean. I’m so excited to go! But back to the reason for this post!

So, this week (really last weeks) CSA box, could be summed up in one word: LETTUCE! Holy moly- lots of lettuce. But I loved it because I could eat salad for the rest of my life and be a happy camper 🙂

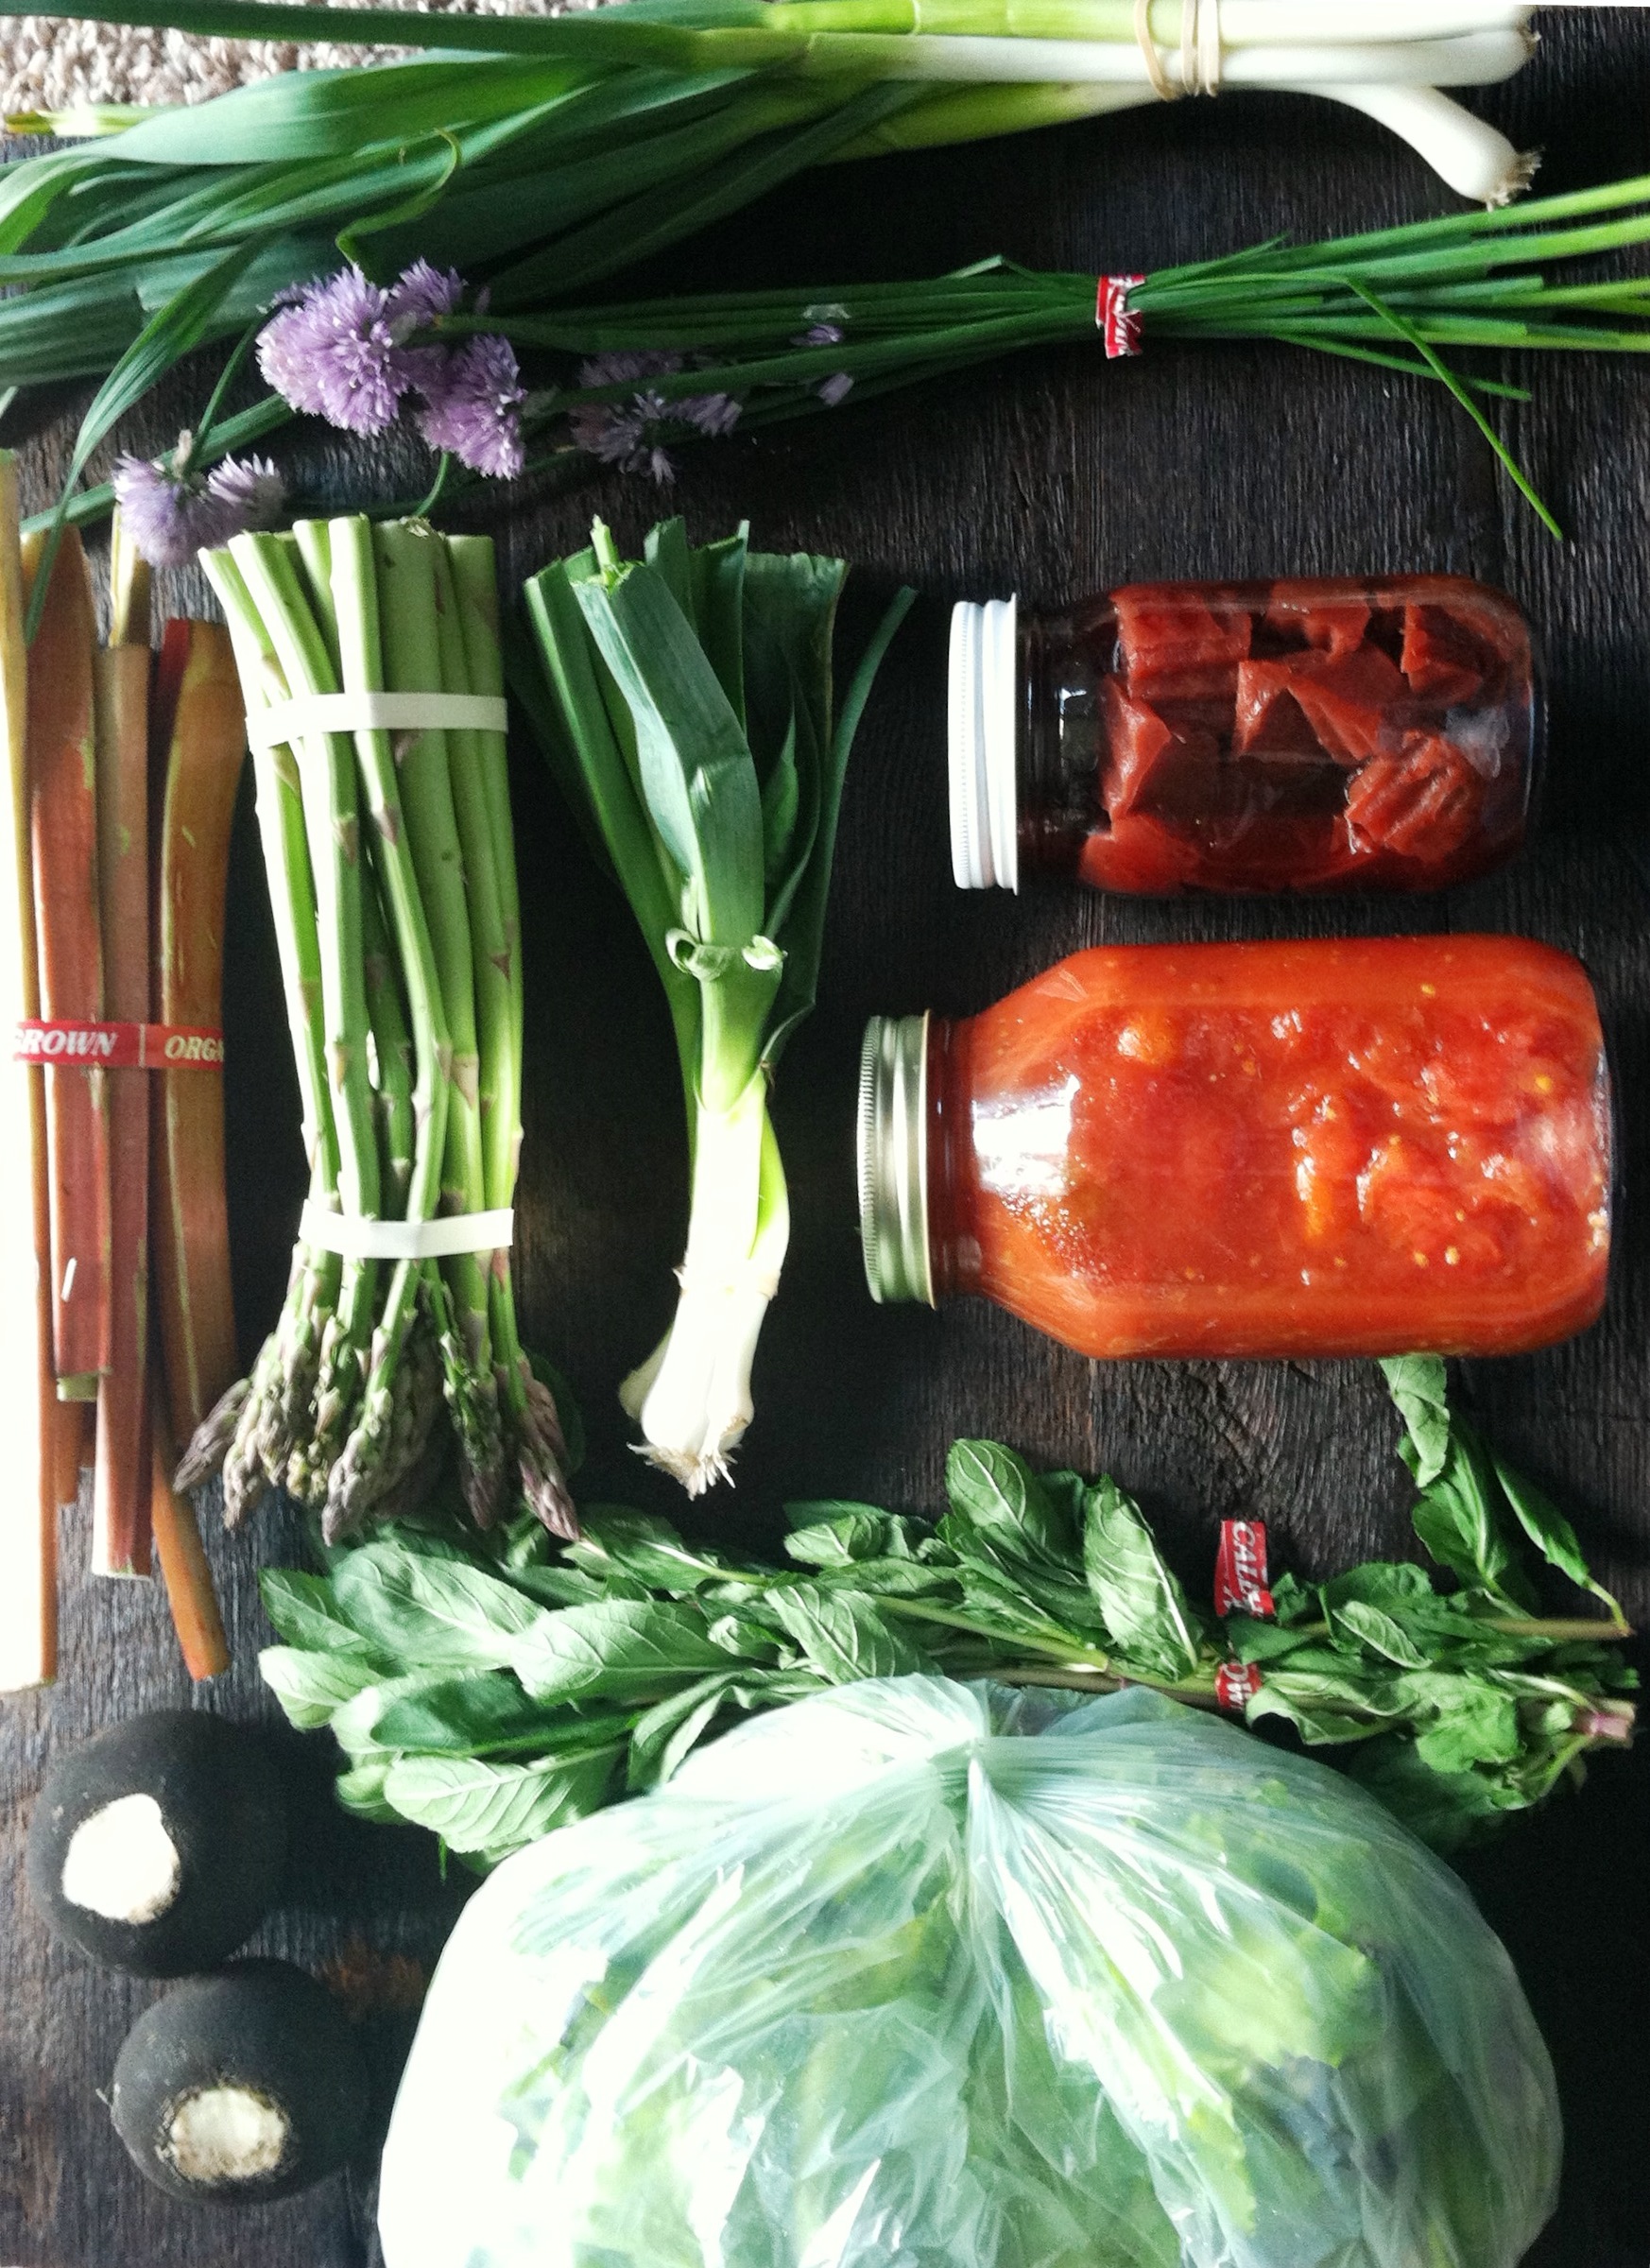
Here is what we got in the box this time:

Week2

– 1 bag salad mix
– 1 lb Asparagus
– 1 bunch Dill
– 1 bunch Cilantro
– 1 bunch Green Garlic
– 1 bunch mini Bulb Onions
– 1 head Red Romaine Lettuce
– 1 bunch Rainbow Chard
– 1 bunch Spinach
– 1 head green Leaf Lettuce

BOX 2

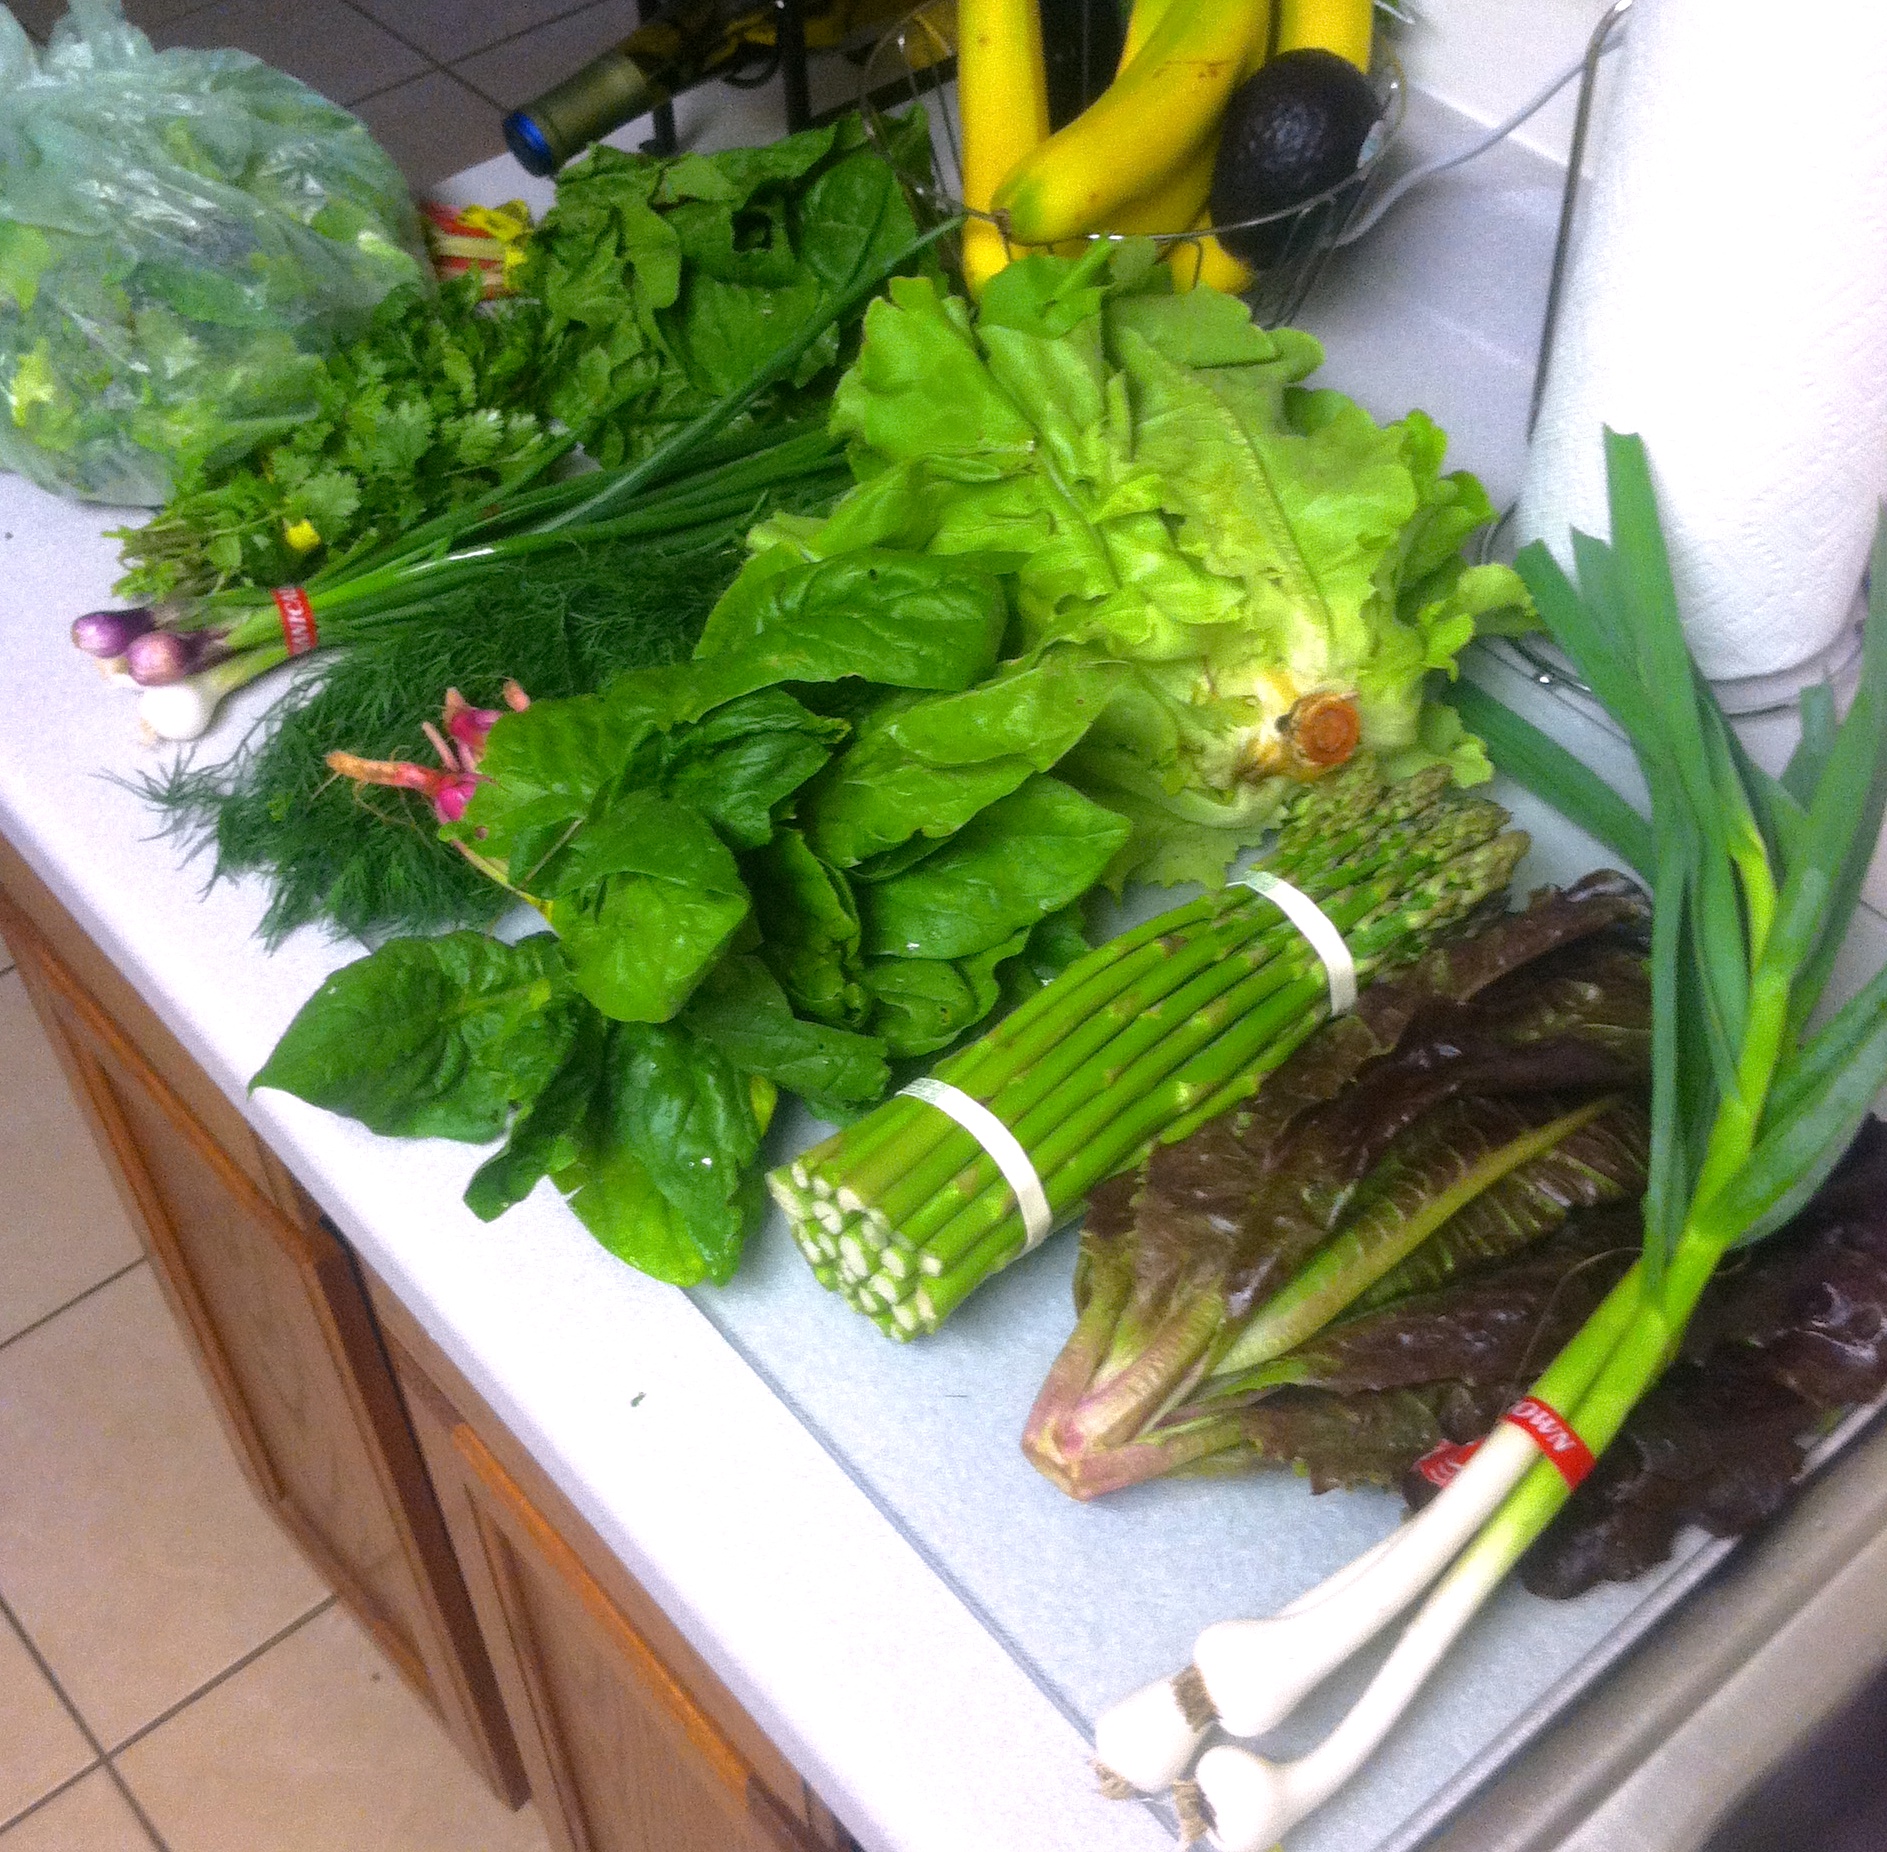
Bananas not included 🙂

So as you can tell- a sh*t ton of lettuce!!! I knew I couldn’t juuuust eat salad with it.

HERE IS WHAT I DID WITH THE GOODIES: 

Salad mix- nothing too creative here. Just really yummy tasty salads
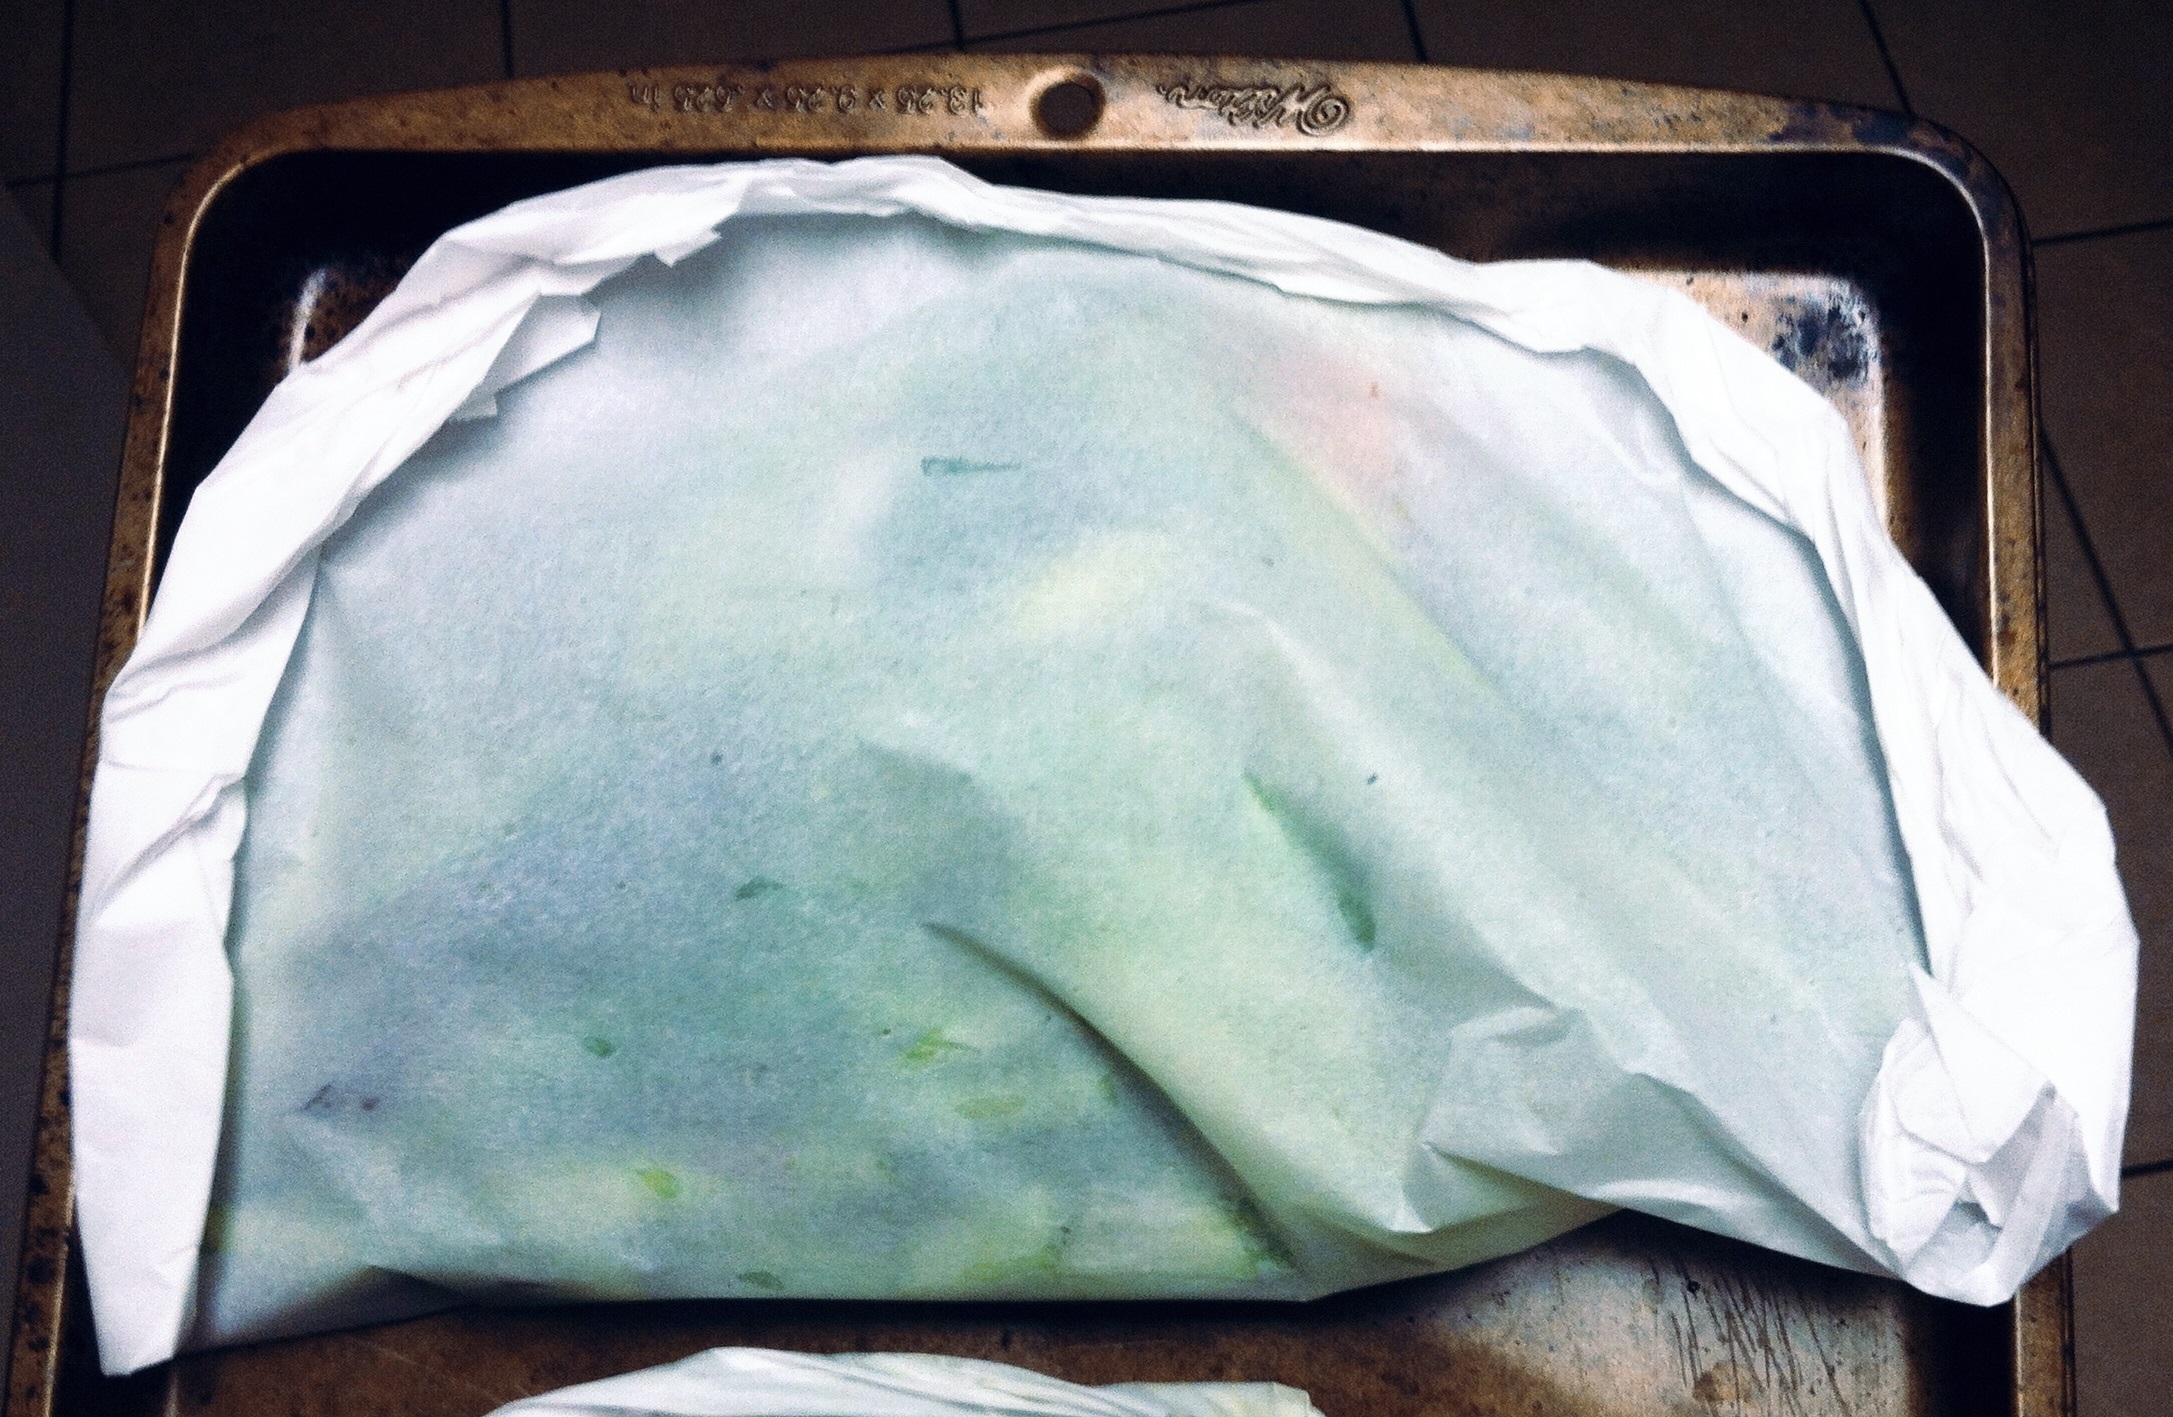
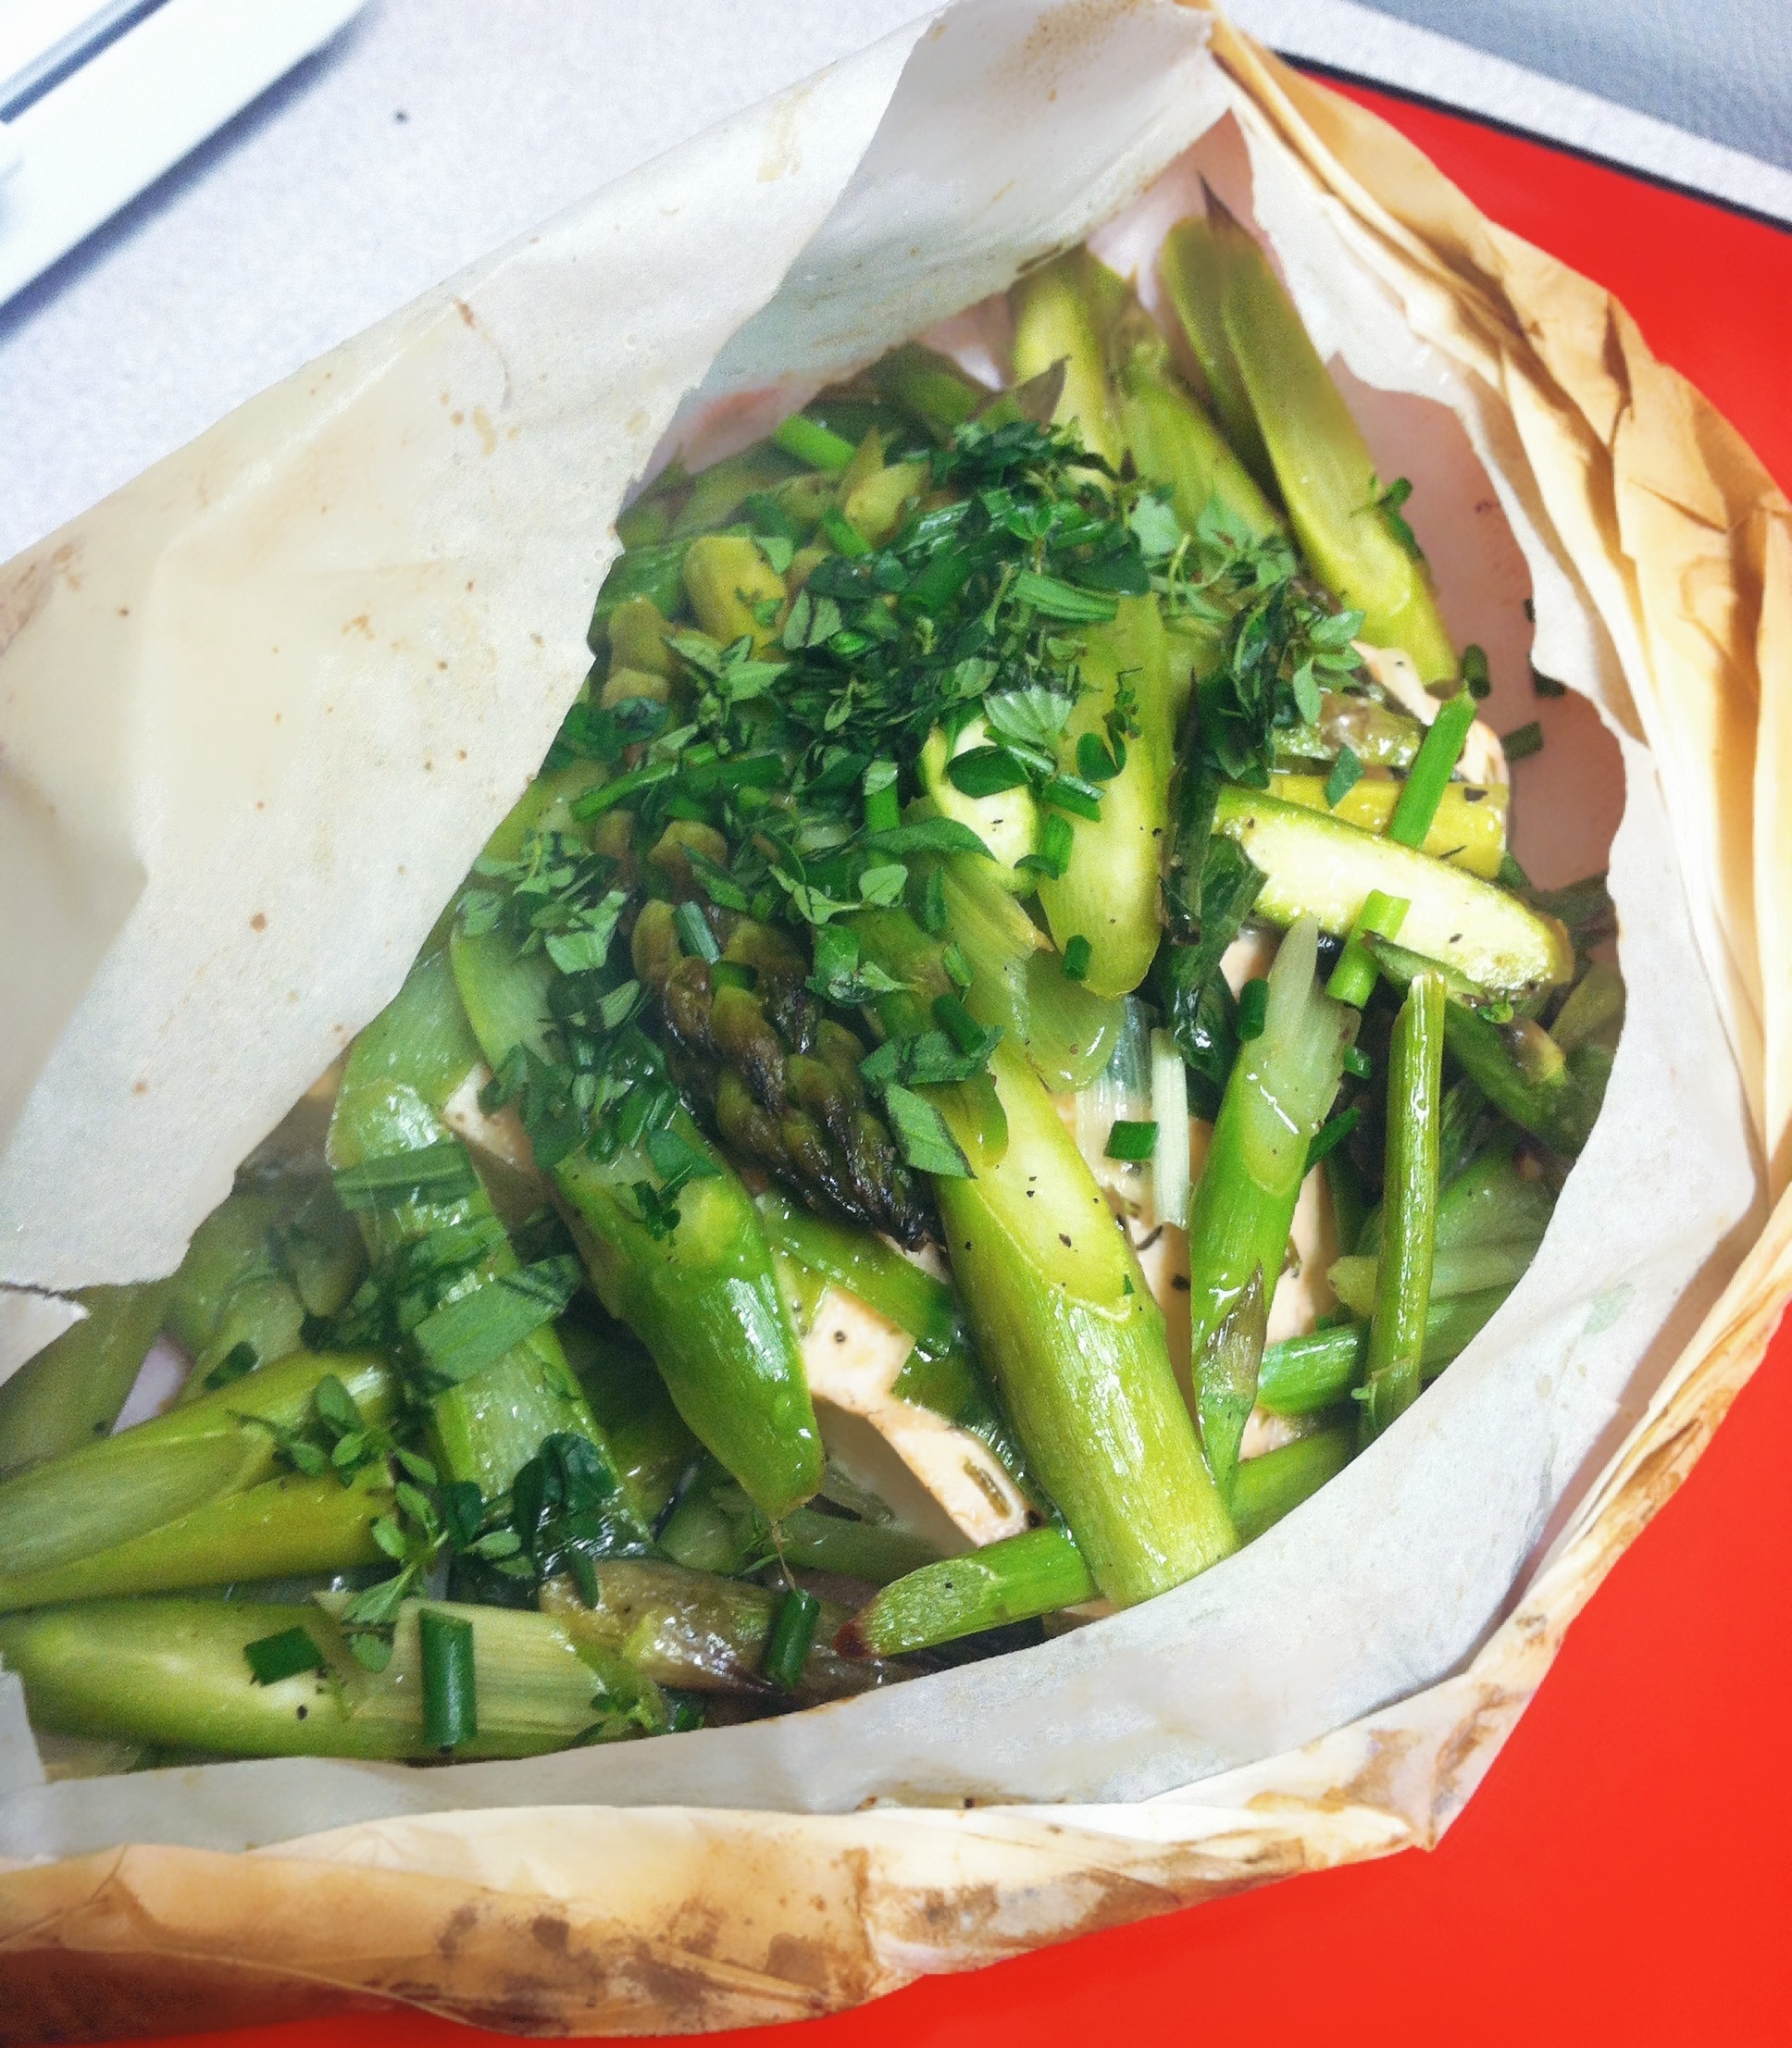
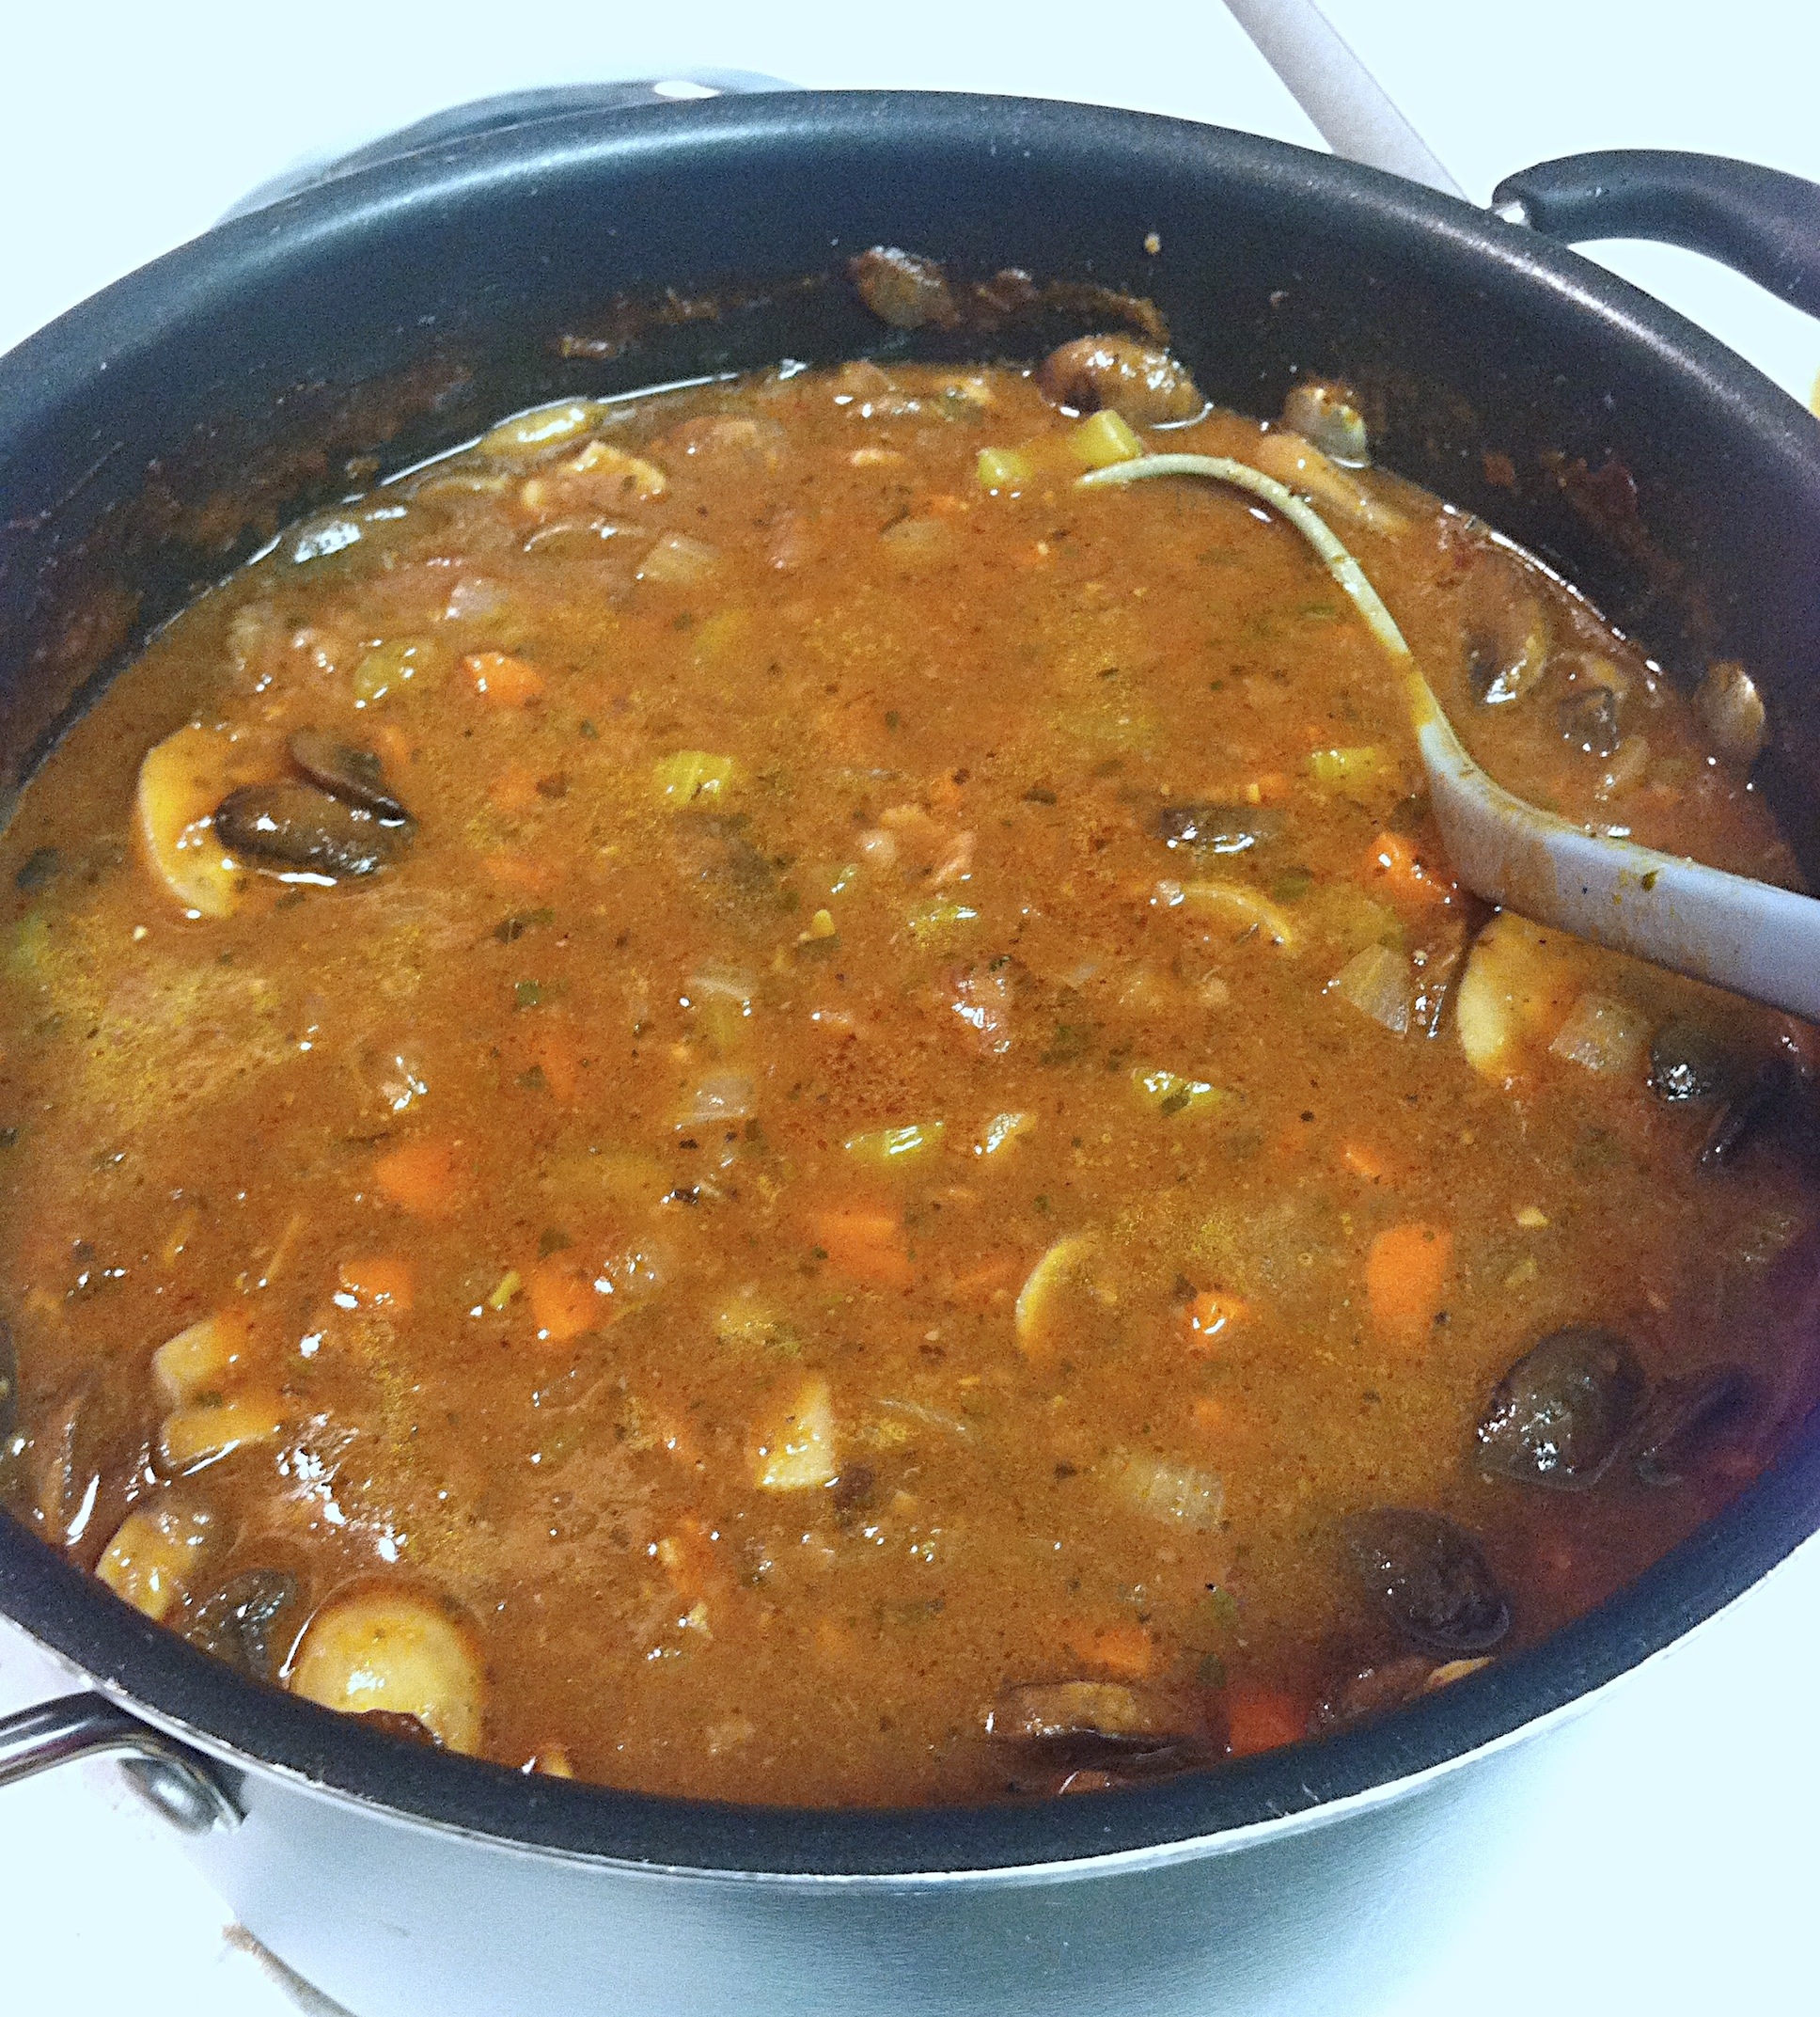
Asparagus- Used it to make this delicious zucchini pasta dish (See below!)
Dill- I put some in a salad one night (very good) and then I made a really yummy dill and lemon baked tilapia very low fat and fresh and delicious! I just prepped the fish, sprinkled garlic powder, chopped dill, and one of the mini bulb onions from the box, on top and baked in a 375 oven for about 1o minutes.
Cilantro- This is one of the those things you either love or you hate. Personally I love it. There wasn’t a ton of this so I made a black bean/corn salsa. Similar to this previous post of mine!
Green Garlic-Now that I know what this stuff is, I’m obsessed! This week you could definitely see that this is a baby garlic plant. The bottom totally looks like a mini baby head of garlic. So interesting! I used some of this in the zucchini pasta dish (see below) and then I also used it in an omelet.
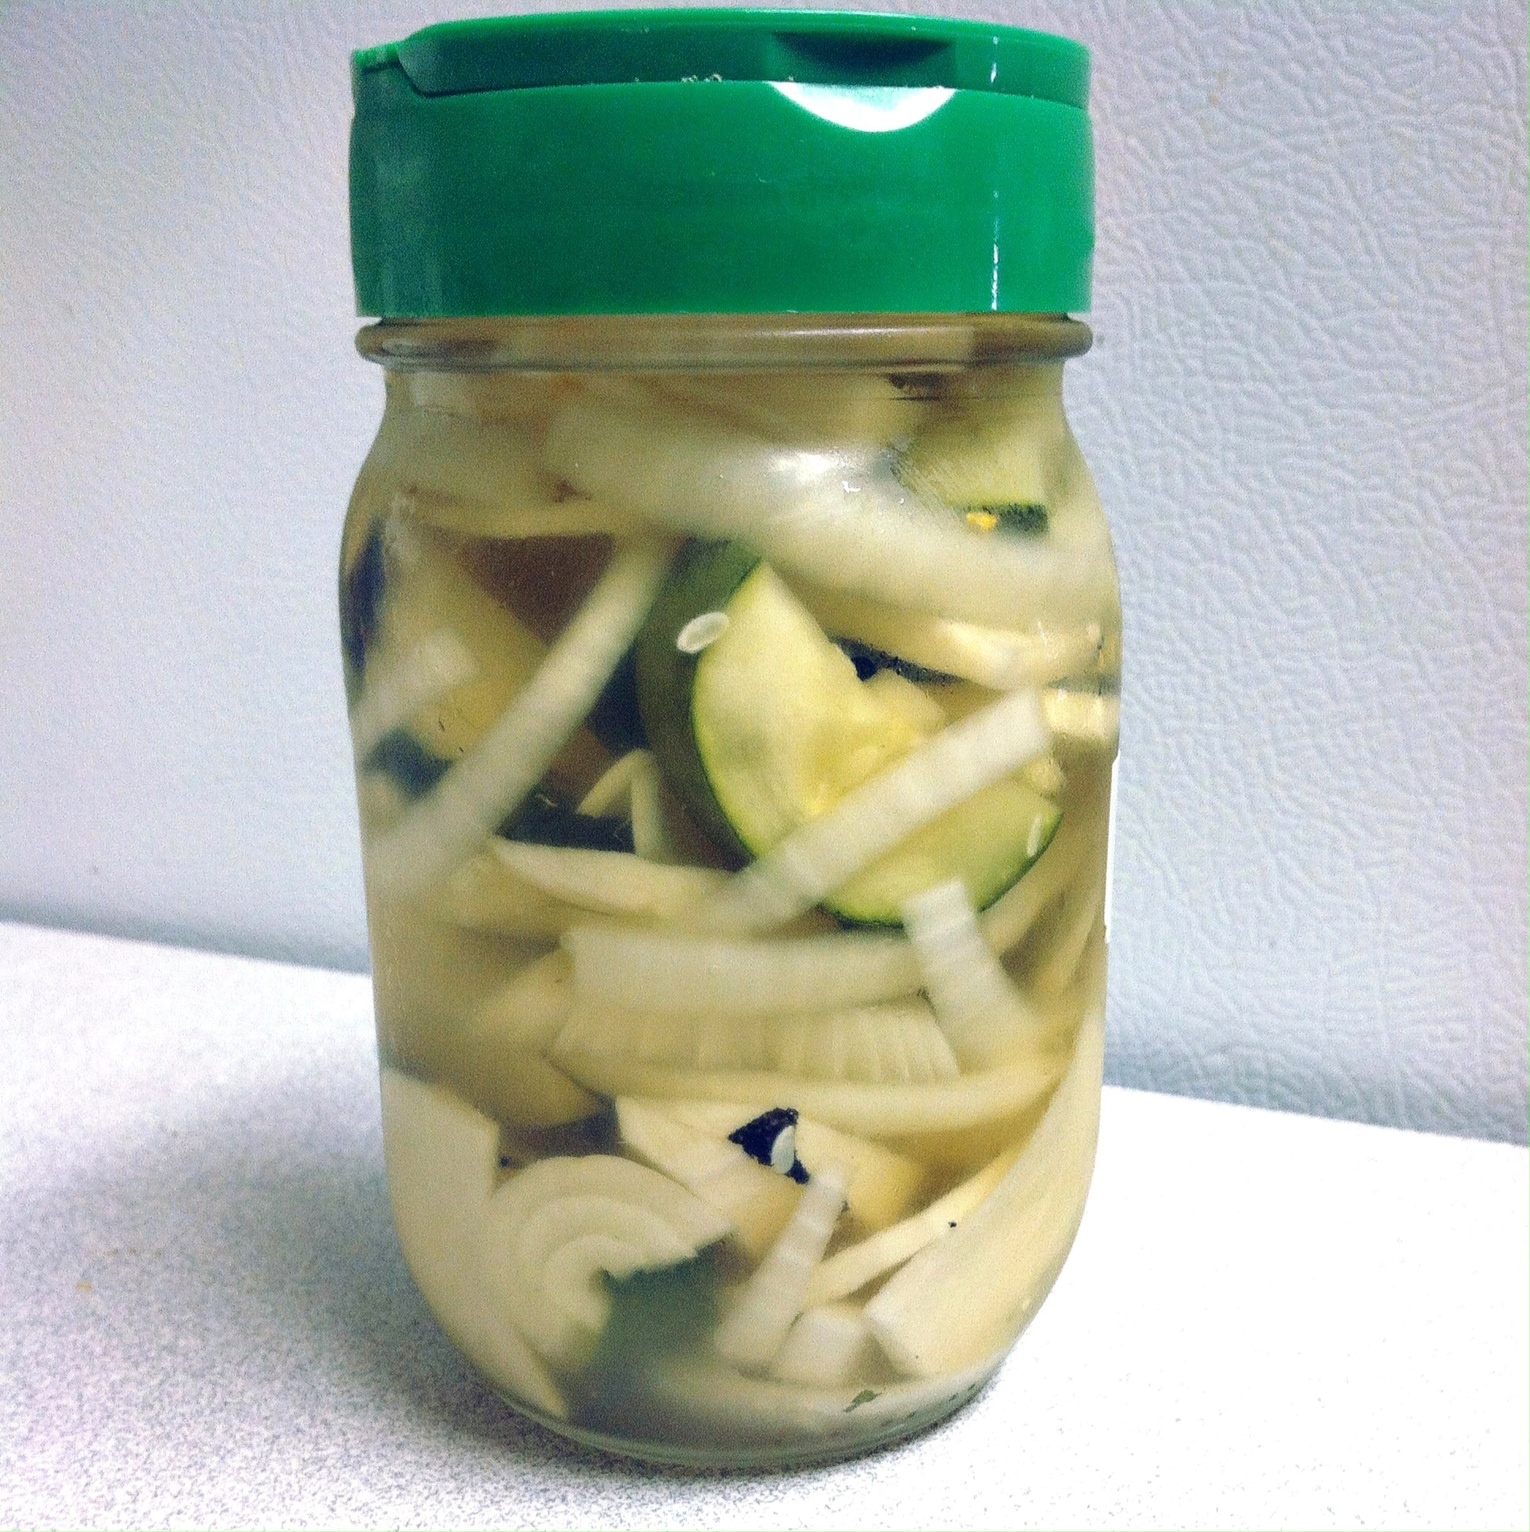
Mini Bulb Onions- Truth time: besides the one I used on my fish dish mentioned above, I ate these raw. I love onions and have since I was born, they tasted soooo good. Not inventive I know, but I’m being honest 🙂
Red Romaine Lettuce- This was such a beautiful color. And it was delicious mixed into some of the salads we had!
Rainbow Chard- I sauteed this up with some shaved brussel sprouts and fresh lemon juice. Along with a sprinkling of balsamic vinegar at the end. I thought it was delicious, though I’ll admit, a little off the wall.
Spinach- Primarily I used this in my morning smoothies. I also put some of it in a salad. I was a little surprised by this because it looks nothing like the spinach you buy in stores. I’m guessing it has something to do with the fact that usually the spinach in stores is baby spinach but had they not provided a list of what I got, I’d have no idea what it was.
Leaf Lettuce- BLT’s. I used my lettuce as the bread and didn’t use mayo ( I hateeee mayonnaise) It was amazing and tasted like summer in my mouth!

That’s pretty much it! With the  first box we got I was very confident that we would have been fine getting an every week share but after this box, I’m not sure I could have eaten that much lettuce in just one week! I’m pretty content with my EOW share. Here is the recipe for the super healthy zucchini pasta with dairy free pesto!

This week’s CSA Recipes:

Zucchini Pasta with Creamy (Dairy Free) Pesto:

For the Pesto:

2 avocados, skin and pit removed
2 cloves of garlic
3/4 cup of fresh basil leaves
Juice of 1  lemon
Salt and Pepper to taste
1/3 cup of Olive Oil

– Add the avocados, garlic, basil, and lemon juice to a food processor and blend well.
– While the food processor is on slowly add in the olive oil until emulsified (fully incorporated so where the oil won’t separate after sitting).
– Set aside.
*you could also add any nuts to this, pine nuts, walnuts etc… I didn’t because I didn’t have any. 

EDIT OF DSC_8493

For the “pasta” part:

1 small onion, diced
2 stalks green garlic (could some more onion), roughly chopped
1/2 pound fresh asparagus, cut on the bias into 2 inch pieces
1 cup organic corn kernels
1/2 pint cherry tomatoes, cut in half
3 zucchini (depending on size), use a vegetable peeler to slice thin ribbons of the zucchini, do this until you hit the seedy center.
Olive oil (or any oil of your choice)

Instructions:

– In a large saute pan(or just a pan with tall sides) heat about a tablespoon of your oil until hot and add in your onions and green garlic. Cook until softened (about 5 minutes).
– Add the asparagus and stir to combine.
– Add the zucchini ribbons and stir to combine, then top your pan with the lid and let it steam for about 5 minutes until the zucchini is softened and reduced in size.
– Toss in the corn and tomatoes and heat through.
– Add in about 1/2-1 cup of the pesto and stir until everything is coated. You can use as much or as little of the pesto as you want.
– ENJOY!

EDIT OF DSC_8514

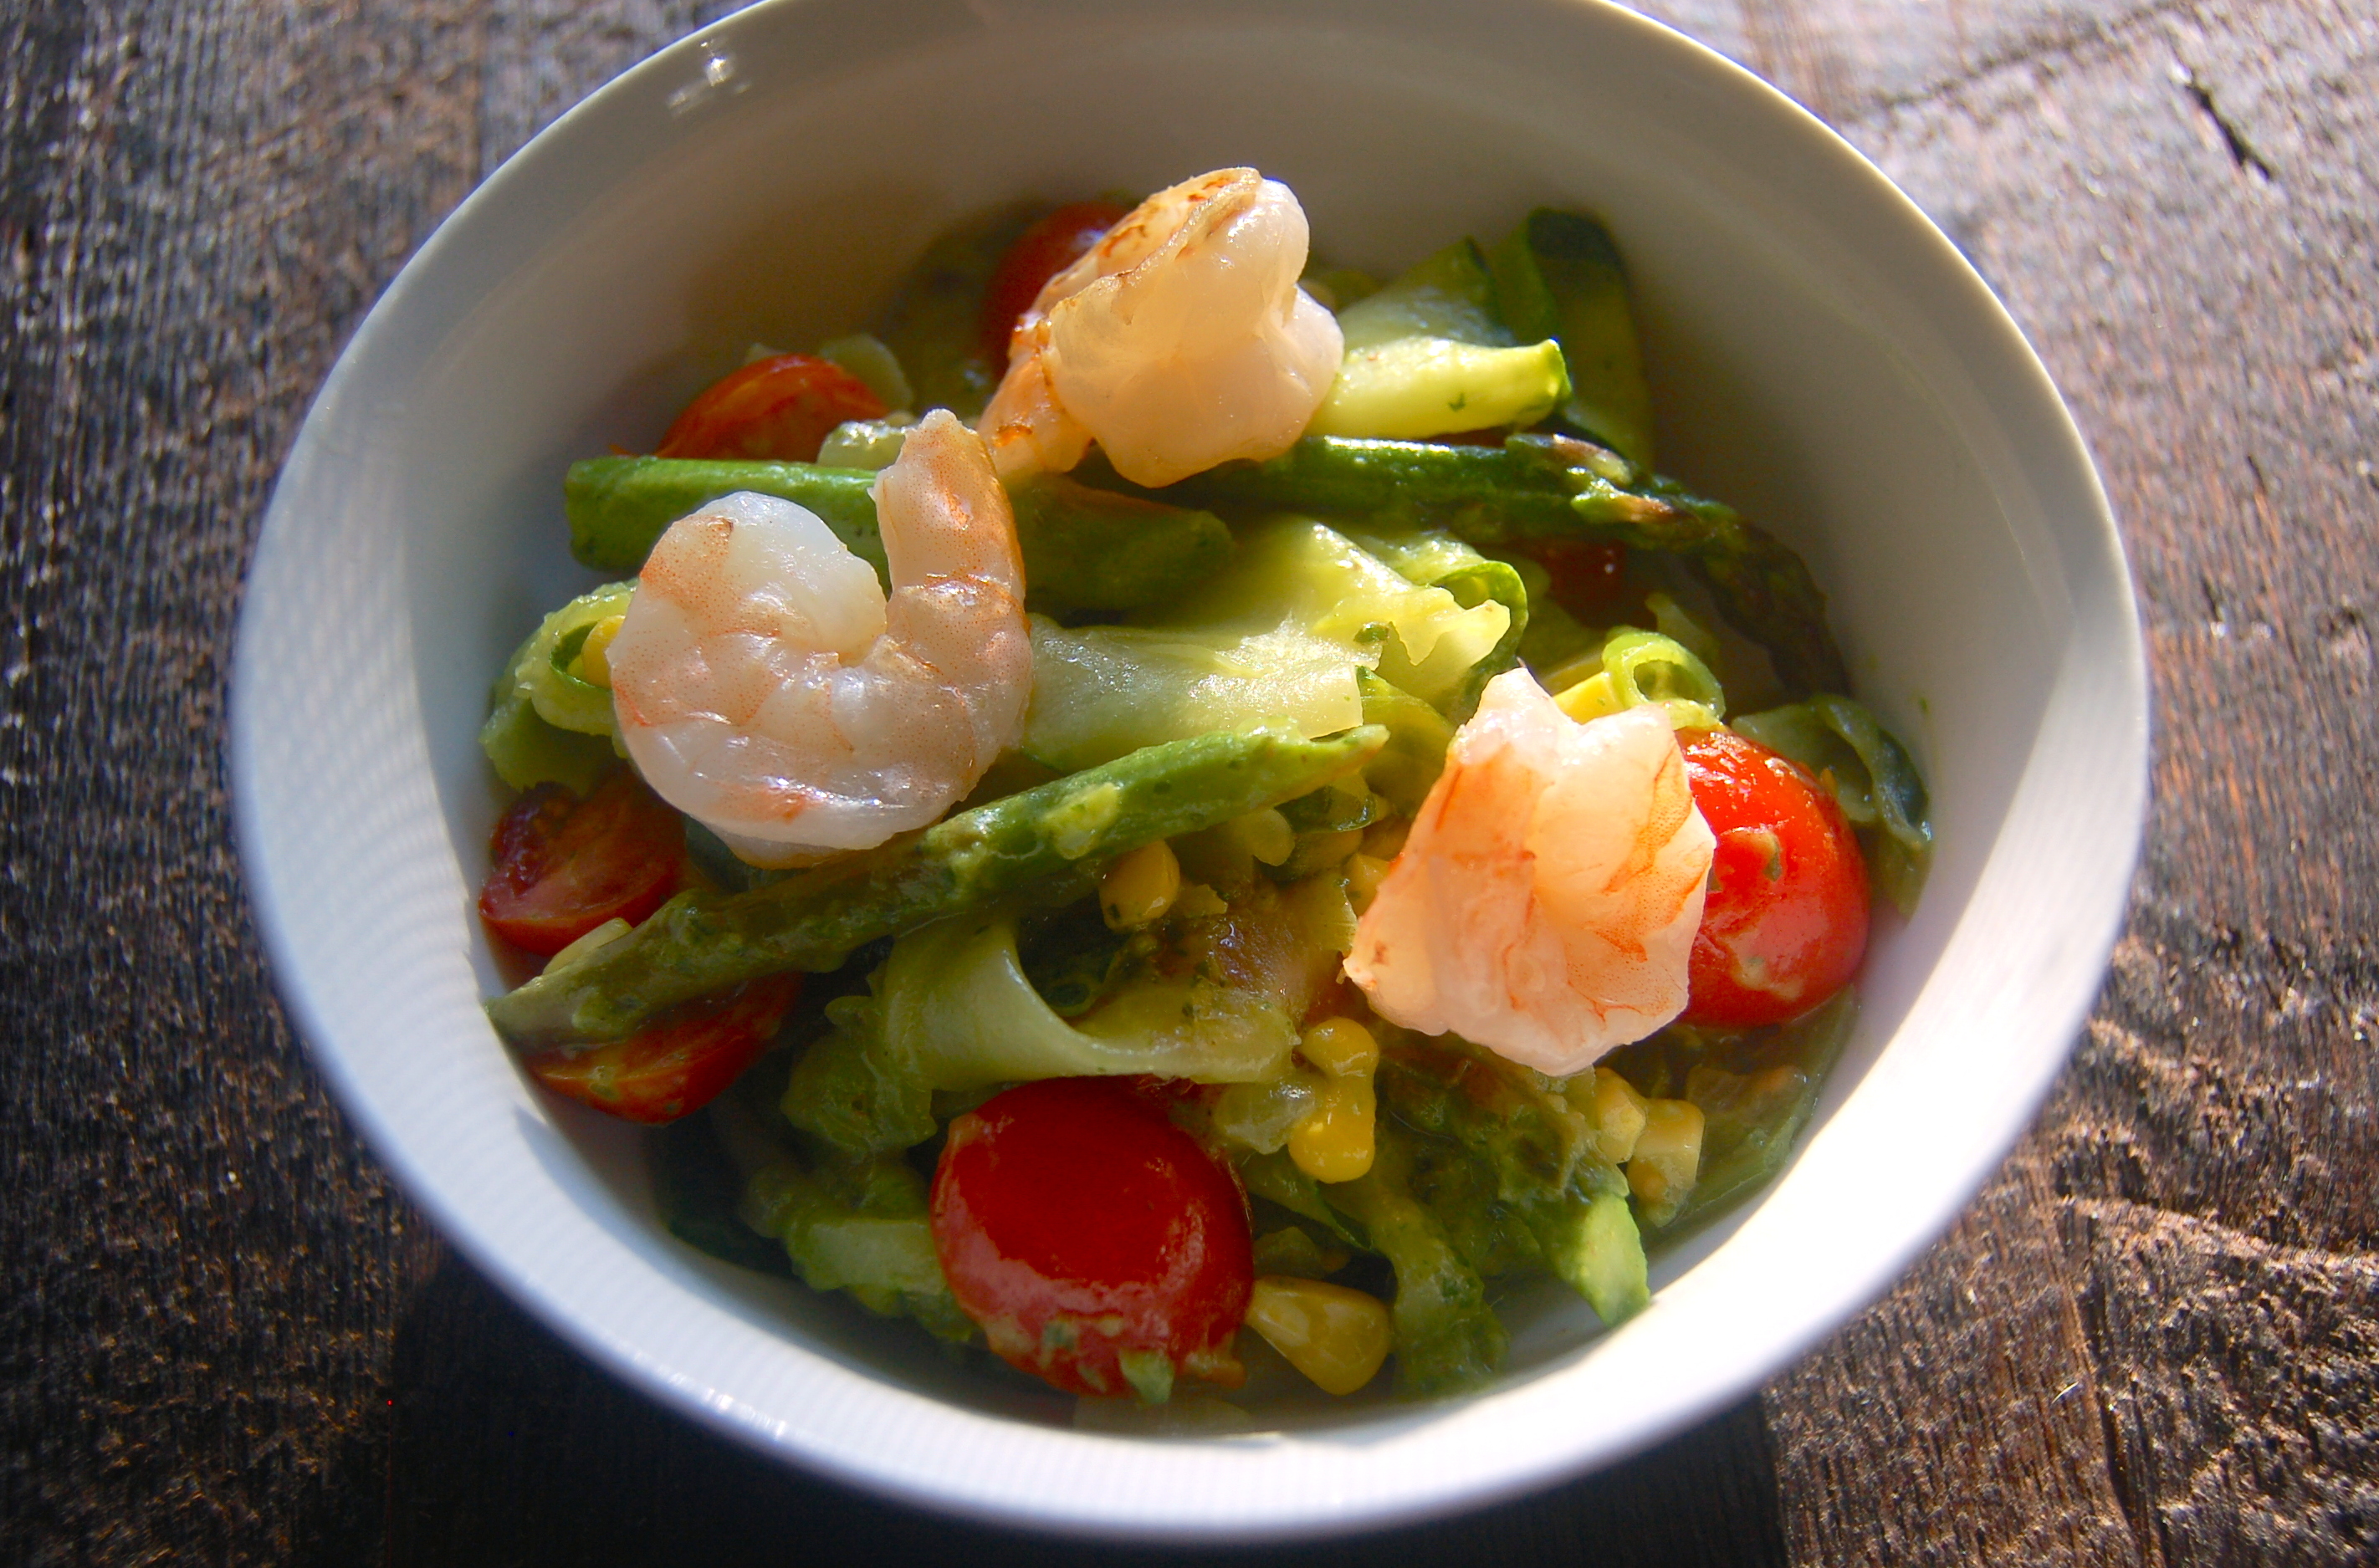
I loved this dish. Jake didn’t care for it. He said it tasted “green”….. no idea what that means but as a veggie lover I can assure you it tastes great! I’m currently doing a detox type of program where I’m eating gluten, dairy, and soy free so this dish was great. I was lovvvving the dairy free pesto. SO GOOD!

Whew! Another week down and I’m definitely loving the abundance of fresh veggies around the house. Thanks for stopping by! Hopefully you were inspired or learned something 🙂

xoxo

669058772380712020613

Check out week one here!

At Home Gel Manicure

At Home Gel Manicure

GelMani


Ummmm, you guys…… this is a miracle. Seriously.

I got my first gel manicure about 2 years ago and obviously loved it. It stayed glossy and shiny and chip free for almost two weeks!  Butttttt I cried a little when I had to take it off and my nails peeled and cracked WAYYYYY more than normal. 😦

I got a few here and there in-between then and now but I didn’t go in regularly because a) it’s a freaking expensive habit! and b) the state it left my nails in for about a month afterwards.

I saw someone post on Pinterest about this magical base coat that would make any regular old nail polish last for weeks! Needless to say I was highly skeptical. When I paint my nails at home I’m lucky if  I can get 3 chip-free days. Well, I’m a sucker so I went to Sally Beauty and picked up the base coat. It’s like $5, that’s less than a Starbucks.

I would not lie to you. This worked sooooooooo good. All you do is:

1) Clean and prep your nails.

  • Whenever I paint my nails before I put anything on them I’ll shape, cut back cuticles etc…. but last step is to wipe the nail down with rubbing alcohol. It cleans the nail and makes sure you get a really good bond with the polish and actual nail. 

2) Apply 1 coat of the Gelous Advanced Nail Gel Coat. Allow to dry

3) Apply 1-2 coats (as needed) of ANY COLOR NAIL POLISH YOU WANT!

  • Yep no special ‘Gel’ colors to buy. You just use anyyyyy color you want! From expensive Butter nail lacquers to $1 NYC Color  and anything in-between! 

4) Finish with a your favorite top coat!

  • Hands down my favorite is Seche Vite. Not only does it protect well but leaves your nails looking fresh and GLOSSY for days ❤ ❤

5) ENJOY your nails for up to 2 weeks!!!!

Yeah, I’m not lying. Up to two  weeks. This picture was taken just after one week.

Processed with Rookie

Yes, I got engaged a while ago for all of you that didn’t know 🙂 Wedding is next summer!

ONE WHOLE WEEK PEOPLE! And virtually still perfect!

And one of the BEST parts about this?!?!? Is that it comes off extremely easily with regular old nail polish remover. No soaking your fingers in that poison for 15+ minutes. (Seriously you guys know that acetone is a carcinogen and is really, really, really bad for you? Yeah it is. I try to only put it on my nails and not all over my fingers skin to soak in and never do I soak my whole freaking hand in it! OK rant over). Just take it off like a regular old manicure, super simple!

I am honestly so excited to have found this and I can’t wait to paint my nails again and again.

This is almost TWO WEEKS People! I know the pointer has a chip but the others are still perfect

Go pick this up and try it yourself! Tell me what you guys think!

xoxo

669058772380712020613


This is really the first post I’ve done raving about a product. I just want you all to know I am in NO way being paid by or endorsed by any of the companies of the products listed above. This is just a product I found that I fell in love with. I’m not being paid to try to get you to try it too 🙂  

What is in my CSA?- Week 1

CSA1

I have something exciting to share! Exciting to me anyway, and hopefully you feel the same way 🙂

I decided to part take in a local Community Supported Agriculture (CSA) program this summer. For those of you that aren’t familiar with this basically what you do is you buy a “share” of a your chosen farm’s vegetables (or fruit or eggs or whatever options they have available) and each week (or other frequency) you pick up fresh organic locally grown vegetables!

I had been thinking about doing this anyway but my health insurance company offers a $100 rebate if you participate in one! So that made up my mind for sure. I opted to do a vegetable only share, because that is mostly what we eat and I also chose an Every Other Week (EOW) share. Which means that I get a box of veggies every other week instead of weekly. I thought this was a good place to start because I have no idea what the expect as far as quantity and I don’t want to be drowning in produce and end up wasting any!

I was a little late in the game signing up for a CSA so the farm I wanted to join most, had sold out of shares. I only really had my heart set on them because they are from where I grew up and I know most of the people that work on the farm. But it turns out that a LOT of farms that do this program are from where I grew up anyway, so I could still feel good about my choice! I decided to go with Keewaydin Farms out of Viola, WI and so far I’ve love them. They send newsletters and are very involved with their “customers” they also had a pick up day and location that worked really well for me.  I  want to point out one other farm that I looked at and absolutely fell in love with their website. Take a look at their site and tell me you don’t love their vegetable background?!?! So cute.

Anyway- if at this point in the post you’re wondering “why the hell do I care you bought some vegetables?” Wellllll let me tell you- I thought that it would be a fun summer blog ‘series’ so post about the CSA box that I’ll be getting every other week. One of the great things about CSA’s is that you’ll get some great stuff that you’ve either never heard of or never tried before!

So I thought I would share my journey with you- share some great recipes and ideas for the fresh produce we get and if and when we get items we have noooo idea what to do with- I’ll share that with you too! It will be fun to see the harvest change with the season. The first pick up was 6/4 and the last one will be 10/8 so we’ll get a wide variety! Every other week it will be my goal to share 2 or 3 new recipes that I used my CSA goodies for.

I am lucky to live in a town (Madison, WI) where there is a big focus on organic and locally sourced food. I had so many farms to choose from that I had to work to narrow it down. I know I’m lucky and don’t take it for granted. Which is just another reason why I’m happy to spend my money to provide better quality and tasting food for my family and support local farmers. Farming is hard business and it takes even more work to organize a CSA and bring it to a place local to me so I can conveniently pick it up after work and not have to go to the farm. I want to say THANKS! to the farmers and definitely try to twist your arm to look into the possibility of a CSA yourself. Here is a great site to help you find some options near you!

Now– onto the good stuff! What is in my CSA box this week?

Week1

1 bag salad mix
1 bunch Green Garlic*
1 bunch Leeks
1 bunch flowering Chives
1 lb Asparagus
1 lb Rhubarb
2 Black Spanish Radish (this was a “what the ?!” item)
1 bunch Mint
1 pint pickled Beets
1 quart Tomatoes

photo 2

Immediately I was excited for the asparagus and rhubarb most. I’ve already eaten my body weight in asparagus this spring and this stuff looked gorgeous! And won’t lie but the black radishes were strange looking. They are hard and have a tough outer skin that is black, black black. I had no idea if they were just like larger radishes or what or how to cut them prepare them. I figured something out, see below.

*Green Garlic- this is the item on the far right of the picture above. Looks like spring onions. Everyone thought I was crazy when I said I received Green Garlic. They thought it would have been ramps or garlic scapes but this is an entirely different thing. It has a very mild garlic flavor but it’s without a doubt garlic and not onion-ey. I found out it’s just a young garlic plant before the bulb and cloves begin to form. There ya go! Learn something every day! 

 HERE IS WHAT I ENDED UP DOING WITH THE GOODIES!

Salad mix– nothing to inventive here we just had a lot of really good salads either me taking some to work for lunch or one day we weren’t really hungry after having a big lunch so we just had a tasty salad 🙂
Green Garlic- I threw half  in a thai curry dish that I made, just cut into 1 inch pieces and then the other have I cut up and put in this awesome Roasted Butternut Squash Enchilada Lasagna. It was delicious.
Pickled Beets- Ate right out of the jar 🙂 and also threw some on a salad one day with some goat cheese and walnuts.
Tomatoes- I haven’t used these yet but they’ll be great for a pasta sauce one day!
Flowering Chives- I cut up some of these real small and put them on some scrambled eggs(my fav thing to do with them) and then I still had some leftover so I used those in my salmon dish described below.
Rhubarb– 1st I made a rhubarb simple syrup to make some rhubarb mint mojitos (see below) and then I also made a Strawberry/Rhubarb crisp(I didn’t add the extra sugar on the berries)! It is Jake’s favorite.
Leeks and Asparagus: I used these (along with my left over chives) and made an amazing springy salmon dish. It was soooo good and springy and light and delicious. See below!
Black Spanish Radish – as I said before I wasn’t sure what to do with these babies. I came across a recipe for pickled regular radishes and thought I’d give it a try with the black. They are just refrigerator “pickles” so it’s really easy and they turned out great. See below!
Mint- What else do you do with mint besides make…..MOJITOS! 🙂 And I made special ones. Rhubarb Mojitos. They turned out really good and to my surprise, you can really taste the rhubarb! See below.

This week’s CSA recipes

Leek & Asparagus Salmon: 

  • 1 lb asparagus trimmed and thinly sliced on the bias
  • 2 small leeks, white and pale-green parts , thinly sliced (Make sure to wash leeks well!)
  • 2 tablespoons olive oil
  • Salt and freshly ground pepper
  • 4 skinless wild caught Salmon fillets
  • 1/4 cup fresh herbs, I used thyme, lavender, chives, and tarragon. 
  • 4 Lemon wedges

Instructions:

  1. Preheat oven to 400 degrees. Cut four 12-by-17-inch pieces of parchment. Fold each in half the long way to make a crease, then unfold and lay flat.

  2. Toss asparagus and leeks with the oil in a bowl. Season with salt and pepper to taste.

  3. Season fish with salt and pepper. Arrange a fillet on one side of the crease on each piece of parchment. Top with asparagus/leek mixture, dividing evenly. Fold each piece of parchment over, then roll the edges in towards the middle to seal open sides, creating half-moon-shaped packets. (See picture)

  4. Bake on rimmed baking sheets, about 10 minutes for medium-rare. Transfer to plates and carefully cut packets open (steam will come out so be careful!). Serve, topped with herbs and some freshly squeezed lemon juice.

?????????????????????

The rolled up packet.

?????????????????????

Delicious finished product 🙂

 Pickled Black Radishes: 

5 Black Spanish Radish’s
1 yellow onion
2 cloves of Garlic, peeled and rough big chopped
1/2 teaspoon Fresh crushed Peppercorns
1 Dried hot chili pepper cut in half lengthwise
3 teaspoons honey
1 teaspoon kosher salt
1 cup Water
1 cup Vinegar

  1. In a saucepan, bring the water, vinegar, salt, and honey to a boil, until salt and honey are dissolved. Remove from heat and add the crushed peppercorns, garlic, and chile pepper.
  2. Tightly pack the sliced radishes and onion in a clean quart-sized jar, and pour the hot liquid over them, making sure to pack the garlic, chile, and all those crushed peppercorns into the jar, too. Cover and cool. Stick in the fridge and enjoy!

Processed with Rookie

*Note that I only had 2 radishes so I added half a cucumber to my jar instead to make up for it. Tastes really great!

Rhubarb Mint Mojitos: 

For the Rhubarb Simple Syrup:
1 cup chopped rhubarb (3-4 small stalks)
1 cup sugar
2 cups water
¼ teaspoon cinnamon
¼ teaspoon nutmeg
½ teaspoon vanilla (optional)

Combine all the ingredients in a small pot. Bring to a boil then reduce to a simmer. Simmer for 5-7 minutes. Let cool completely.
Strain the ‘solids’. Reserve the rhubarb to top some yogurt, ice cream or oatmeal (seriously save it. Soooo good.)
The syrup will keep covered in the fridge for up to two weeks.

For the Rhubarb Mojitos:
3 oz white rum
5 oz rhubarb syrup
5 (roughly) mint leaves
1 Tablespoon fresh lime juice
Club Soda
lime zest
nutmeg

In the bottom of a glass add a bit of nutmeg, lime zest, mint leaves and the lime juice. Using a muddler or the end of a wooden spoon muddle the ingredients. Fill the glass with ice. Add the rum and syrup, give a light stir then top with a splash of club soda. Perfect for summer sitting on the patio!

Processed with Rookie

So- what do you guys think? Are you as excited for this series as me? I just love being able to share it with you! Do any of you parttake in community supported agriculture? Tell me about your favorite things about it and or some of the crazy and fun veggies/fruits you’ve received before. Thanks for making it to the end of this post- it was a long one, I know. But I had to explain everything for the 1st time too! 🙂 So the future ones won’t be quite as long.

As always, thank you for stopping by and checking out my blog! HAVE A FABULOUS WEEKEND!

xoxo

669058772380712020613

Goat Cheese, Sausage, and Arugula Stuffed Peppers

Goat Cheese, Sausage, and Arugula Stuffed Peppers

20140322-202648.jpg

Wowza you guys. This recipe is sooooo freaking good. simple. delicious. fresh. healthy. did I already say delicious? Because it is.

It probably doesn’t hurt that I am OBSESSED with Arugula. Something about that taste just gets my every time. Spicy. Nutty. A tiny bit bitter. Loveeee it.

This dish does a great job highlighting those flavors. And it has goat cheese. So, what’s not to like?

Ingredients:

3 medium bell peppers of any color, halved lengthwise, seeds and ribs removed
2 teaspoons olive oil
4 links sausage of your choice, casings removed (I used spicy italian)
1 onion, diced
4 ounces goat cheese, softened or just buy the pre-crumbled stuff
2 large handfuls of arugula (about 1½ ounces) *Rocket for all you non USA folks 🙂
Salt, pepper and/or red pepper flakes, to taste
1/4 cup  freshly grated Parmesan (or mozzarella)

Instructions:

Turn on oven to 400º. Place the prepped peppers in a baking dish and set aside.

Heat olive oil in a medium skillet set over medium-high heat. Add the sausage and cook until it browns, crumbling with a wooden spoon as it cooks. Drain the sausage and return to heat. Add the onion and cook until softened. Reduce heat to low and stir in the arugula and goat cheese until the cheese has melted and the arugula is wilted. Taste and add salt, pepper and red pepper flakes.

Spoon the filling into the peppers and sprinkle each half with Parmesan. Bake for 12-15 minutes, until the peppers have softened slightly. Hit with the broiler for about a minute to get the golden cheese on top and serve!

20140322-202603.jpg

I tried some with and without cheese on top

So I tried baking both with cheese on top and without. Honestly, the cheese sort of helped hold everything together but it’s one million percent possible to make this without the extra cheese on top. Just as delicious, just slightly messier.

20140322-202729.jpg

so pretty too!

Hmmmmmmm seriously sooo delicious. This meal was so quick to make and the flavors were aaaaaammmazing. I could have eaten the pepper “stuffing” by the spoonful out of the bowl.

Ok, I did that.

Don’t judge. It was soooooo good. You could serve this as a side or meal by itself! You need to make this pronto!

Also I just wanted to share that I’ve created some social media pages dedicated to the blog, check us out on Twitter and Facebook!

Thanks!

xoxo

669058772380712020613

Beef Bourguignon Soup

Beef Bourguignon Soup

20140322-211133.jpg

A little overkill on the parsley. Don’t care. Still delicious!

Happy Sunday! Hope your weekends were all great and relaxing and fun! This is totally a winter comfort food- which I’m posting, not in winter. I’m not that organized. Get over it 🙂

I love a good Beef Bourguignon and when I saw a soup rendition, I was all for it. Most are kind of stew-like anyway, so why not go all in?!

I served this with my great grandmothers Homemade German Potato Dumplings and it was to. die.for.

This is actually a pretty rich and decadent version of a beef bourguignon. It takes a little but more time that more recipes I feature on here, but I promise that it will be worth it! 🙂

Ingredients:
3-4 thick cut slices of bacon
2 tablespoons flour
1 ½ teaspoons salt
½ teaspoon freshly ground black pepper
2 pounds stew beef meat, cut in 1/2-inch dice
1 onion, chopped in 1/4-inch dice
3 medium cloves garlic, minced
6 tablespoons tomato paste
2 cups red wine
6 cups beef stock
4 medium fresh thyme sprigs
1 large bay leaf
5 tablespoons pesto, prepared or homemade (Costco has the BEST pre-made pesto on the planet)
2 teaspoons brown sugar
2 stalks celery, diced
8 medium carrots, peeled and diced
2 tablespoons butter
8 ounces mushrooms, sliced

Instructions:
1. Cook bacon over medium low heat until golden brown and crisp, but not hard. Remove bacon with a slotted spoon and set aside. Remove half of the bacon drippings and set aside.

2. Combine flour, salt and pepper in a large bowl and stir to combine. Add beef and toss with your hands to coat.

3. In a large Dutch oven or heavy duty pot, heat bacon fat over medium high heat until hot, but not smoking. Add ½ of the beef and spread out to cover the bottom of the pan. Cook until the beef is golden brown on the underside, about 5-7 minutes. Don’t mess with it too much. Let it get a good golden brown coat. With a large metal spatula, flip beef to uncooked side and cook until second side is golden brown too. Remove with a slotted spoon to a clean plate. Add the rest of the bacon fat to pot. Heat until hot, add remaining beef and repeat cooking process as directed above.

4. Once second batch of beef is browned, return first half of beef to pan. Add onion and garlic, tomato paste and 1 of cup wine. Bring to a boil then lower heat to maintain a low simmer. Continue cooking, stirring occasionally. Simmer until most of the wine is absorbed, about 20 minutes then add the remainder of the wine and simmer until almost completely absorbed .

5. Add the beef stock, thyme, bay leaf, pesto and brown sugar and return to a boil. Reduce to a low constant simmer, cover and cook for 1 hour or until beef is tender. Remove bay leaf and thyme sprigs (if you used real thyme)

6. Add celery, carrots and potatoes, cover loosely and cook till tender, about 20-25 more minutes.

7. While vegetables are cooking, melt butter in a sauté pan over medium-high heat. When butter is bubbly, add mushrooms and salt. Cook, stirring occasionally until mushrooms are golden brown, about 10-15 minutes. Add mushrooms to soup and stir. If soup is too thick add a bit more stock or water.

8. Serve it up. Like I said, I served over some German Potato Dumplings, but served by itself or with some good crusty french bread would be amazing too!

20140322-211102.jpg

Yum. Yum. Yum. I want this again right now!

xoxo

669058772380712020613