Roasted Veggie & Black Bean Burritos
Heyyy-o! It’s fridayyyy friiiidaaay (you’re welcome that song is now stuck in your head). But seriously I pretty pumped that it’s the weekend! The weather is starting to look up around here (high of 66 today!) and I am visiting a old roomie from my college days tonight. Life is good.
I was browsing through my dashboard (basically like the settings portal of my blog) here on WordPress and saw that I didn’t ever publish this recipe! I made a quite a while ago and it was deeelcious but must have spaced on the publishing part.
This would also work great as a gluten free option to just make the “stuffing” part of the burrito and put it over rice or or quinoa or any grain you want etc…
Hope you enjoy this tasty meal and also the helpful burrito rolling tip below 🙂
INGREDIENTS:
2 whole Sweet Potatoes, peeled And cubed small
2 whole Jalapenos diced
1 whole Red Pepper, diced
1 whole Red Onion, diced
2 teaspoons Olive Oil
1 teaspoon Cumin
1 teaspoon Chili Powder
1 pinch Salt And Pepper
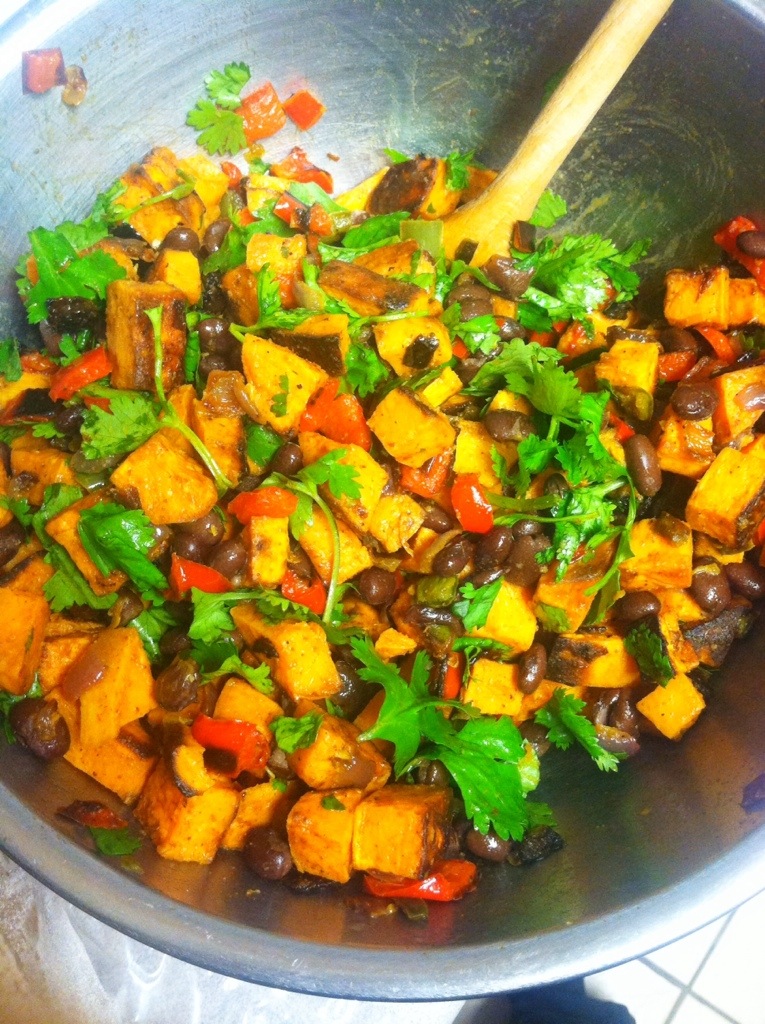
2 cups cooked Black Beans (or 1 15 oz can rinsed and drained)
½ cups Fresh Cilantro, chopped
2 teaspoons Fresh Lime Juice
1 cup Shredded Cheddar
1 package Burrito-Sized Wheat Tortillas Or Wraps (6-10 Count) but really any tortilla will work.
INSTRUCTIONS:
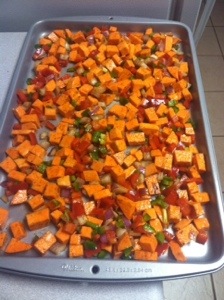
In a bowl, toss your raw veggies in olive oil and season with spices. Place in a large baking dish and roast in 425 degree oven for 20 minutes, tossing around halfway through.
Let cool. Add your roasted veggies to a cans worth of rinsed black beans. Add cilantro and squirt of fresh lime juice. Combine gently. At this point, mixture can be stored for later use if want to make this part ahead of time.

Warm your tortillas of choice in microwave for about 30 seconds (so they are easier to handle and roll). Spray a casserole dish with nonstick spray or olive oil spray.
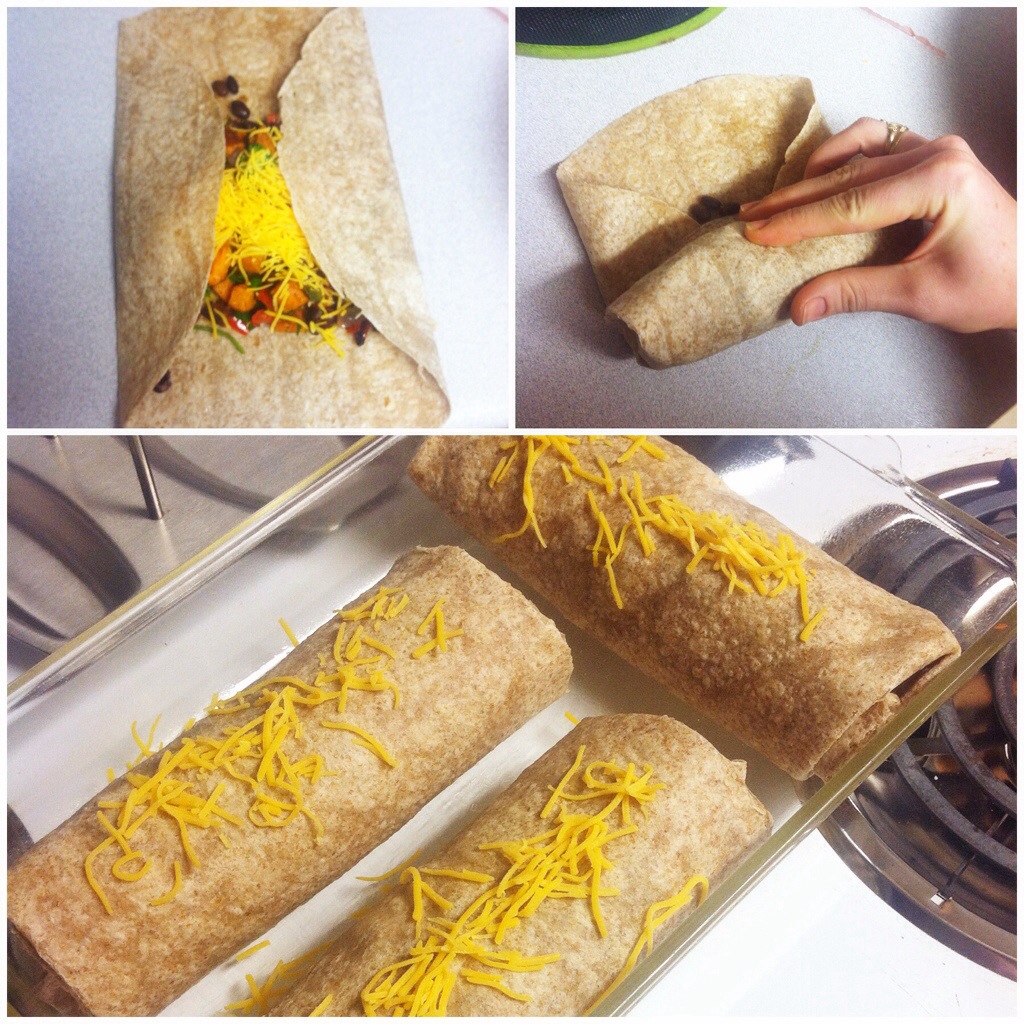
Add few heaping spoonfuls of vegetable and bean mixture to center of wrap. Top with shredded cheese. Fold in sides, and then roll up to complete(see pic below).Place in pan and continue to roll the others. Place into your baking dish, seam side down so that they stay together.
Bake in 375 degree oven for about 15 minutes or until golden brown. Baking this way will make the tortilla wrap crisp. It’s up to you if you want to sprinkle with cheese or not, I just thought it would look a little ‘prettier’.
** Tip: Premake your burritos and wrap them in aluminum foil. Keep in refrigerator for 3-4 days for a quick lunch or dinner!
Burrito Rolling 101:

This is how my mom taught us to roll up our tortillas. I have been doing it this way since before I can remember. It blows my mind to see people do it any other way. I mean your “stuffing” is falling out all over the place and you, more likely than not, end up with food all over you! All I do is fold in the sides of the burrito like the the top left picture and then roll up(tucking in the ‘insides’ while you go) to complete it! Super simple and it all stays inside.
Hope you guys enjoy this one. It is a healthy, filling, tasty dinner!
xoxo


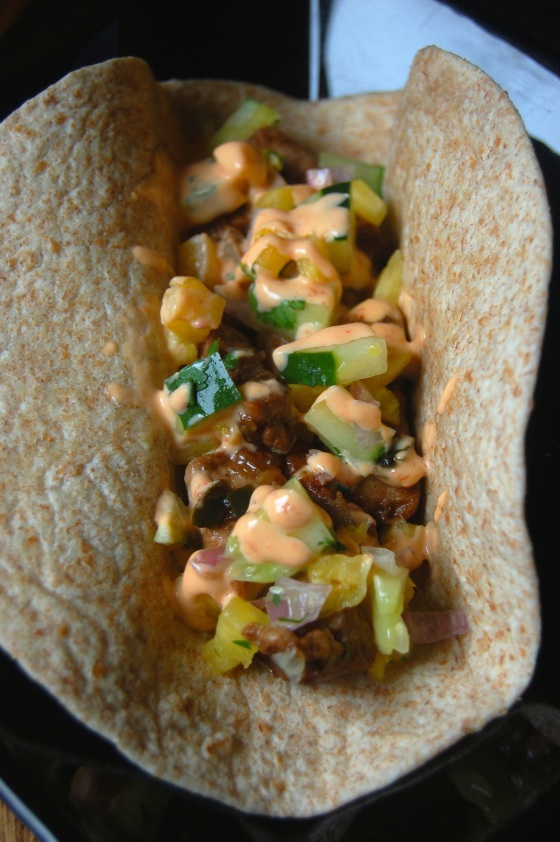
 Oh Tacos. So difficult for me to try to photograph yet so delicious that I can’t help but share.