Candy Cane Popcorn

Candy Cane Popcorn

20140109-204030.jpg

Ingredients:
12 oz. of white chocolate, melted (I prefer the chocolate blocks but chocolate chips or white candy melts will work too)
1/2 – 1cup of un-popped popcorn (measure it un-popped and then pop it)
1/2 cup of crushed candy canes(about 10 candy canes)
7-8 drops peppermint oil
1/2 cup dark chocolate chips (optional)
dash of salt (optional)
Red and Green m&m’s (or any mini candy of your choice)

Directions:
1. Pop your popcorn and make sure to remove all the un-popped popcorn kernels. Place in a large mixing bowl with ample room to mix. (You may have to pop the popcorn in batches depending on how much you make and your method of popping. I did it in two batches.)
2. Melt white chocolate in a double boiler or in the microwave. If you are using the microwae, make sure to use it at 50% power. Seriously, it makes a WORLD of difference and you wont turn your chocolate into an unuseable burn blob within a minute….not speaking from experience or anything…….. 🙂
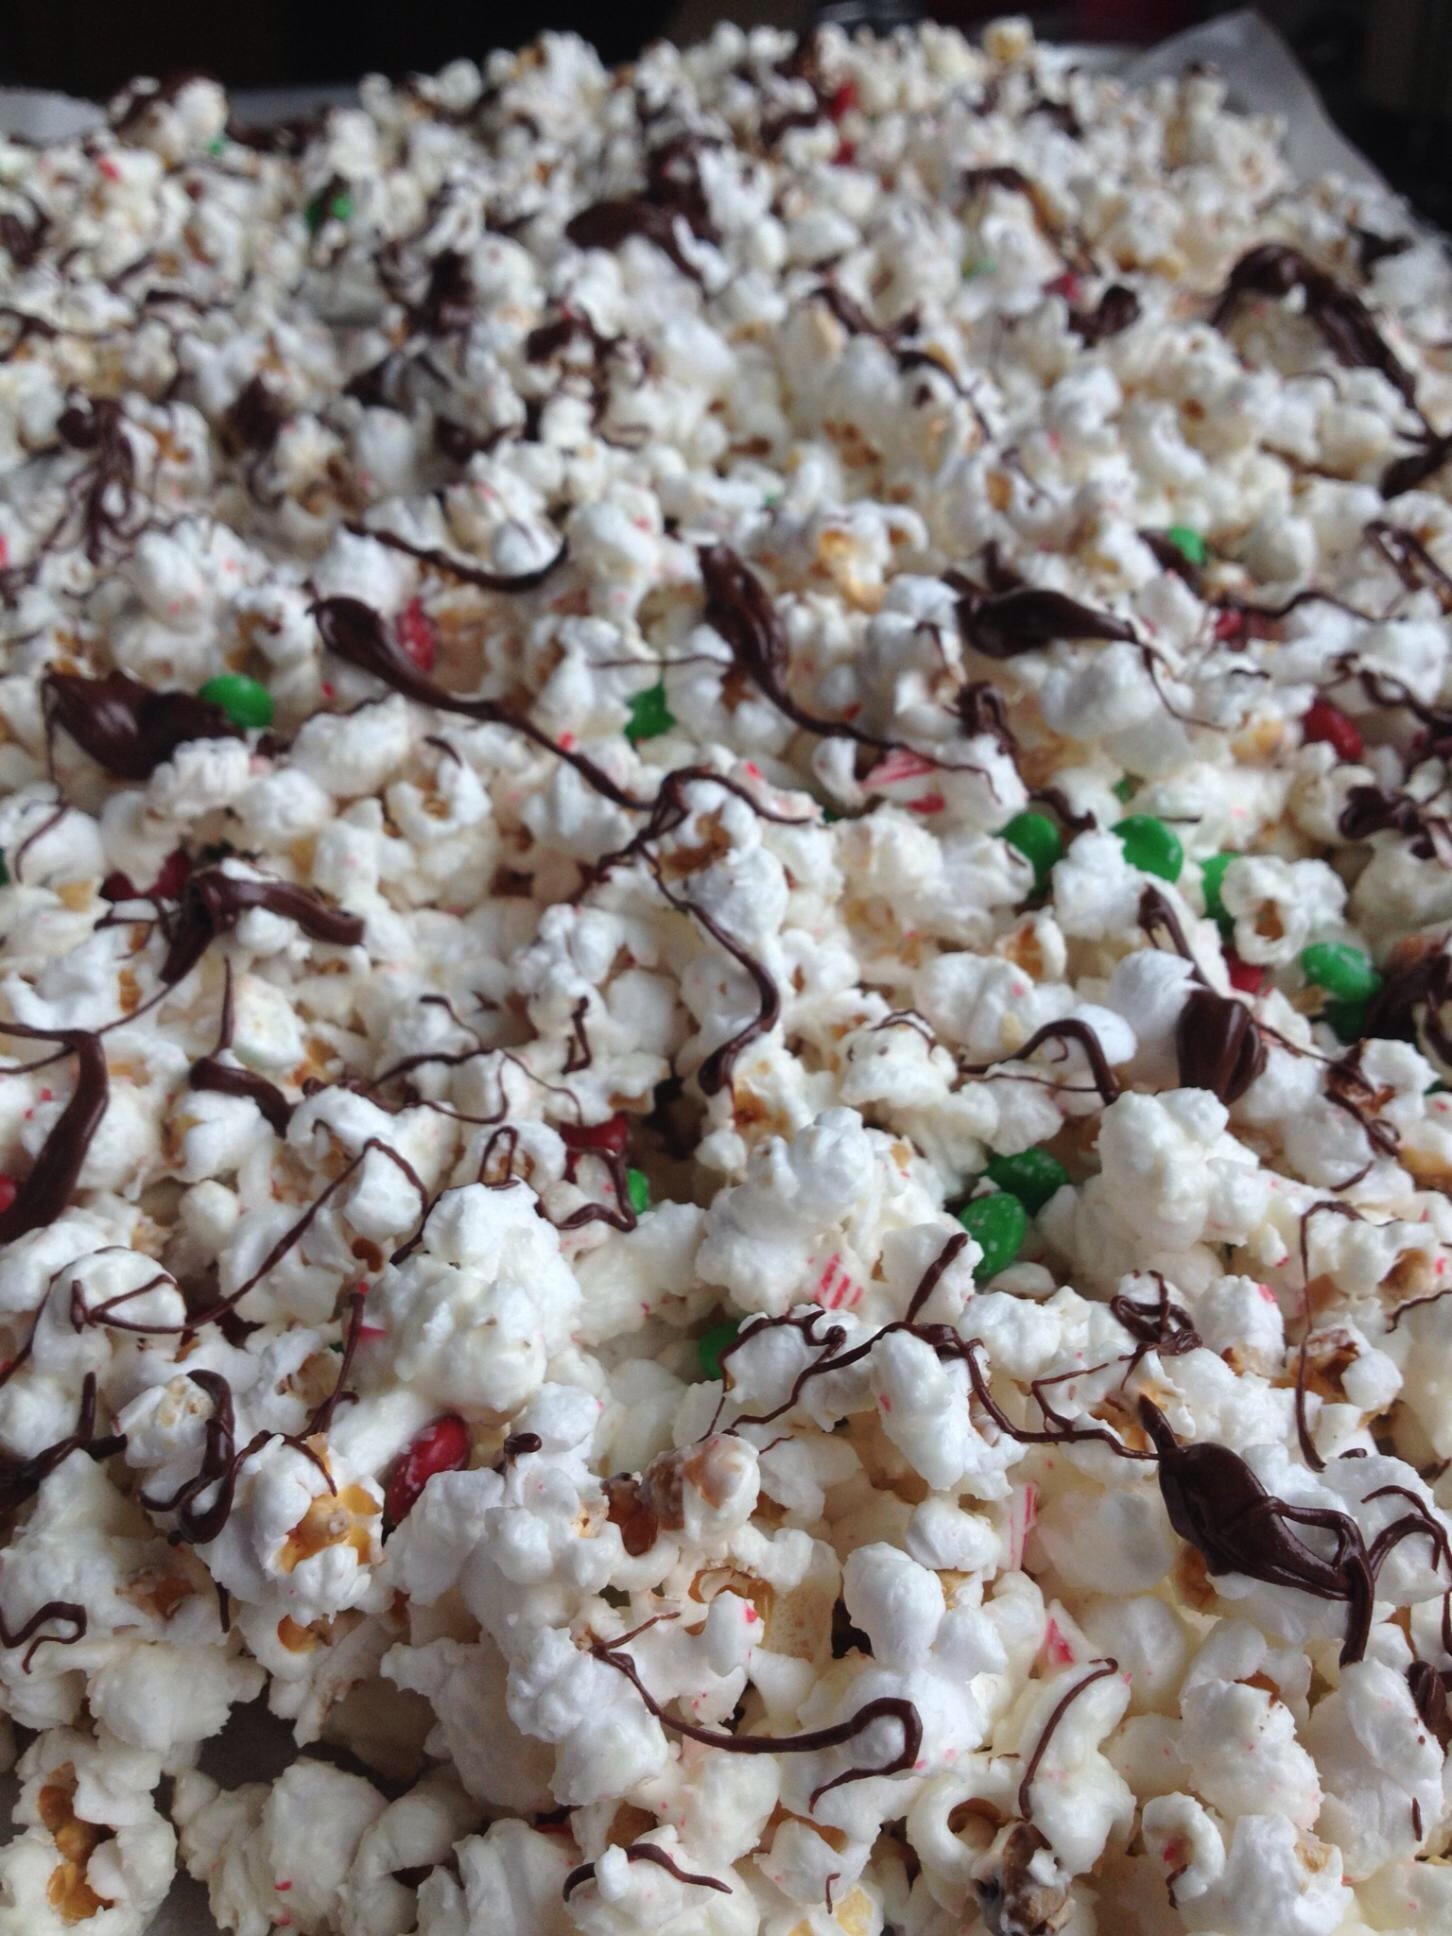
3. Add the peppermint oil to melted white chocolate and stir quickly. Pour over popcorn and mix it so that it is even distributed and all the popcorn is covered. Then pour the crushed candy cane peices and your candy of choice (if you’re using)  into the popcorn and mix until it’s evenly all over the popcorn.
4. Spread out on a wax lined cookie sheet or jelly roll pan. Add a dash of salt over the popcorn(optional)
5. Melt the chocolate chips in the microwave(*remember the 50% rule!) and drizzle over the popcorn. Set aside and let the chocolate harden.
6. Break up into bite size pieces and serve /eat it all immediatly (preferred method)/ or store for later.

I am a popcorn FREAK. Seriosuly- could it eat every day. I don’t eat microwave popcorn, I honestly hateeee the taste. I grew up not eating it as my step-dad was WAYYYYY ahead of the game with the absolutely disgusting hazardous toxins that line the bag and seep into the food you ingest….serisouly if you eat microwave popcorn, STOP. Anyway, I love popcorn. This is my first time making a sweet batch of popcorn myself and it turned out amazeeeeeeeeeeeing. I could have eaten this whole thing- almost did but my sister split it with me. lol. Hope you guys enjoy, let me know what you think!

As always, thanks for reading!!

xoxo

669058772380712020613

20140109-204050.jpg

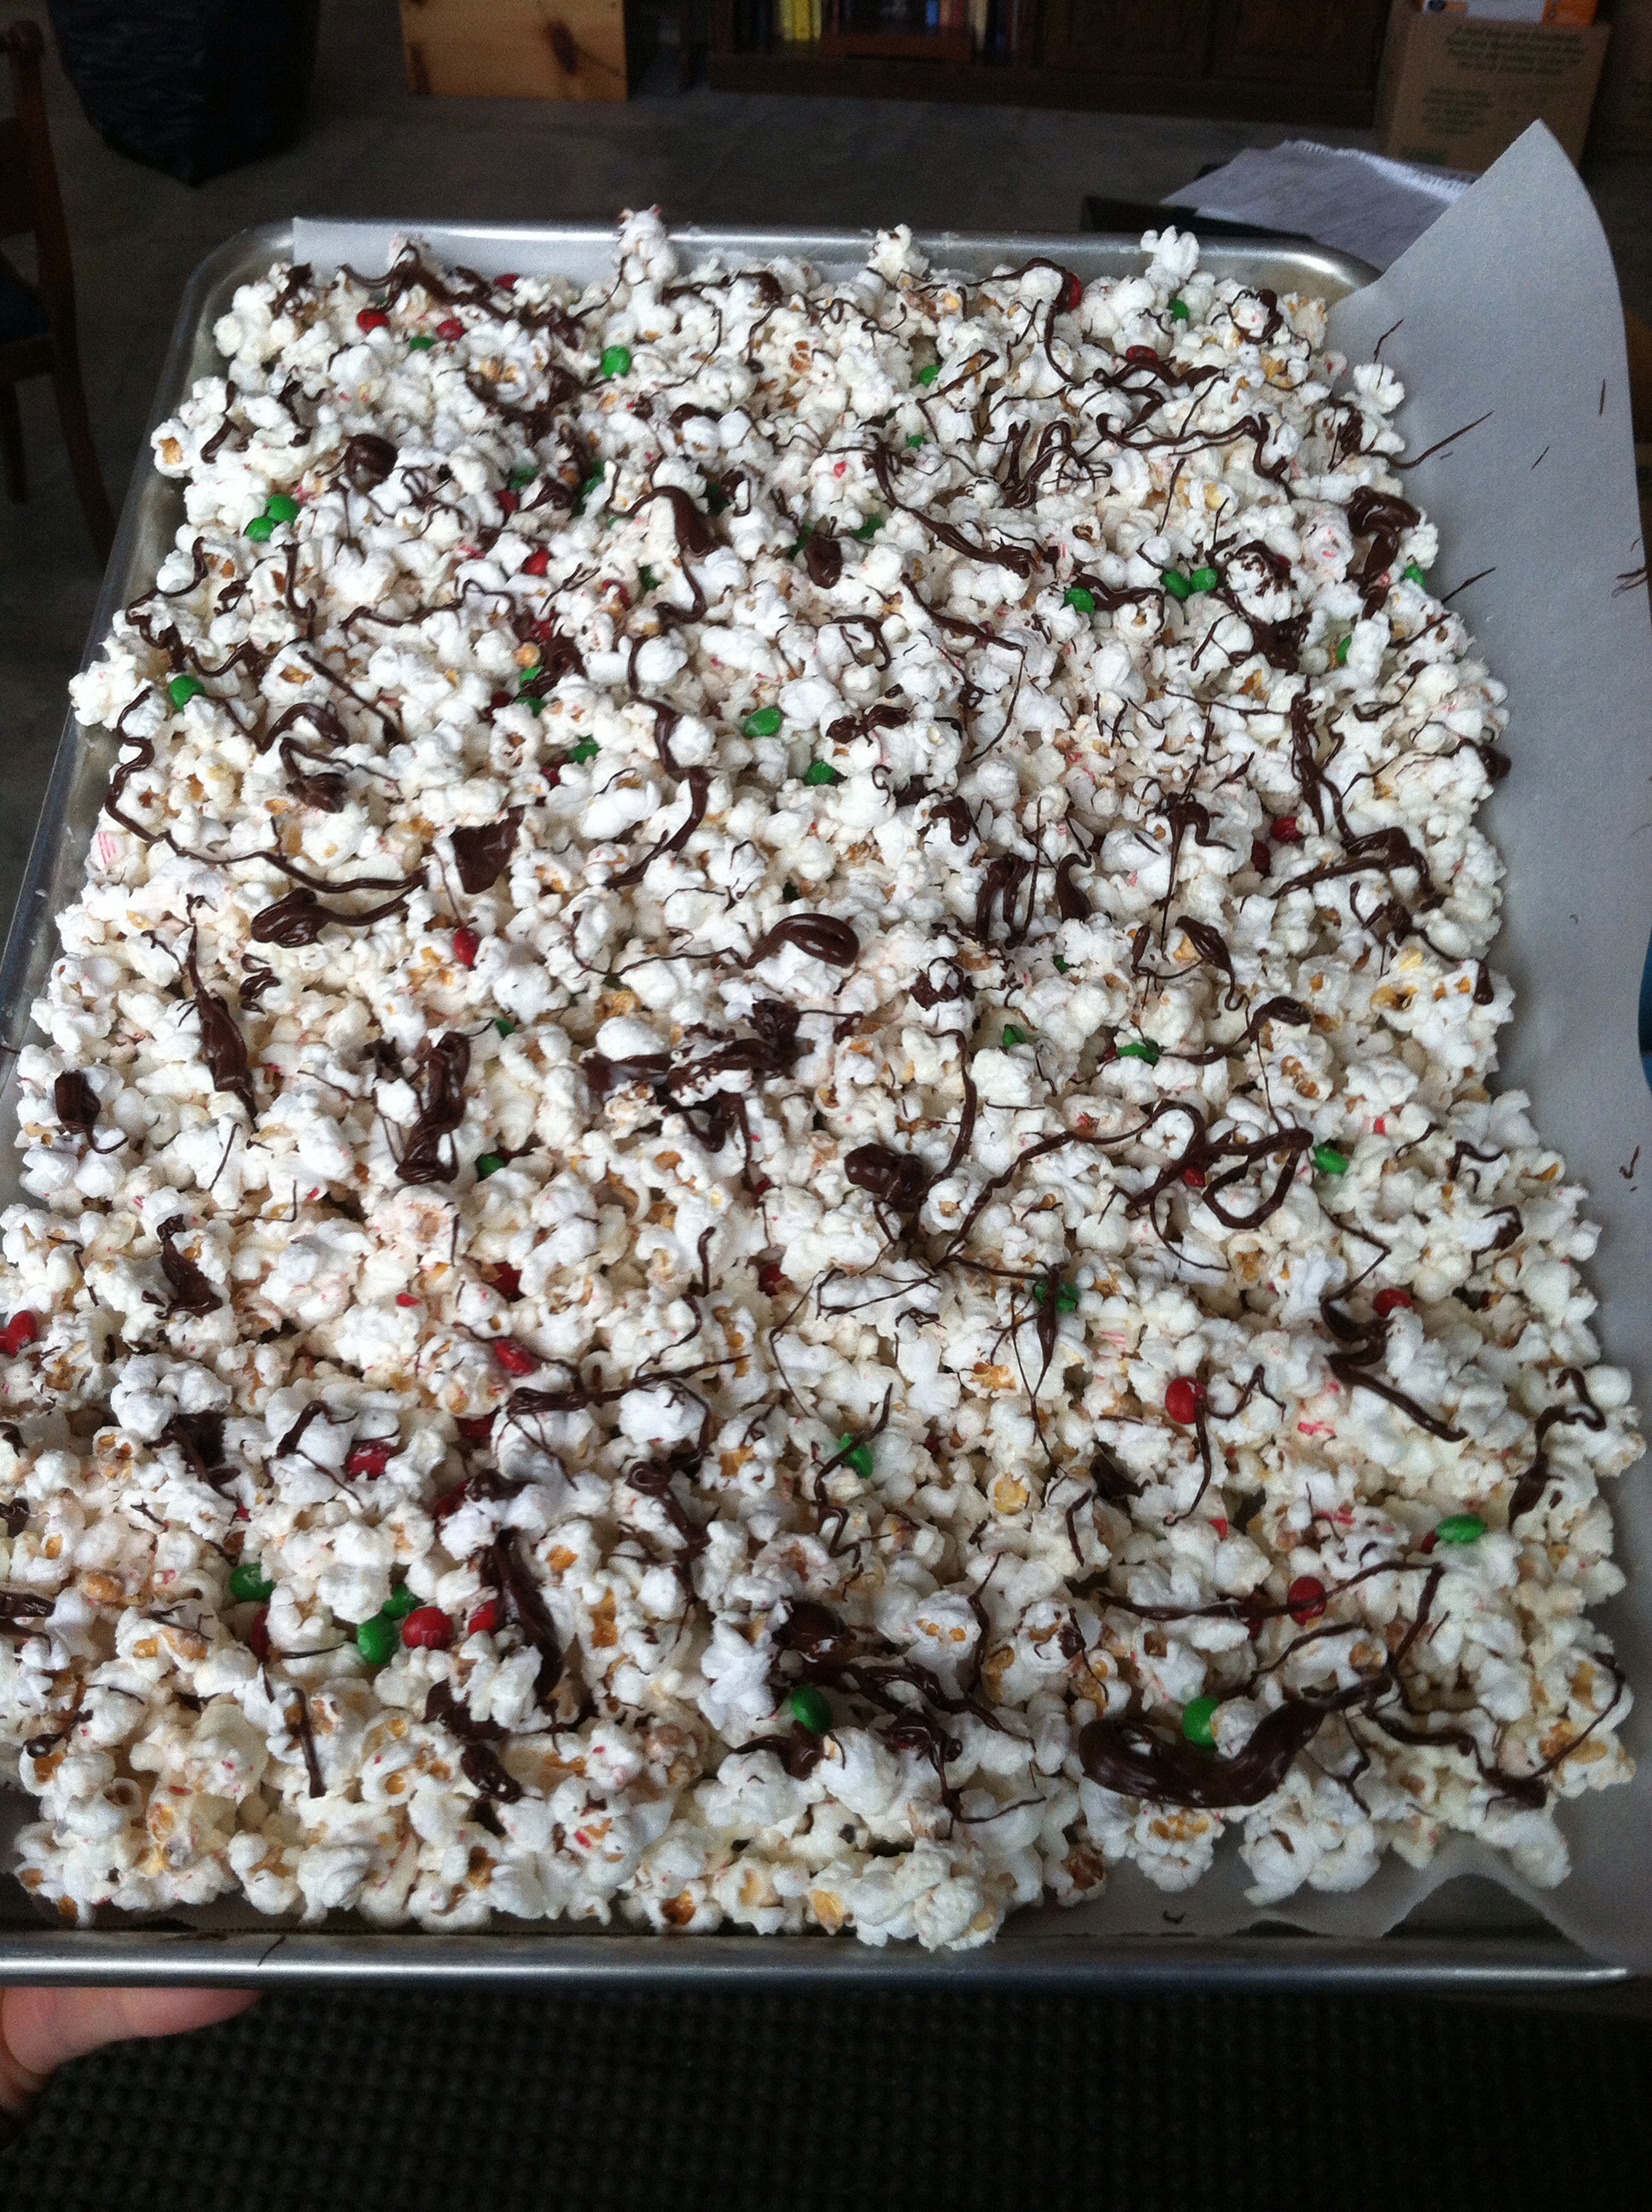
Ok- I’m not so great at delicately drizzling the chocolate over the popcorn- my bad. But still deeeelicious!

Skinny Spaghetti Squash Alfredo

Skinny Spaghetti Squash Alfredo

So I’ve said this before but seriously, I love spaghetti squash. It is so easy and I am just fascinated by how it turns all stringy and spaghetti like! This is cool recipe becuase it actually is very rich and filling just on it’s own. I am to be honest, not a big alfredo fan. Not that I don’t like it but never really have made it and given the choice out at a restaraunt I’d rather have something more fresh tasting with tomatoes veggies etc….. Anyway, I thought I would give this a try with one of the squashes my mom gave me last time I visited her and it turned out really good! Hope you enjoy!!!

20131215-212807.jpg

INGREDIENTS:
1 spaghetti squash ( I used a medium/large sized one)

1 Tablespoon butter

3 cloves of garlic, finely minced

2 Tablespoons flour

1 cup milk (I used fat-free)

1 Tablespoon cream cheese or Neufchatel cheese

1 cup freshly grated Parmesan cheese, plus 2 Tablespoons extra for topping

1/4 teaspoon kosher salt

1/8 teaspoon freshly ground pepper

Crushed red pepper flakes and fresh parsley or basil, for optional garnish

DIRECTIONS:
Preheat oven to 350 degrees F.

First, cook the squash. There are several methods to do this. I usually just cut in half and microwave for about 10-15 minutes. Usually thats how I do it because I can’t plan ahead/don’t have the patience to cook it in the oven but if you don’t want to use microwaves you can use your oven! Just cut spaghetti squash in half using a large sharp knife, scoop out the seeds and place cut side down on a rimmed baking sheet with some water on the bottom of the pan. Bake until tender, about an hour.

Once squash is cooked, use a fork to gently scrape the “spaghetti” strands into the center. Careful you dont burn your fingers. I usually do everytime, must be that patience thing again 🙂

For the sauce, melt butter in a small pot over medium-low heat. Once hot, add garlic and sauté for 1-2 minutes. Whisk in flour slowly, cooking for another minute while stirring. Whisk in milk until no lumps remain. Once hot, add cream cheese and stir until smooth. Remove from the heat. Stir in Parmesan, salt and pepper.

Spoon sauce equally into each spaghetti squash half. Gently mix the spaghetti strands to coat as much as possible with the sauce. Top with extra Parmesan and place under the broiler of your oven for 2-3 minutes, or until golden and bubbly.

Top each half with a pinch of red pepper flakes and fresh chopped parsley or basil, if desired. Serve hot and enjoy!!

Thanks for stopping by my blog!

xoxo

669058772380712020613

Garlic Artichoke Bread

Garlic Artichoke Bread

Think of this as Cheesy Garlic Bread meets Baked Artichoke Dip, only it’s 50 times better than that 🙂

20131125-084956.jpg

Ingredients
2 tbsp butter
2 cloves garlic, pressed
1 (14 oz) can artichoke hearts, drained and chopped
1 cup shredded cheddar and mozarella cheese blend
½ cup grated Parmesan cheese
¼ cup plain greek yogurt
1 large shallot, finely minced
1 small loaf ciabatta bread ( Really any type of bread would be fine)
Salt and freshly ground black pepper
*I added about 1-2 tbs of fresh chopped basil and it was sooooo delicious!

Instructions
Preheat oven to 350-375

In a large skillet set over medium-high heat, melt the butter until foamy. Add garlic and cook until fragrant, about 30 seconds. Remove from heat, and stir in artichoke hearts, mozzarella, cheddar, Parmesan, sour cream and shallot until combined.
Slice/open your bread) Place the bread open face side up on the baking sheet,  and spread the cheese and artichoke mixture overtop. Bake until cheese is melty and it starts to brown and bread is hot. I finished it off with a few minutes under the broiler to get even better color! Then cut bread into servable size pieces and serve right away, while the cheese is still nice and melty and delicious.

I made this for a group of friends and they all seemed to enjoy it. I defineitly did! This would be great as an appitizer or side dish. Also you can totally make this ahead. I actually make the artichoke cheese mixture the day before and then just spread it on the bread and baked it and it turned out fan.tast.ic!

Enjoy!

xoxo

669058772380712020613

Creamy Spinach & Sausage Pasta

Creamy Spinach & Sausage Pasta

20130907-121029.jpg

This picture could definitely use some better lighting but you get the idea 😉

Ingredients

  • 1 package smoked sausage of your liking
  • 1 Tbsp olive oil
  • 1 medium onion
  • 1 (14.5 oz.) can diced tomatoes w/chiles
  • 2.5 cups chicken broth
  • 1 lb pasta (any shape you want)
  • 1 package fresh spinach
  • 1 cup (4 oz.) shredded monterrey jack
  • 1 bunch green onions

Instructions

  1. Thinly slice the smoked sausage and add it to a large skillet with 1 tablespoon of olive oil. Saute the sausage over medium heat until it is nicely browned (about 5-7 minutes). Drain off the excess fat.
  2. Dice the onion and add it to the skillet. Continue to saute until the onion has softened (about 5 minutes). Add the can of diced tomatoes with chiles and the chicken broth. Stir to combine and dissolve any browned bits off of the bottom of the skillet.
  3. Add the uncooked pasta to the skillet and make sure it is all submerged under the liquid. Place a lid on the skillet and allow the mixture to come up to a boil. Once it reaches a boil, turn the heat down to low and let it simmer for about ten minutes, or until the pasta is tender. Stir once or twice while the pasta cooks to keep it from sticking.
  4. Stir in the fresh spinach, one cup at a time, until wilted. If you add it all at once, the skillet will be too full to stir. Keep the heat on while adding the spinach, so the liquid will continue to simmer and thicken.
  5. Sprinkle the shredded cheese on top, replace the lid, and let it sit for a few minutes, or until the cheese is melted. Slice the green onions and sprinkle them over top. Serve hot!

Jake seriously loved this! He snuck a bit before I sat down and was like ” this is so good! What is in here? Seriously this is really delicious”. That always makes me super happy when he loves what I cook. Now you can share this with your loved ones 🙂 Enjoy!

669058772380712020613

Black Bean & Pepper Polenta Bowl

Black Bean & Pepper Polenta Bowl

20131119-210022.jpg

gluten-free, vegan option // yields 4-5 servings

for the onions + peppers
1 tablespoon coconut oil or any kind of oil you want
1 large red onion, sliced
1 1/2 sweet bell peppers, sliced
sea salt

Heat the oil in a large pan over medium heat.
Add the onion and peppers and stir frequently until just softened. 5-7 minutes.
Generously sprinkle with salt, stir, then reduce heat to med-low for about 25-30 minutes until fully golden brown and caramelized. Stir every few minutes. Seriously I know you’ll be tempted to use them right away before they are fully caramelized but the time it takes to caramelize is totally worth it!! DO ITTTT.

for the black beans
2 tablespoons coconut oil or any kind of oil you want
1 3/4 cup cooked black beans, if using canned- rinsed + drained
1 small can diced mild green chiles
1/4 cup no/low-sodium vegetable broth
1/4 cup salsa
1/2 tsp chipotle pepper powder
2 cloves minced garlic
1/2 tsp cumin
sea salt

Heat the oil in a pot over medium heat.
Add the garlic and stir for about 30 seconds – 1 minute until fragrant and ever so lightly(seriously hardly at all or it will taste bitter)browned.
Stir in the black beans, green chiles, veggie broth, salsa, chipotle, and cumin.
Bring to a boil, then reduce heat to simmer uncovered for 10 – 15 minutes until thickened and almost all of the liquid has cooked off, stirring occasionally.

for the polenta
1 cup dry polenta aka “corn grits”
1 1/2 cups water
1 1/2 cups low/no-sodium vegetable broth
3/4 cup freshly grated sharp cheddar cheese, * totally optional
few splashes of hot sauce (I used a little Franks and a little Siracha)
black pepper

**I used Bob’s Red Mill polenta grits, so be sure to check your package for exact instructions.**
Bring water + veggie broth to a boil.
Slowly stir in the polenta grits, reduce heat to simmer ( low)
Stir occasionally for 5 minutes.
Stir in the cheese [if using], hot sauce, and a few pinches of black pepper, then cover for 5 minutes before serving. If it thickens too much add a bit more water and heat over med-low until smoothed out and creamy.

The cheese is not necessary at all if you need this dairy-free or vegan. Honestly if I was making this just for me, I’d leave it out. I thought Jake would be more willing to try ‘scary’ polenta if it was cheesy 🙂

Once all the items are done, serve it up! I just put the beans and onion/pepper mix on top of the polenta and garnished with some cilantro and sliced avacado! It was verrrry good. Lots of flavors all coming together. Jake told me it tasted like a restaurant meal 🙂 awww love that man ❤

As always, thanks for stoping by my blog !

669058772380712020613