Roasted Vegetable Stacked Enchiladas

Roasted Vegetable Stacked Enchiladas

20130907-121225.jpg

Ingredients:

1 large red pepper, chopped, seeds removed
1 medium zucchini, chopped
1 medium yellow squash, chopped
1 large onion, chopped
1 tablespoon olive oil
1 sweet potato chopped
1 can black beans, rinsed and drained
1 teaspoon ground cumin
1 teaspoon chili powder
2 garlic cloves, minced
1 jalapeño, minced
1/2 cup chopped fresh cilantro
Salt and pepper, to taste
2 cups red enchilada sauce
9-10 small corn tortillas
2 cups shredded Monterey Jack cheese

*This is optional but I added the zest and juice of 1 lime to mine 🙂

Directions:

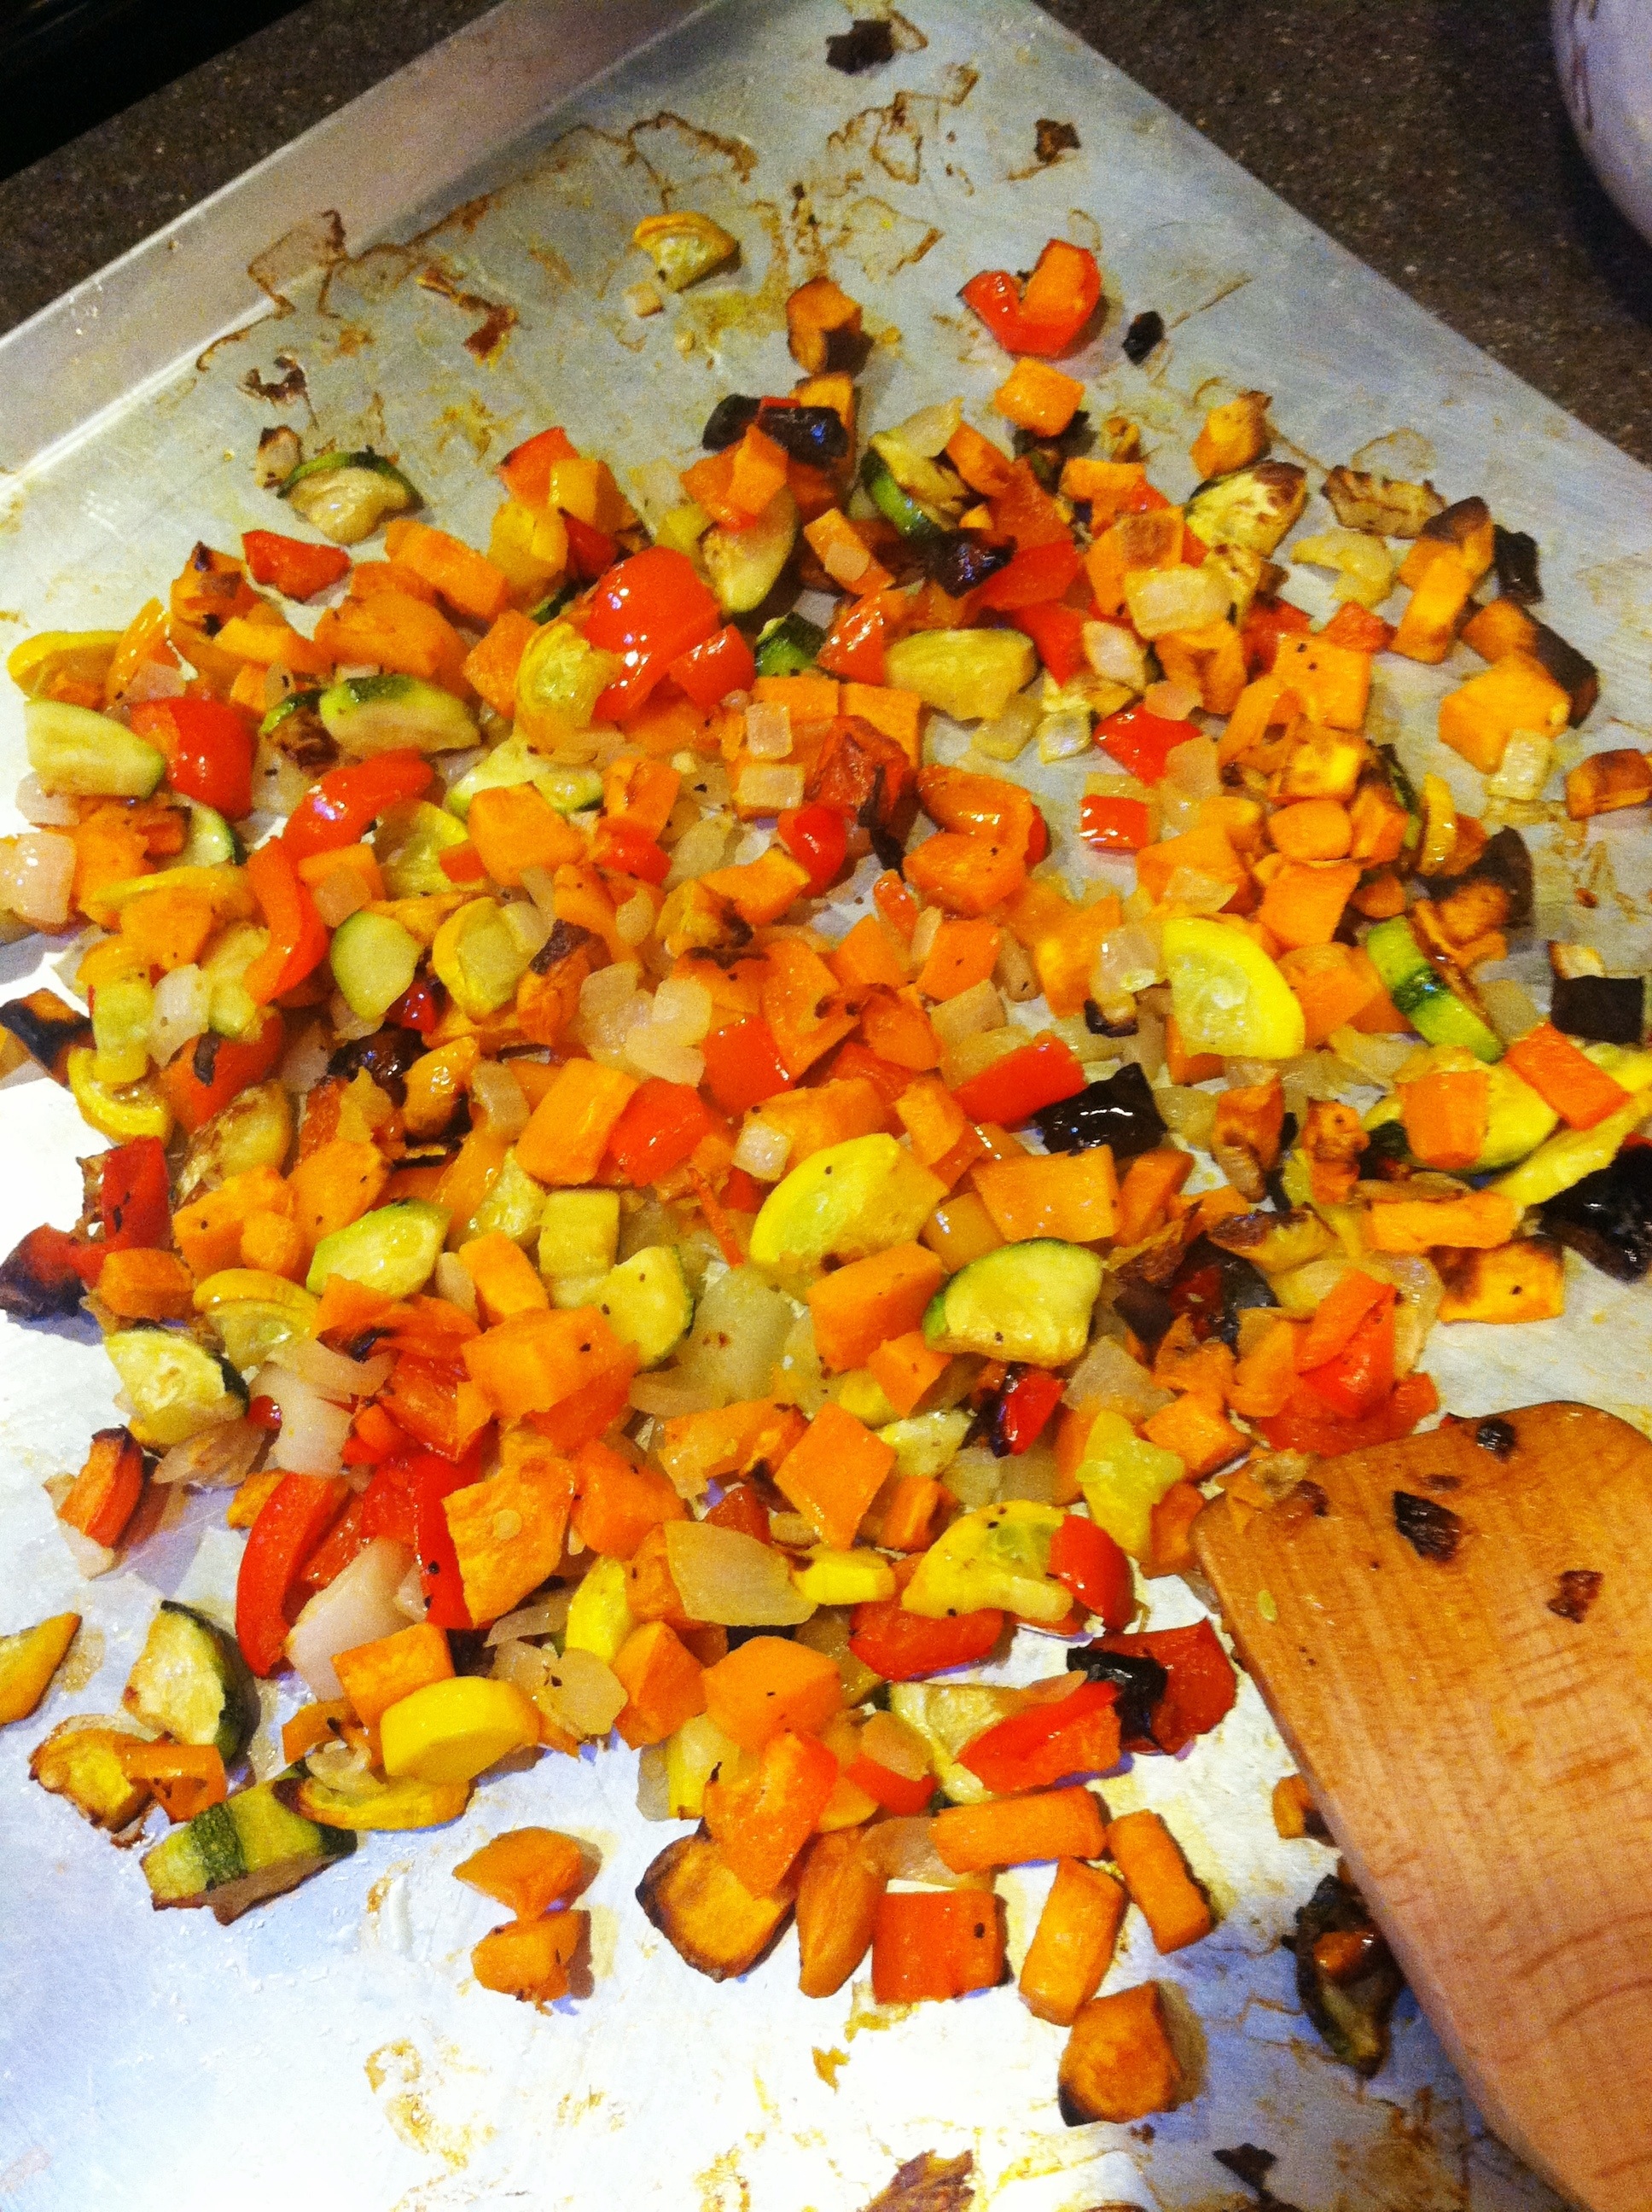
1. Preheat the oven to 400 degrees F. Place red pepper, zucchini, yellow squash, sweet potato, and onion on a large baking sheet. Drizzle with olive oil and toss until vegetables are coated. Season with salt and pepper. Roast vegetables for 30-40 minutes, or until tender, stirring occasionally. Remove vegetables from oven and let cool to room temperature. Reduce oven temperature to 350 degrees F.

20130907-121236.jpg

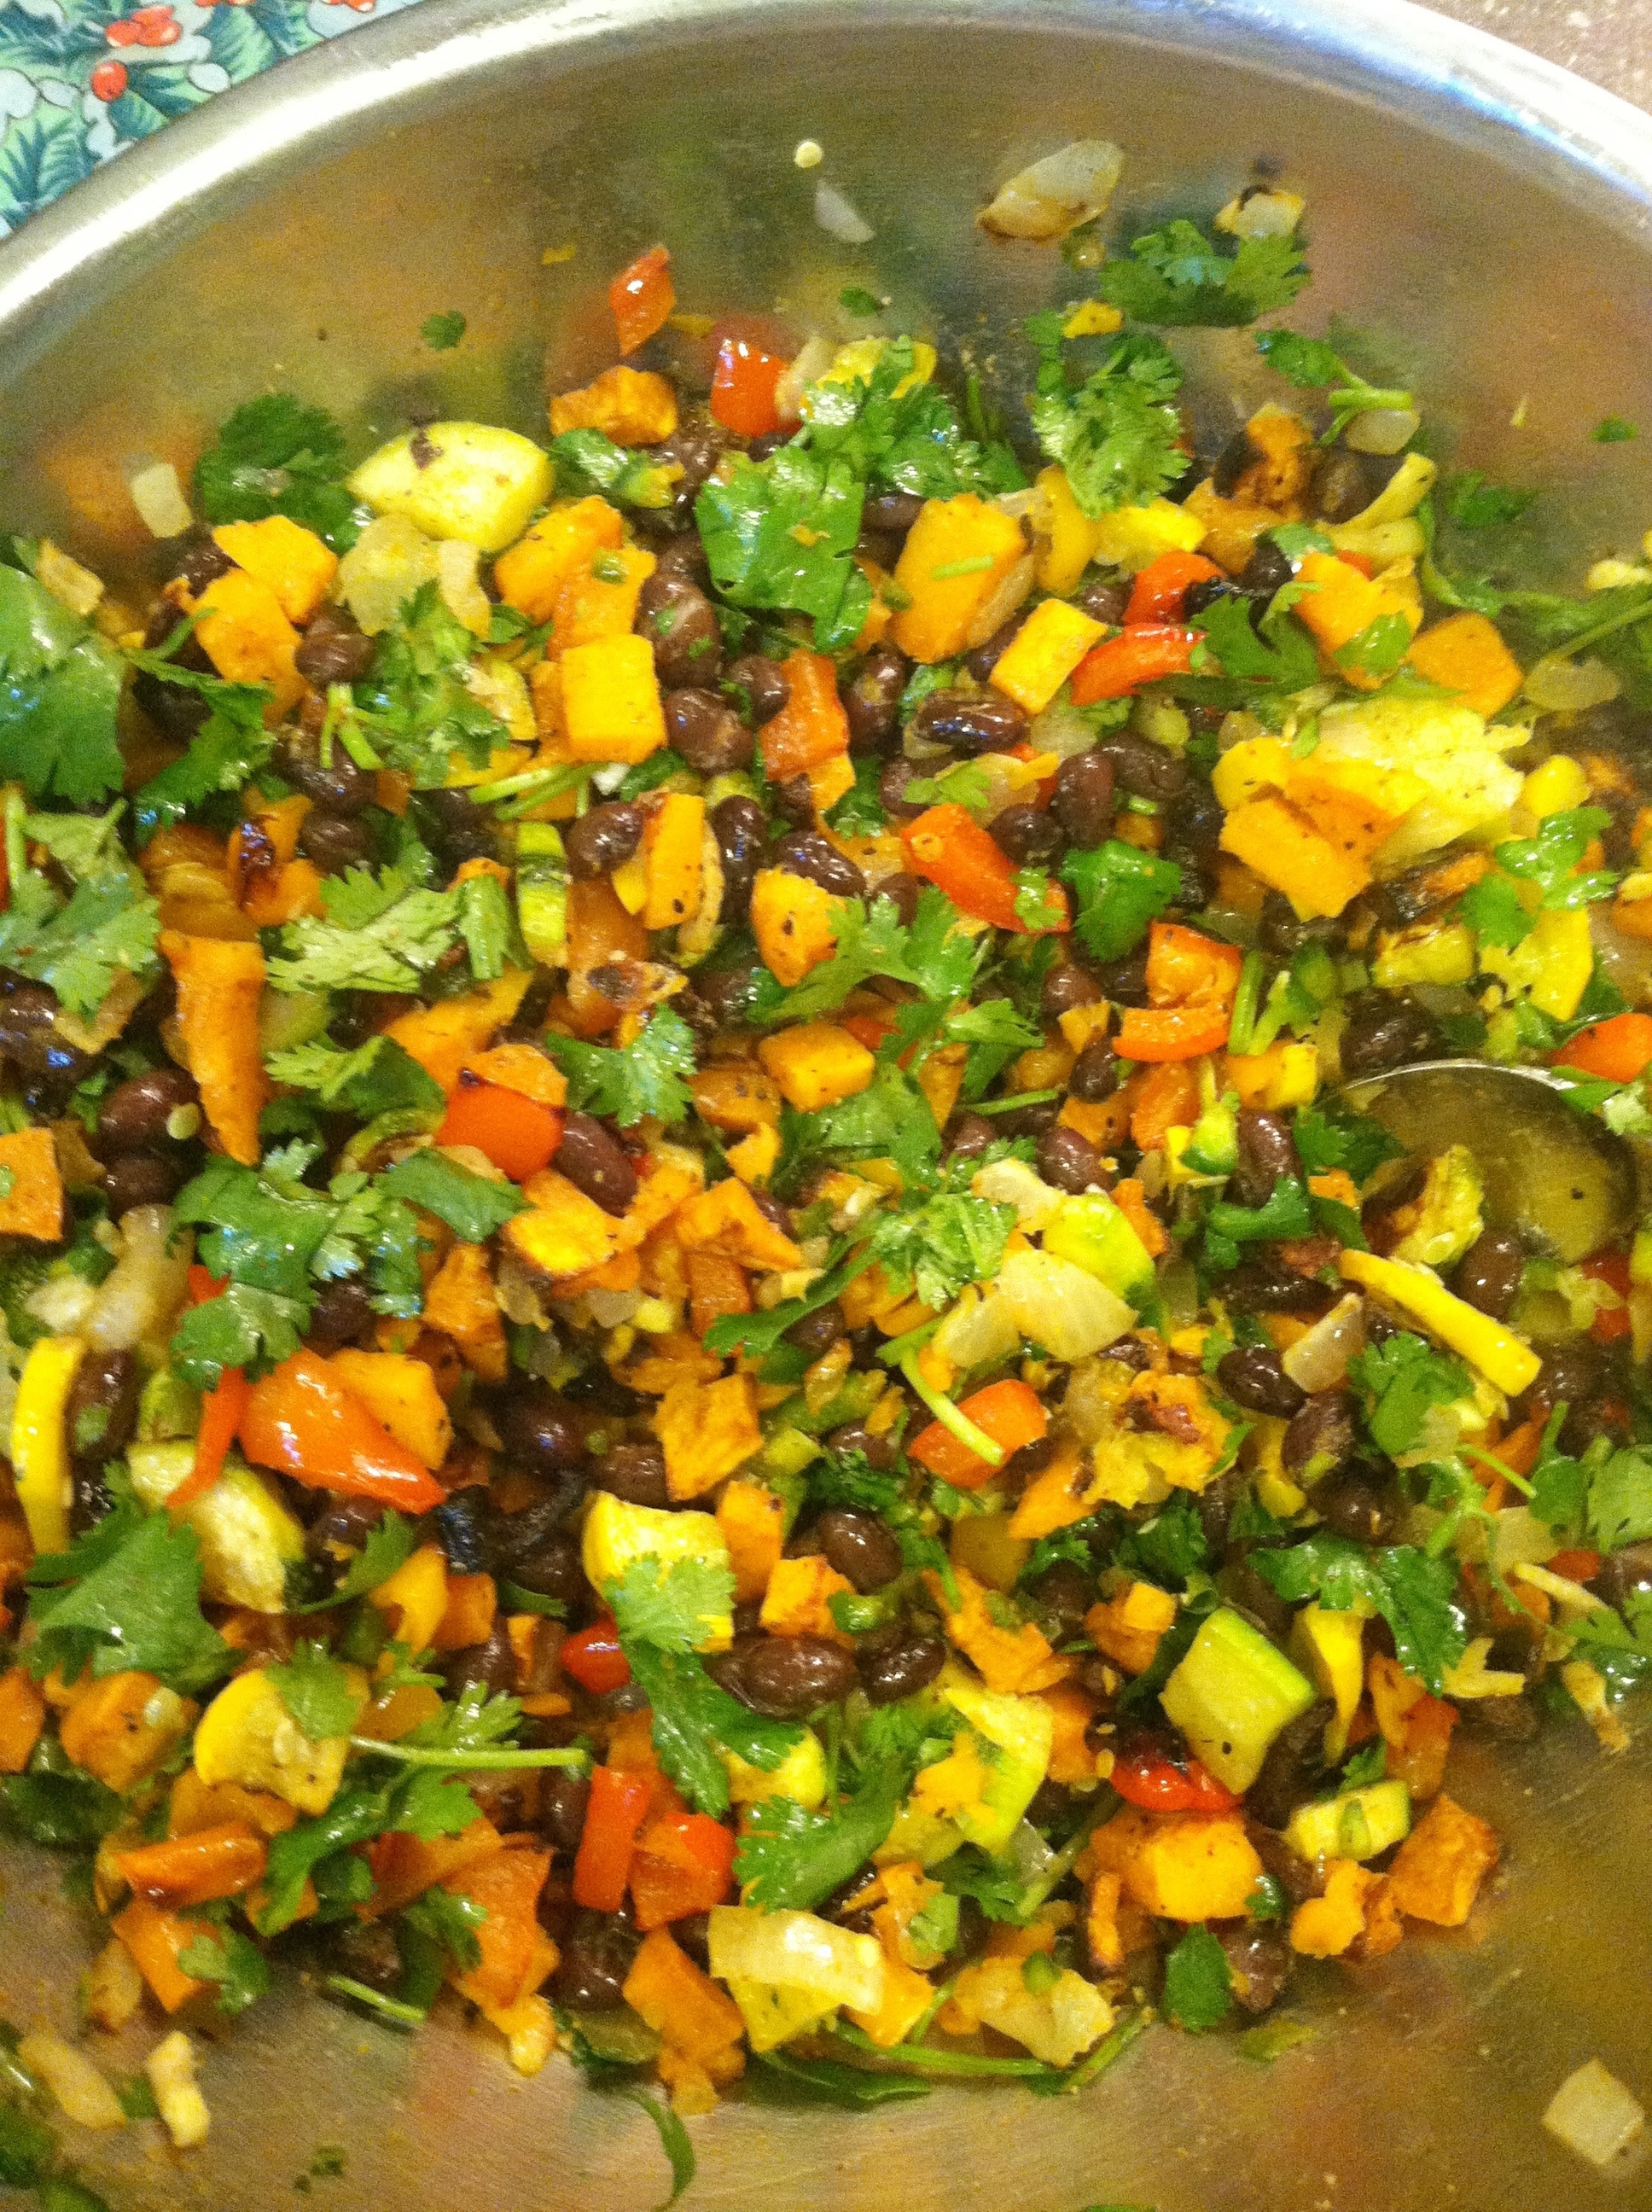
2. Grease an 8×8 square baking pan and set aside. In a medium bowl, combine roasted vegetables, black beans, cumin, chili powder, garlic, jalapeño, lime zest and juice(if using) and cilantro. Stir and season with salt and pepper.

20130907-121301.jpg

3. Spread 1/4 cup of enchilada sauce into the bottom of the baking pan. Add a layer of tortillas, to completely cover the bottom of the pan(See my picture before for a trick!). Top with 1/3 of the vegetable/bean mixture and 1/3 of the cheese. Make a second layer of tortilla, enchilada sauce, vegetables/beans, and cheese. Top with with a layer of tortillas, enchilada sauce, vegetables/beans, and cheese. Spray a sheet of aluminum foil with cooking spray and cover the pan.

20130907-121248.jpg

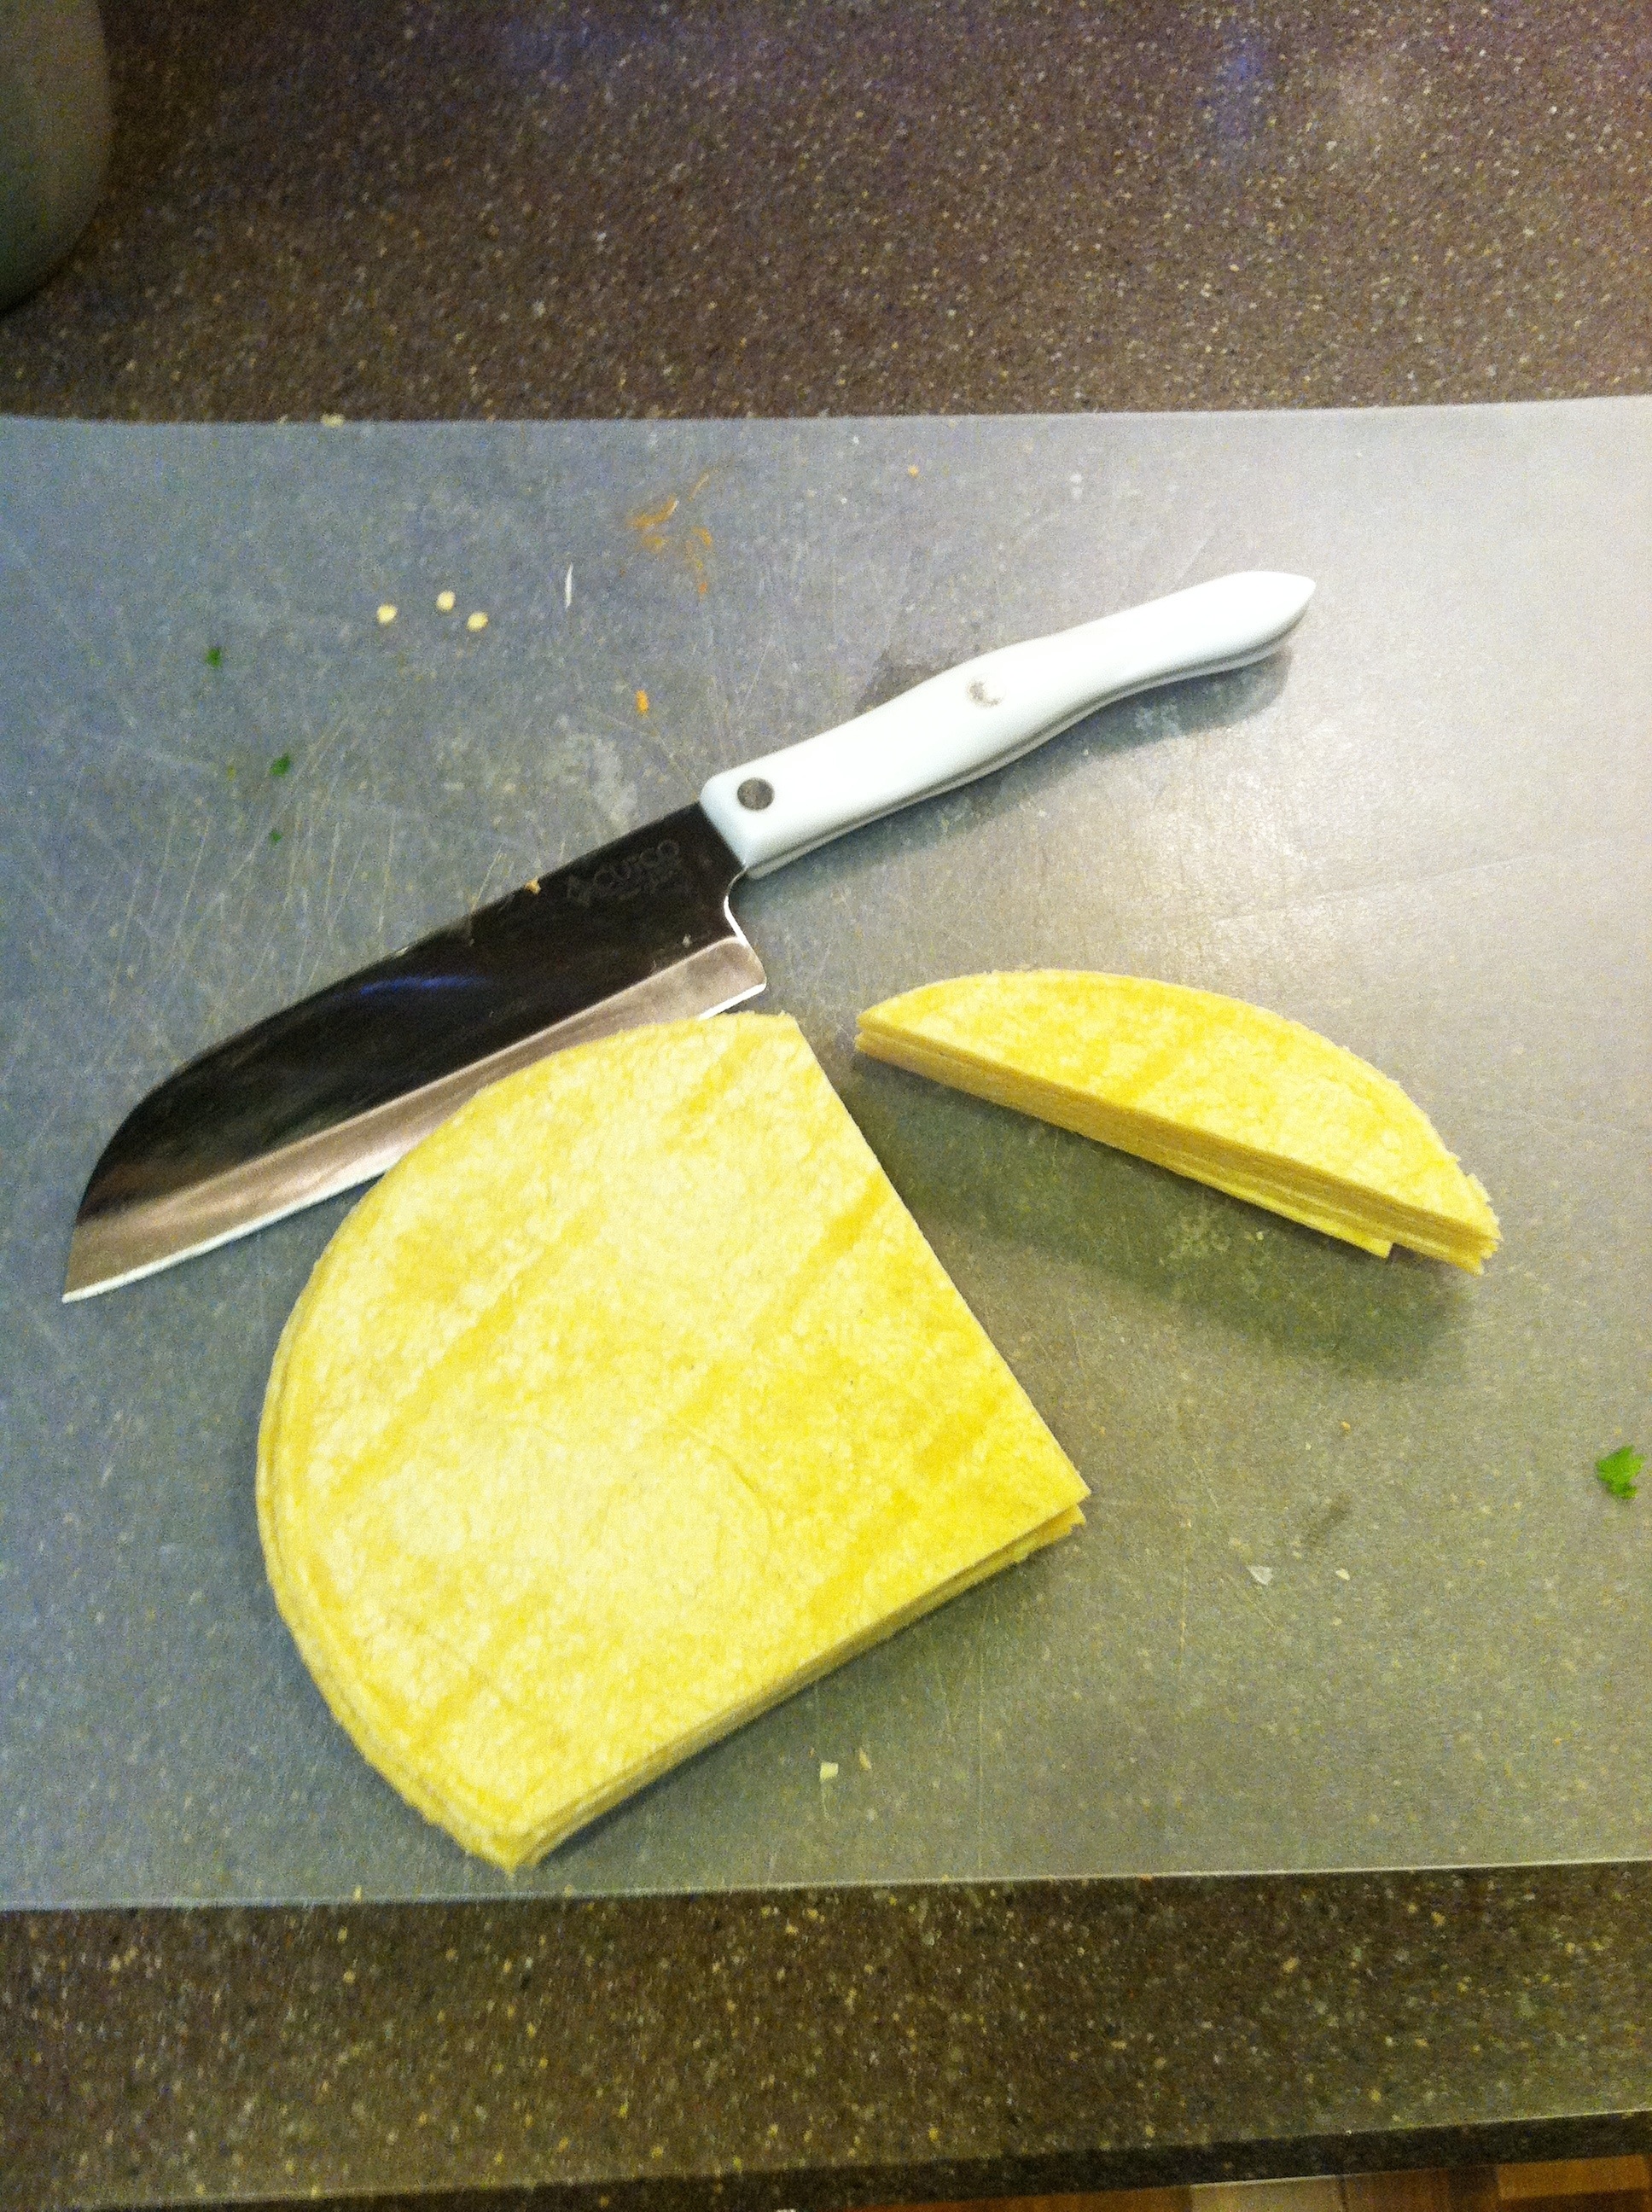
My mom taught my this trick to cut off two sides of the round tortillas. This makes them fit perfectly in the corners of pans with minimal overlap so you have a perfectly even layer. She’s a genius 🙂

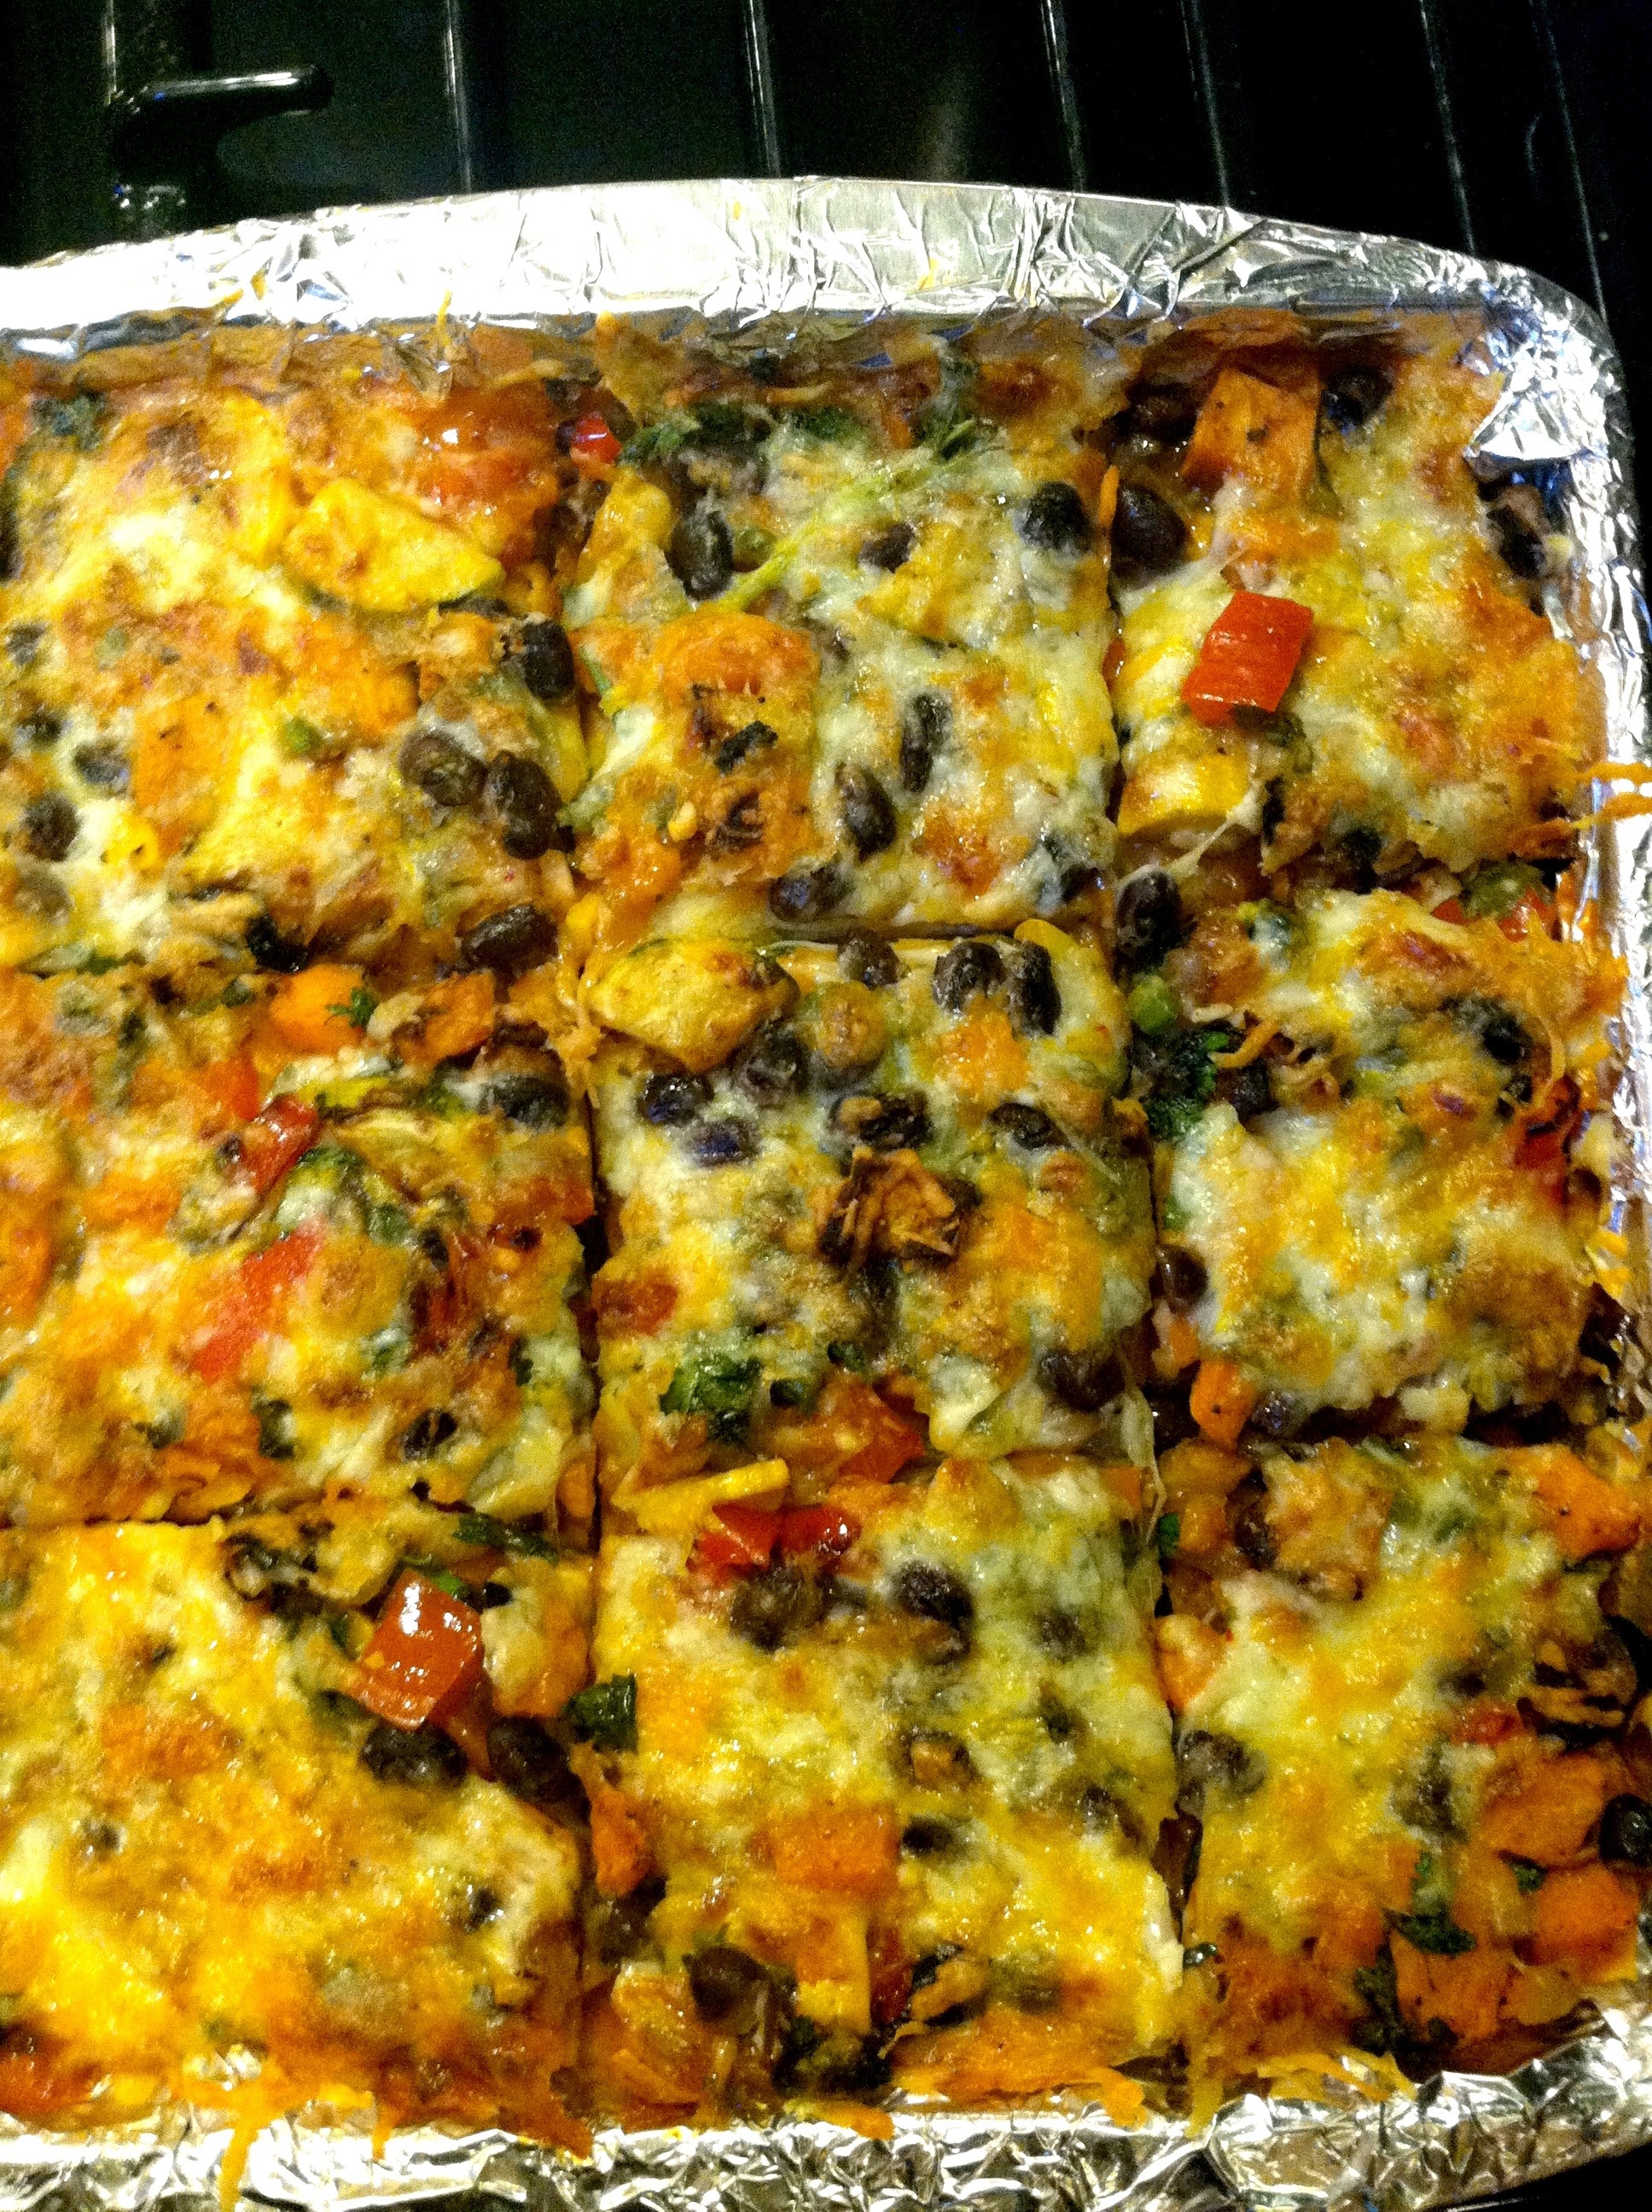
4. Bake enchiladas for 20 minutes. Remove the foil and bake for another 10 minutes, or until cheese is melted and the enchiladas are bubbling. Remove enchiladas from the oven and let cool for 10 minutes. Cut into squares and serve warm.

20130907-121157.jpg

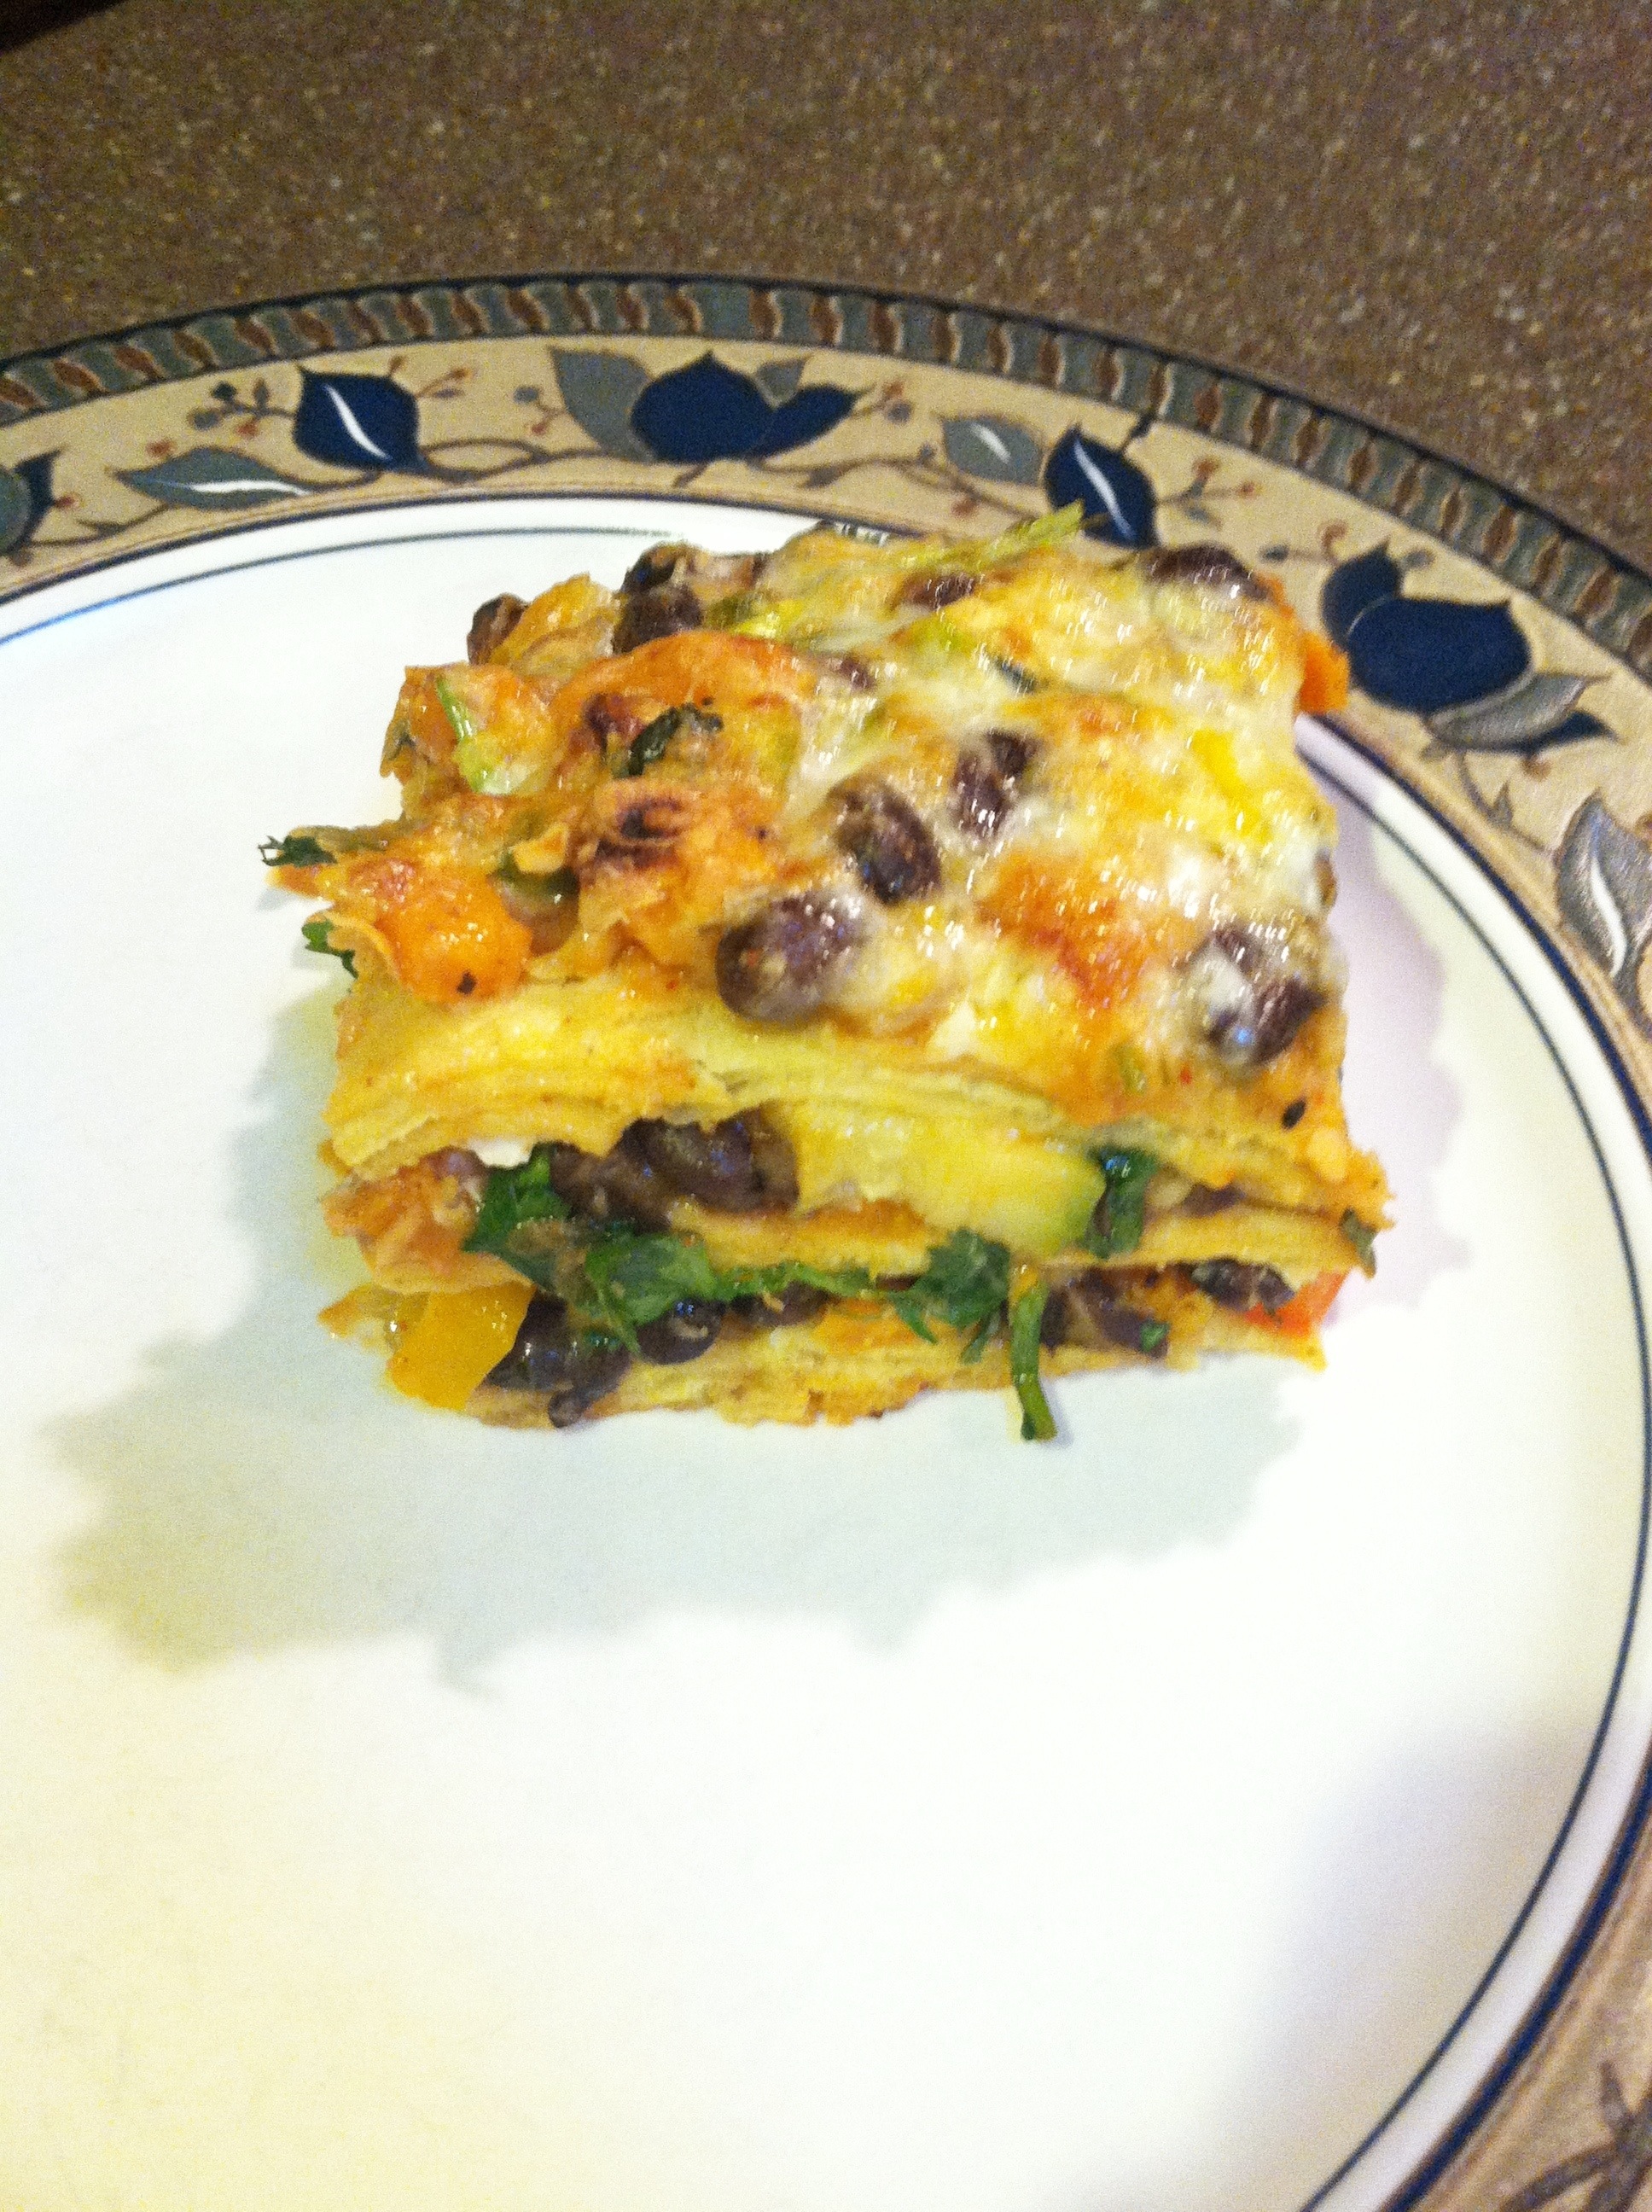
This is another beautiful meal. I served this with some Salsa and chips and we had a delicious light meal. Hope you enjoy and of course thanks for reading my blog. I’m blown away at how many views and comments I get in a day. Never in my wildest dreams would I have thought that so many people would visit my site when I started this. Seriously you all make me so happy! 🙂

669058772380712020613

Quinoa Stuffed Peppers

Quinoa Stuffed Peppers

Hi everyone! Ok I’ve been a busy cooking bee- but a lazy blogger. (for real it’s embarrassing how little I’ve blogged lately- there is reason for it but I’ll save that for a later post!)Needless to say,  I can’t wait to share some of my creations with you 🙂 This particular recipe is one of my favorite recent ones! So tasty, easy, and healthy. The perfect trio for an awesome recipe. Enjoy and let me know what you think!

20130907-121525.jpg

Gorgeous right?!

Ingredients

  • 2 cups cooked quinoa
  • 1 (4-ounce) can green chiles
  • 1 cup corn kernels
  • 1 cup black beans, drained and rinsed
  • 1 cup diced tomatoes
  • 1/2 cup shredded pepper jack cheese
  • 1/2 cup crumbled feta cheese
  • 1/4 cup chopped fresh cilantro leaves (I love cilantro so I always add more)
  • 1 teaspoon cumin
  • 1 teaspoon garlic powder
  • 1/2 teaspoon onion or garlic powder
  • 1/2 teaspoon chili powder, or more to taste
  • 1/2 teaspoon smokey paprika, or more to taste
  • Kosher salt and freshly ground black pepper, to taste
  • 6 bell peppers, tops cut, stemmed and seeded

Instructions

  1. Preheat oven to 350 degrees F. Line a 9×13 baking dish with tin foil.
  2. In a large bowl, combine quinoa, green chiles, corn, beans, tomatoes, cheeses, cilantro, cumin, garlic, onion and chili powder, paprika, salt and pepper, to taste.
  3. Spoon the filling each each bell pepper cavity. Place in prepared baking dish, cavity side up, and bake until the peppers are tender and the filling is heated through, about 25-30 minutes.
  4. Serve immediately and enjoy!  🙂
  5. PS. I only cooked 4 peppers since there fewer people I was feeding but then I put the extra quinoa mix in a baking dish, topped with a little more cheese and baked along with the peppers. This was great for lunch throughout the week 🙂 As you can see there was quite a bit of extra “stuffing” so I think you could do more than 6…but experiment! 🙂

20130907-121557.jpg

20130907-121537.jpg

I just love how pretty this dish is! So colorful and fresh looking and not to mention out of this world delicious. This is a recipe you could seriously have so much fun with and experiment with different flavor combinations and ingredients. Also easily could be vegan with some small adjustments. Please stop back and share your own concoctions 🙂

As always, thanks for stopping by!

669058772380712020613

Crunchy Asian Chicken Salad

Crunchy Asian Chicken Salad

IMG_2703

INGREDIENTS

1 package (3 ounces) ramen noodle soup mix(any flavor you want)
1 bag (16 ounces) coleslaw mix
2 cups cut-up cooked chicken
1/2 cup  chopped dry-roasted peanuts
1/2-1 cup of chopped Cilantro
2 tablespoons sesame seed oil
1 Tbs sugar
1/4 cup white vinegar
1 tablespoon vegetable oil
1/2 teaspoon pepper
Juice of 1 lime

DIRECTIONS

  • Open coleslaw mix into a large bowl. Break block of noodles into bite-size pieces over salad. 
  • Chop your cooked chicken, cilantro, and peanuts and add to the coleslaw mixture. 
  • In a smaller bowl combine the sesame oil, vinegar, sugar,veggie oil, pepper, and lime juice  and stir until well mixed and sugar is dissolved.
  • Pour over the coleslaw and  noodle mixture; toss until coated and enjoy! 🙂 

This was deeeelicious! I added Siracha sauce to mine because seriously I cannot get enough of that stuff!! Also if you don’t like sesame you may want to scale back a little bit, the flavor was quite strong but I enjoy it so I didn’t mind. I think this recipe also has great capability for versatility- please experiment and let me know what you create!!!!

Hope you all have an amazing week. I have had a lot of comments and new followers on my blog lately and I just want to say, I seriously appreciate each and everyone of you who spend the time to check out my blog- I appreciate and you guys make me feel so special!

xoxo

669058772380712020613

Quinoa with Corn & Scallions

Quinoa with Corn and Scallions

cornquinoa

Hello all! 🙂 Hope you’re enjoying the start to “summer”. I always think of Memorial Day as the kick-off to summer even though I know it technically isn’t until June 21st. I think this quinoa side dish is the perrrrfect compliment to a barbecue or picnic, really any where any time, but particularly those 😉 I want to make this recipe again because as you can see from my picture it turned out a little gooier than  I would like. Next time will make it a littler drier by undercooking the quinoa a little bit. I hope you guys enjoy this deeeelicious recipe and let me know what you think!

Ingredients:

4 ears corn, shucked (If you want you could use frozen corn and just skip steps 1 and 2 below)
1 Tablespoon grated fresh lemon zest
2 Tablespoons fresh lemon juice
1/4 stick (1/8 cup) unsalted butter, melted
1 Tablespoon honey
½ teaspoon salt
¼ teaspoon black pepper
2 cups uncooked quinoa
4 scallions, chopped

Directions:

Place the corn in a large pot and fill it with enough water to cover the corn. Cover the pot and bring it to a boil. As soon as the water comes to a boil, turn off the heat and let the pot stand, covered, for 5 minutes.

Remove the corn from the pot and let it cool on a cutting board until it’s easy to handle. Then, using a sharp knife, cut the kernels off the cob.

Prepare the dressing by whisking together the lemon zest, lemon juice, melted butter, honey, salt and pepper in a large bowl.

Rinse the uncooked quinoa in a sieve under cold water until the water runs clear.

Cook the quinoa in a pot of of boiling salted water per the package directions.

Add the quinoa, corn kernels and chopped scallions to the bowl with the dressing and toss until it’s evenly coated. Season with salt and pepper and serve.(This is my opinion but I think this dish would be awesome served cold too!)

As always, thanks for checking out my blog! Now go out there and enjoy the summer!

xoxo

669058772380712020613

Spaghetti Squash Vegetable Bake

Spaghetti Squash Vegetable Bake

IMG_2360

I hadn’t tried spaghetti squash until this past winter. I was soooo skeptical that it was just soooo easy to cook like everyone said. How in the world could it just string apart like that?!? It HAS TO BE some sort of special technique that people are under playing, has to be, c’mon how could it be easy?! Well I finally decided to give it a try and I’ll be damned- it’s freaking easy! Seriously you heat it and it use a fork to scrap out the insides and it’s just like noodles. I even told Jake they were a special kind of noodle in an attempt to get him to eat them- he believed me but even once I told him the truth, he STILL liked it! If you haven’t tried it people, you MUST! This is a great recipe to ease into the squash because there are so many other flavors, but I sometimes just eat the squash alone. Anyway, I hope you enjoy!

INGREDIENTS

1 whole spaghetti squash
2 tablespoons olive oil
1 red pepper, diced
1 zucchini, diced
1 carrot, shredded
2 cloves garlic, minced
1 tomato, diced
16 ounces tomato sauce
4 ounces shredded mozzarella cheese
1/4 cup shredded Parmesan

DIRECTIONS

    1. Preheat oven to 350 degrees.
    2. Cut the squash in half length wise (be careful), place in a microwave safe dish and cook in the microwave for eight to 12 minutes until soft. If you don’t have a microwave, place the squash halves on a baking pan and bake at 350 degrees for 45 to 60 minutes. While that’s cooking, add the oil, garlic, pepper, zucchini, and carrots to a pan, cooking over medium heat.
    3. Once the squash is done ( and I let it cool a bit so you don’t burn the sh*t out of your hands) use a fork and scrape the flesh from the peel. It should flake off easily in strings, resembling spaghetti. Place the spaghetti squash flesh in an oven safe casserole dish. Add the cooked veggies, diced tomato, sauce, and most of the cheese and mix well. Sprinkle leftover cheese on top and bake for 30 minutes or until the cheese is bubbly.
    4. Allow to cool for five minutes, serve, and enjoy! I also added some chopped basil on top, but thats just because I’m obsessed with it 🙂

Thanks for checking out my blog!

-G