Quinoa with Corn & Scallions

Quinoa with Corn and Scallions

cornquinoa

Hello all! 🙂 Hope you’re enjoying the start to “summer”. I always think of Memorial Day as the kick-off to summer even though I know it technically isn’t until June 21st. I think this quinoa side dish is the perrrrfect compliment to a barbecue or picnic, really any where any time, but particularly those 😉 I want to make this recipe again because as you can see from my picture it turned out a little gooier than  I would like. Next time will make it a littler drier by undercooking the quinoa a little bit. I hope you guys enjoy this deeeelicious recipe and let me know what you think!

Ingredients:

4 ears corn, shucked (If you want you could use frozen corn and just skip steps 1 and 2 below)
1 Tablespoon grated fresh lemon zest
2 Tablespoons fresh lemon juice
1/4 stick (1/8 cup) unsalted butter, melted
1 Tablespoon honey
½ teaspoon salt
¼ teaspoon black pepper
2 cups uncooked quinoa
4 scallions, chopped

Directions:

Place the corn in a large pot and fill it with enough water to cover the corn. Cover the pot and bring it to a boil. As soon as the water comes to a boil, turn off the heat and let the pot stand, covered, for 5 minutes.

Remove the corn from the pot and let it cool on a cutting board until it’s easy to handle. Then, using a sharp knife, cut the kernels off the cob.

Prepare the dressing by whisking together the lemon zest, lemon juice, melted butter, honey, salt and pepper in a large bowl.

Rinse the uncooked quinoa in a sieve under cold water until the water runs clear.

Cook the quinoa in a pot of of boiling salted water per the package directions.

Add the quinoa, corn kernels and chopped scallions to the bowl with the dressing and toss until it’s evenly coated. Season with salt and pepper and serve.(This is my opinion but I think this dish would be awesome served cold too!)

As always, thanks for checking out my blog! Now go out there and enjoy the summer!

xoxo

669058772380712020613

Spaghetti Squash Vegetable Bake

Spaghetti Squash Vegetable Bake

IMG_2360

I hadn’t tried spaghetti squash until this past winter. I was soooo skeptical that it was just soooo easy to cook like everyone said. How in the world could it just string apart like that?!? It HAS TO BE some sort of special technique that people are under playing, has to be, c’mon how could it be easy?! Well I finally decided to give it a try and I’ll be damned- it’s freaking easy! Seriously you heat it and it use a fork to scrap out the insides and it’s just like noodles. I even told Jake they were a special kind of noodle in an attempt to get him to eat them- he believed me but even once I told him the truth, he STILL liked it! If you haven’t tried it people, you MUST! This is a great recipe to ease into the squash because there are so many other flavors, but I sometimes just eat the squash alone. Anyway, I hope you enjoy!

INGREDIENTS

1 whole spaghetti squash
2 tablespoons olive oil
1 red pepper, diced
1 zucchini, diced
1 carrot, shredded
2 cloves garlic, minced
1 tomato, diced
16 ounces tomato sauce
4 ounces shredded mozzarella cheese
1/4 cup shredded Parmesan

DIRECTIONS

    1. Preheat oven to 350 degrees.
    2. Cut the squash in half length wise (be careful), place in a microwave safe dish and cook in the microwave for eight to 12 minutes until soft. If you don’t have a microwave, place the squash halves on a baking pan and bake at 350 degrees for 45 to 60 minutes. While that’s cooking, add the oil, garlic, pepper, zucchini, and carrots to a pan, cooking over medium heat.
    3. Once the squash is done ( and I let it cool a bit so you don’t burn the sh*t out of your hands) use a fork and scrape the flesh from the peel. It should flake off easily in strings, resembling spaghetti. Place the spaghetti squash flesh in an oven safe casserole dish. Add the cooked veggies, diced tomato, sauce, and most of the cheese and mix well. Sprinkle leftover cheese on top and bake for 30 minutes or until the cheese is bubbly.
    4. Allow to cool for five minutes, serve, and enjoy! I also added some chopped basil on top, but thats just because I’m obsessed with it 🙂

Thanks for checking out my blog!

-G

Eggplant and Cherry Tomato Bruschetta

Eggplant and Cherry Tomato Bruschetta

eggplant bruschetta 2
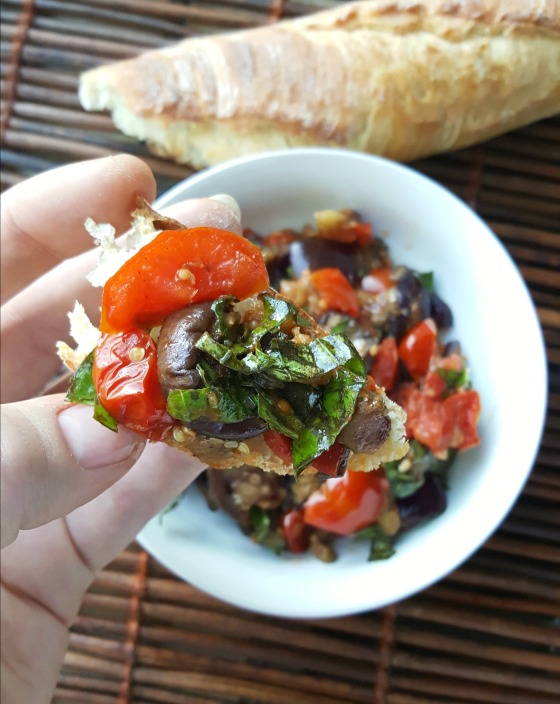
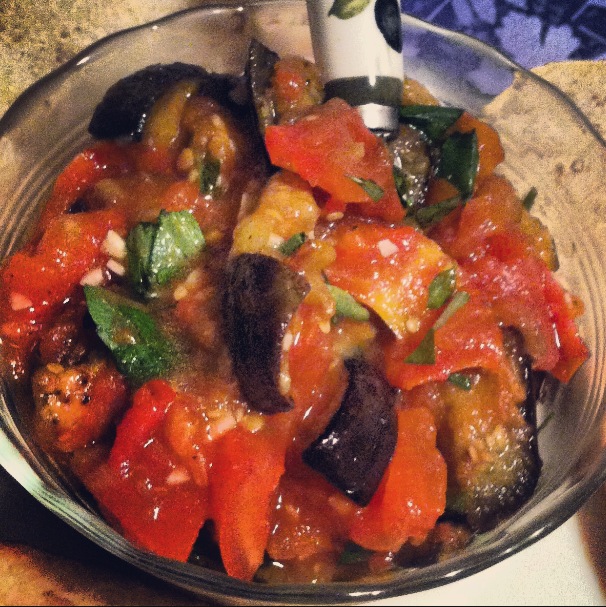
When people ask you what’s your favorite season, most people answer with Fall, Summer, Spring, or Winter. Well honestly I’d be hard pressed not to say my favorite season is tomato season.

Laugh all you want, but there is no other time in the YEAR where tomatoes taste as good as during the heart of summer. You just can’t get it any other time.

I’ve been known to give myself belly aches from eating too many at one time, didn’t stop me, but it happened.

Sometimes it can be challenging to use up all the tomatoes in new ways.Enter this delicious bruschetta with roasted tomatoes to save the day. Not only are the tomatoes delicious and because you roast them down, you use quite a bit of them.

But tomatoes aren’t the only star of this dish. Because #EGGPLANT. Ohhh eggplant. You weird little veggie. Who decided to name you eggplant? You don’t look like an egg at all. Other people call you aubergine, or brinjal, which are also weird. But whatever your name, you are delicious and nutritious.

There are so many health benefits of adding eggplant to your regular diet. Many of which I did not know until reading Helen from Well Being Secrets post about this veggie’s awesomeness. Two of my favorite facts are that 1) eggplants are actually berries!(say what?) and 2) eggplants are over 90% water! If you want to read more about this, check out this post HERE.

This recipe is one of my favorite go to’s for summer and when we have guests over or need a dish to pass. So easy to make and healthy to eat! Enjoy!Roasted Eggplant & Cherry Tomato Bruschetta CSA RecipeYou can serve with toasted bread, not toasted bread, crackers, just eat it by the spoonful(the last method is my preferred way to eat it) In the hot summer months serve with a Pinot Grigio or Sauvignon Blanc and enjoy!!Eggplant Bruschetta 1Embarrassing Fun fact. Here’s the original blog picture from when I first made this recipe for the blog back in 2013…. aren’t we all so happy my food photography has come such a long way 🙂 🙂eggplant

xoxo

669058772380712020613


*Original Post published 5/19/2013 and subsequently updated on 11/22/2016

Shrimp Tacos

Fresh Shrimp Tacos

taco

Seriously I want to eat this again right now.

You will need: 

  • 3 limes
  • 1 cup chopped seeded tomato
  • 1/2 cup diced peeled avocado
  • 1/2 cup chopped fresh cilantro
  • 1 jalapeño pepper(you can omit if you don’t like spicy)
  • 1/4 tsp black pepper
  • 1 garlic cloves, minced
  • 1 pound cooked, peeled medium shrimp
  • Corn tortillas (or any tortillas you want)

___________________________________________________________

Then do this:
  1. Marinate the shrimp. Make sure to choose a nonreactive bowl, such as one that is glass or ceramic; a metal or copper bowl will react with the citrus juice to give the shrimp a metallic taste.GROSS!
  2. To marinate: Finely grate rind from limes to measure 1 tablespoon; juice limes to measure 1/4 cup. Place rind and juice in a large bowl. Add tomato and remaining ingredients except tortillas; toss well to combine. Cover and chill for 15-20 minutes, stirring occasionally.
  3. Heat tortillas according to package directions. Spoon about 1/2 cup shrimp mixture down center of each tortilla and top with more cilantro if you want; fold in half. Eat immediately.

OMG this probably has like 4 grams of fat (and It’s from the avocado(so healthy fat!) and sooooo delicious. Serve with an ice cold margarita (probably not fat free 🙂 ) and this is a fiesta in my mouth!! Also because I’m a wino i would recommend a young riesling or an Argentinian Rosé like Crios.

Enjoy!

xoxo

-G

Lemon Baked Tilapia with Spinach & Carrot Lentils

Lemon Baked Tilapia with Spinach & Carrot Lentils

IMG_2390

Lentil Recipe

Ingredients

  • 1 quart water
  • 1/2 cup lentils
  • 1 carrot, finely chopped (1/2 cup)
  • 1/2 onion, finely chopped (1/2 cup)
  • 2 cloves garlic, minced
  • 1 dried bay leaf
  • Coarse salt and freshly ground pepper
  • 1 tablespoon olive oil
  • 8 ounces spinach, stems removed, leaves washed well

Directions

  1. In a large saucepan, combine the water, lentils, carrot, onion, garlic, and bay leaf. Season with salt and pepper. Bring to a boil. Lower the heat and simmer, partially covered, until the lentils are soft, 15 to 20 minutes. Drain, discarding bay leaf.
  2. Use a paper towel to wipe out any water from the saucepan. Add oil, and return pan to medium heat. Stir in the lentils, vegetables, and spinach. Cook, stirring occasionally, until the spinach is wilted, about 2 minutes. Serve 🙂

* Later in the week I made this recipe again but added ground turkey and just had it for lunch a couple days at work- it was equally amazing! Seriously so delicious!!!

Tilapia Recipe

Ingredients

  • 2 tilapia filets (*or really you could adapt this to however many you want to make as ingredient measurements aren’t exact)
  • Lemons (I used 1 lemon- the juice of 1 half and then sliced the other half)
  • Salt and Pepper

Directions

  1. Preheat oven to 350 degrees
  2. Line a glass baking dish with foil and grease with non-stick spray or olive oil 
  3. Put the fish in the dish
  4. Pour lemon juice over the fish filets
  5. Season the fish with salt and pepper(you can also really use any spices you choose)
  6. Place the slices of lemon over the fish
  7. Cover the dish with foil and bake in the oven for 20-30 minutes.

There you go! Seriously so easy, and healthy and most importantly delicious!! Hopefully you guys enjoy as much as we did.

Thanks for stopping by 🙂

xoxo

G