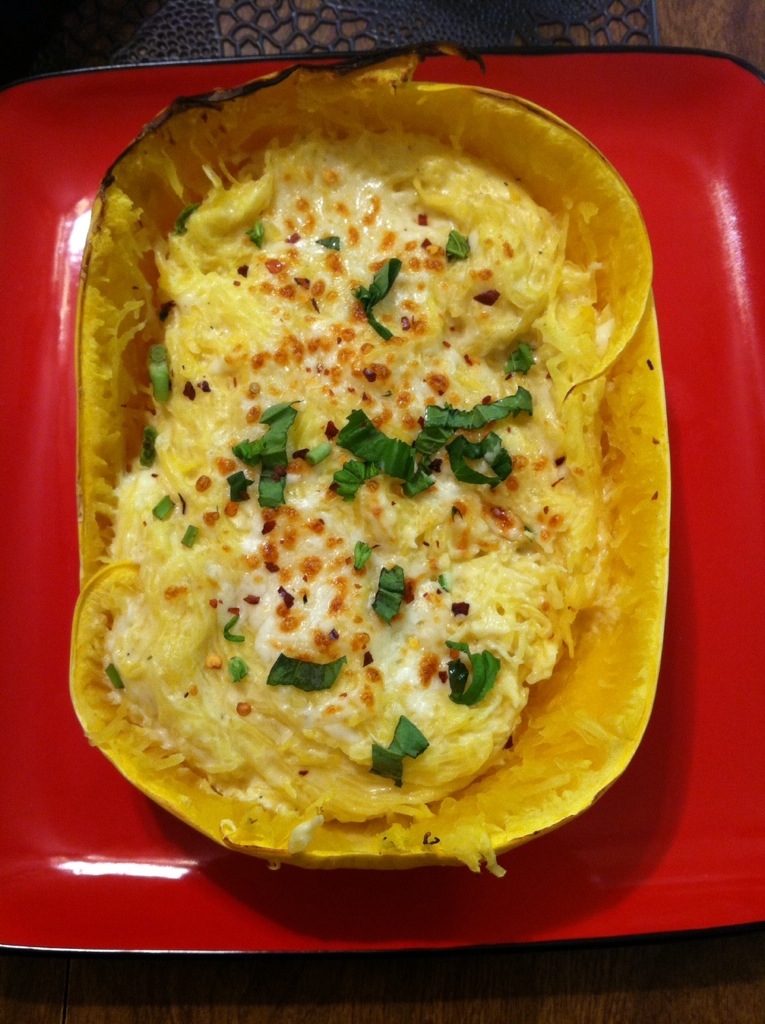
Skinny Spaghetti Squash Alfredo
So I’ve said this before but seriously, I love spaghetti squash. It is so easy and I am just fascinated by how it turns all stringy and spaghetti like! This is cool recipe becuase it actually is very rich and filling just on it’s own. I am to be honest, not a big alfredo fan. Not that I don’t like it but never really have made it and given the choice out at a restaraunt I’d rather have something more fresh tasting with tomatoes veggies etc….. Anyway, I thought I would give this a try with one of the squashes my mom gave me last time I visited her and it turned out really good! Hope you enjoy!!!
INGREDIENTS:
1 spaghetti squash ( I used a medium/large sized one)
1 Tablespoon butter
3 cloves of garlic, finely minced
2 Tablespoons flour
1 cup milk (I used fat-free)
1 Tablespoon cream cheese or Neufchatel cheese
1 cup freshly grated Parmesan cheese, plus 2 Tablespoons extra for topping
1/4 teaspoon kosher salt
1/8 teaspoon freshly ground pepper
Crushed red pepper flakes and fresh parsley or basil, for optional garnish
DIRECTIONS:
Preheat oven to 350 degrees F.
First, cook the squash. There are several methods to do this. I usually just cut in half and microwave for about 10-15 minutes. Usually thats how I do it because I can’t plan ahead/don’t have the patience to cook it in the oven but if you don’t want to use microwaves you can use your oven! Just cut spaghetti squash in half using a large sharp knife, scoop out the seeds and place cut side down on a rimmed baking sheet with some water on the bottom of the pan. Bake until tender, about an hour.
Once squash is cooked, use a fork to gently scrape the “spaghetti” strands into the center. Careful you dont burn your fingers. I usually do everytime, must be that patience thing again 🙂
For the sauce, melt butter in a small pot over medium-low heat. Once hot, add garlic and sauté for 1-2 minutes. Whisk in flour slowly, cooking for another minute while stirring. Whisk in milk until no lumps remain. Once hot, add cream cheese and stir until smooth. Remove from the heat. Stir in Parmesan, salt and pepper.
Spoon sauce equally into each spaghetti squash half. Gently mix the spaghetti strands to coat as much as possible with the sauce. Top with extra Parmesan and place under the broiler of your oven for 2-3 minutes, or until golden and bubbly.
Top each half with a pinch of red pepper flakes and fresh chopped parsley or basil, if desired. Serve hot and enjoy!!
Thanks for stopping by my blog!
xoxo